fibsemOS Documentation
This page covers installation, setup, and the main workflows in fibsemOS.
If you’re new here, start with the setup and UI overview, then follow the walkthroughs below.
Getting Started
This guide will walk you through the complete workflow for automated cryo-lamella preparation using fibsemOS and AutoLamella. Currently this workflow is only available on Thermo Fisher hardware.
On-Grid Lamella Milling Walkthrough
Initial Setup
This walkthrough assumes you have installed the application, and configured your microscope. Please see the README for instructions.
Running the Application
Open Anaconda Prompt:
conda activate fibsem
fibsem-autolamella-ui
If you used a different environment manager (e.g. venv, uv), replace with the relevant instructions to activate the environment.
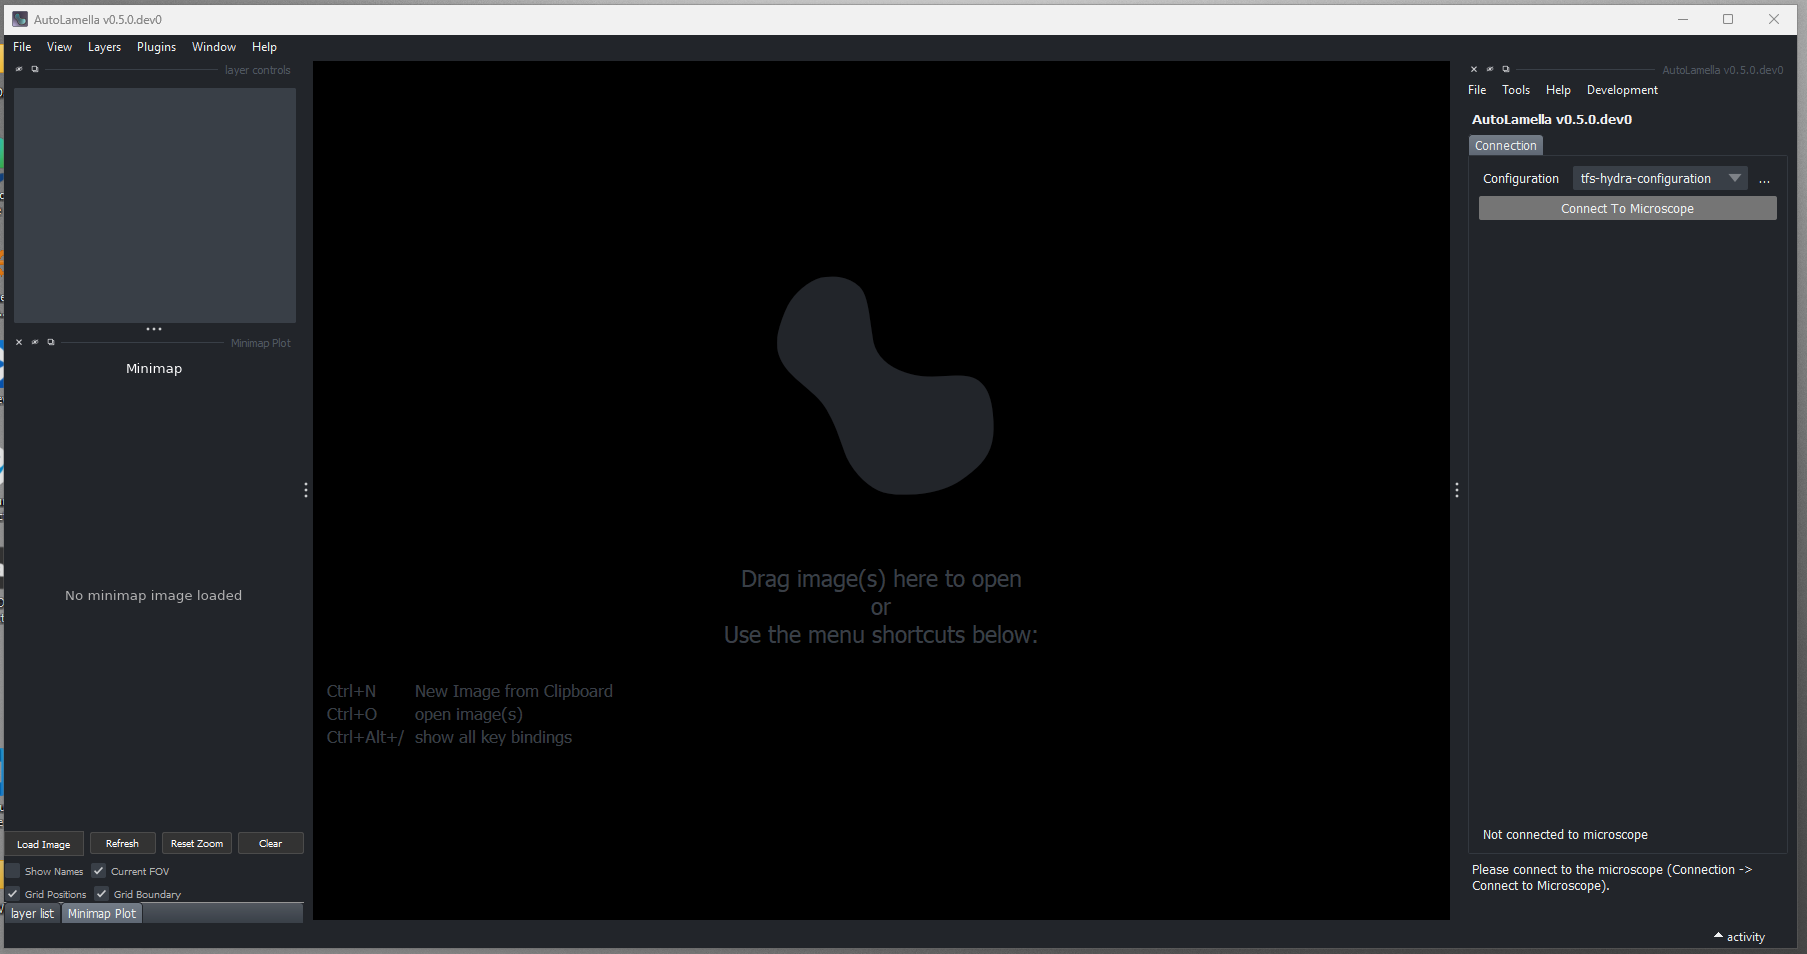
Connecting to the Microscope
- To connect to the microscope, first navigate to the ‘Connection’ tab.
- Ensure the correct microscope configuration is selected. See microscope configuration page for more information on configurations. We provide configurations for most supported systems.
- Press ‘Connect to Microscope’. The button should turn green, and other microscope control tabs (Imaging, Movement, Milling) should appear.
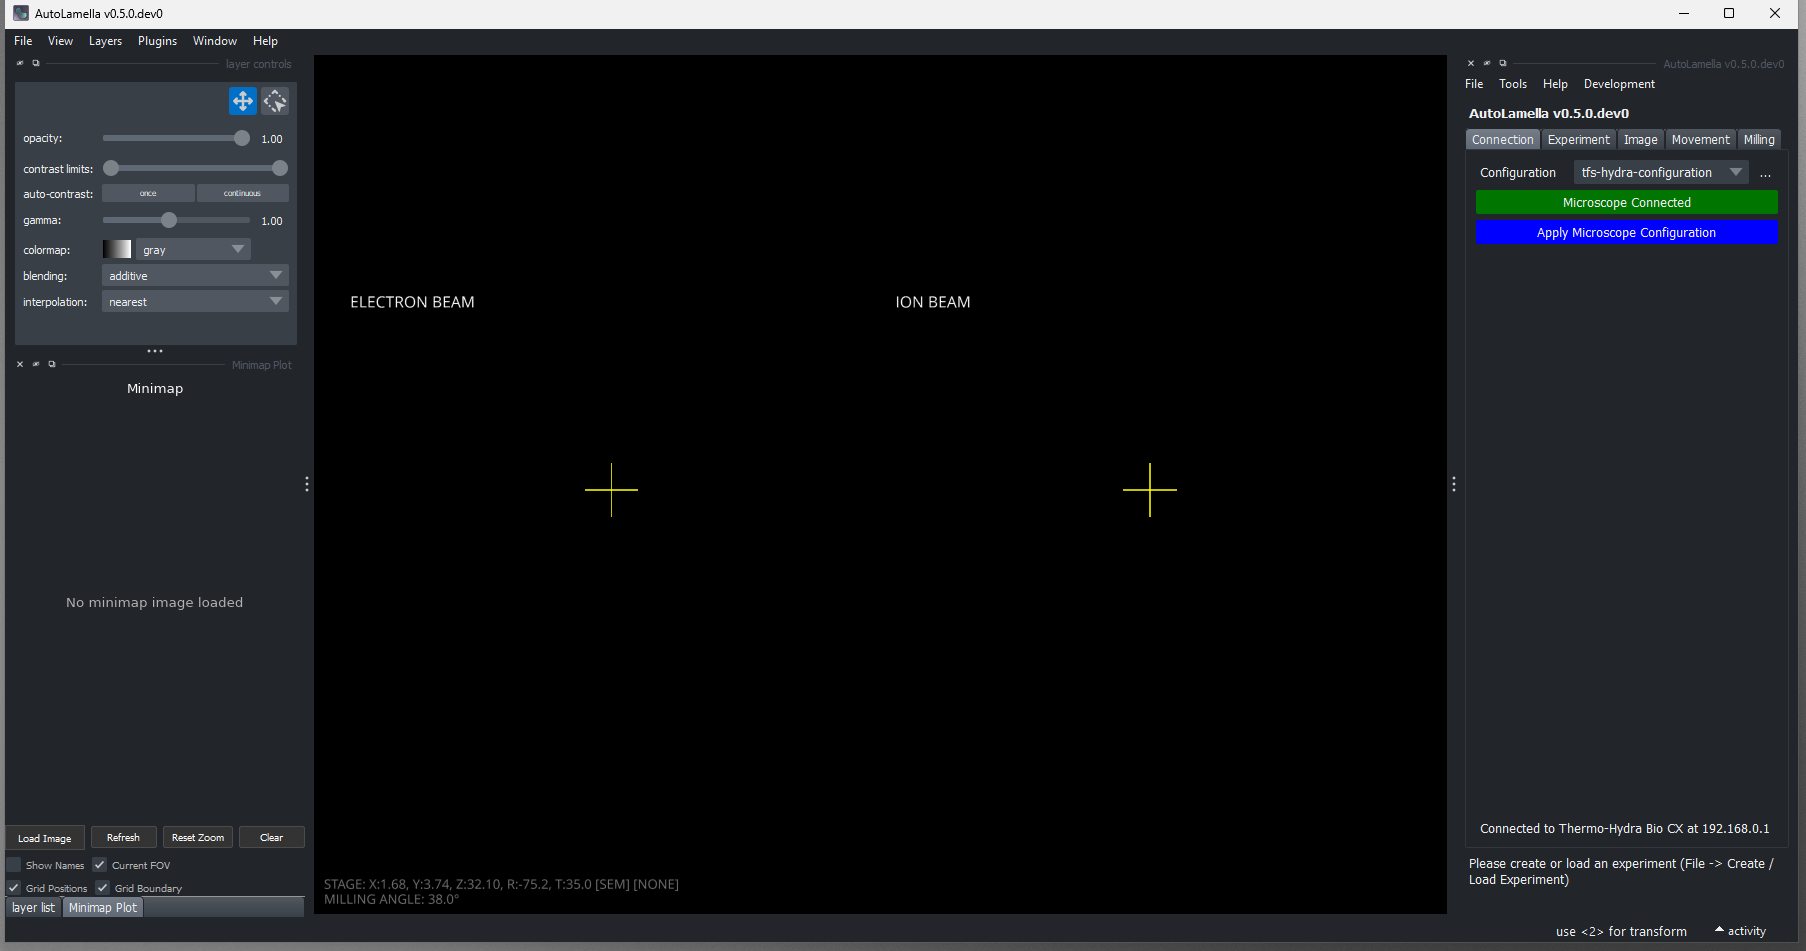
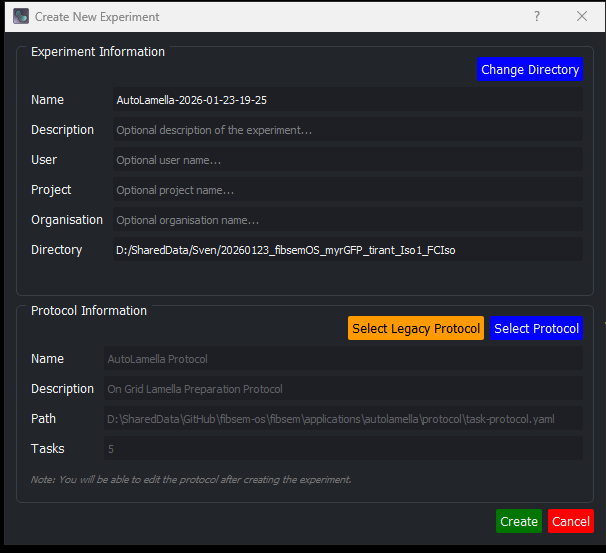
Creating an Experiment
- An experiment is the collection of data in a single ‘session’. Typically this is the loading of a grid / set of grids.
- To create a new experiment, Select File -> Create Experiment. The create experiment dialog will open.
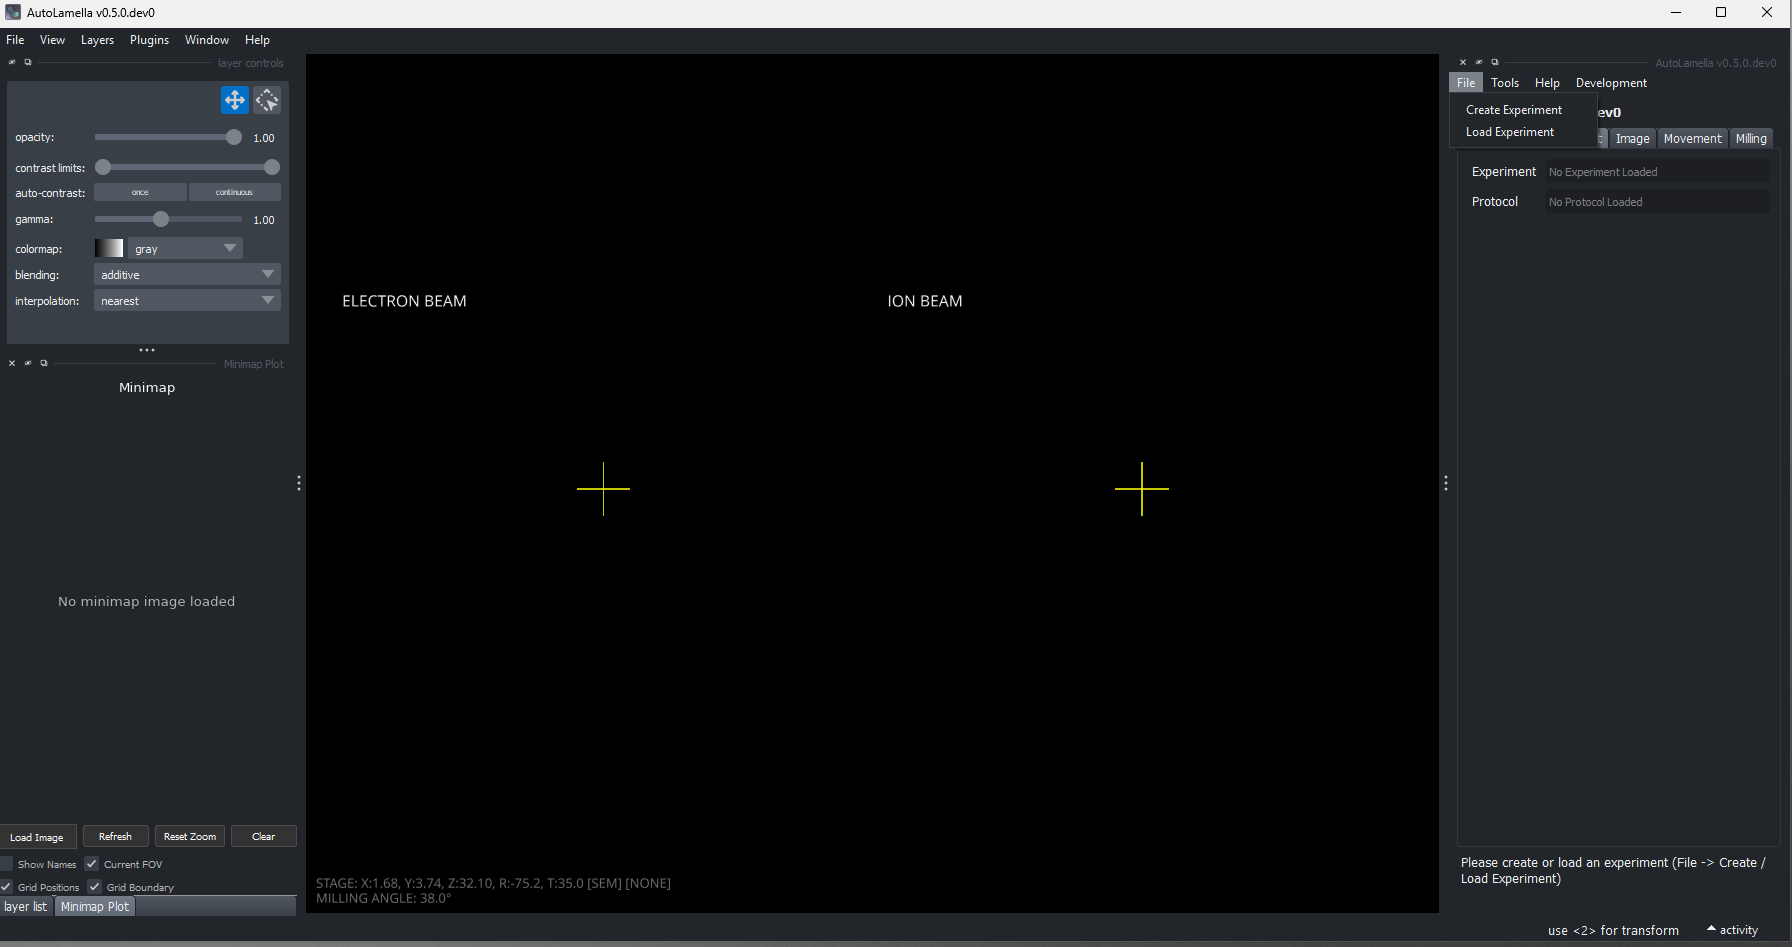
- The experiment requires a unique name and directory. You can also add additional optional metadata to the experiment for further analysis (project, institute, user, sample).
- You also need to select a protocol to associate with the experiment. Protocols define the task configuration and workflow. More details on protocols below.
- A copy of the protocol file will be saved into the experiment directory, and automatically updated when editing the experiment/protocol in the program.
Protocol Files
- Protocols are stored in yaml files
- Protocols contain three sections: tasks, workflow, and options
- Tasks: The configuration of individual tasks in the workflow, e.g. Rough Milling Task -> contains milling patterns for rough milling, Setup Lamella Position -> milling angle
- Workflow: The ordering of tasks in the workflow, and any restrictions on the execution. E.g. requiring a task to run before another
- Options: Global set of options that apply to the entire experiment
- For more information on editing the protocol see Protocol Editor section below
- For more information on Tasks and Workflow see the workflow section below.
- If you have a protocol from the previous versions of AutoLamella, you can load them using the ‘Load Legacy Protocol’ button.
Loading an Experiment
- You can reload experiments to continue with a previous experiment. All experiment and protocol data is automatically saved so you can reload / restart easily.
- To reload an experiment: File -> Load Experiment
- Reloading an experiment will also reload the related protocol (from the experiment directory).
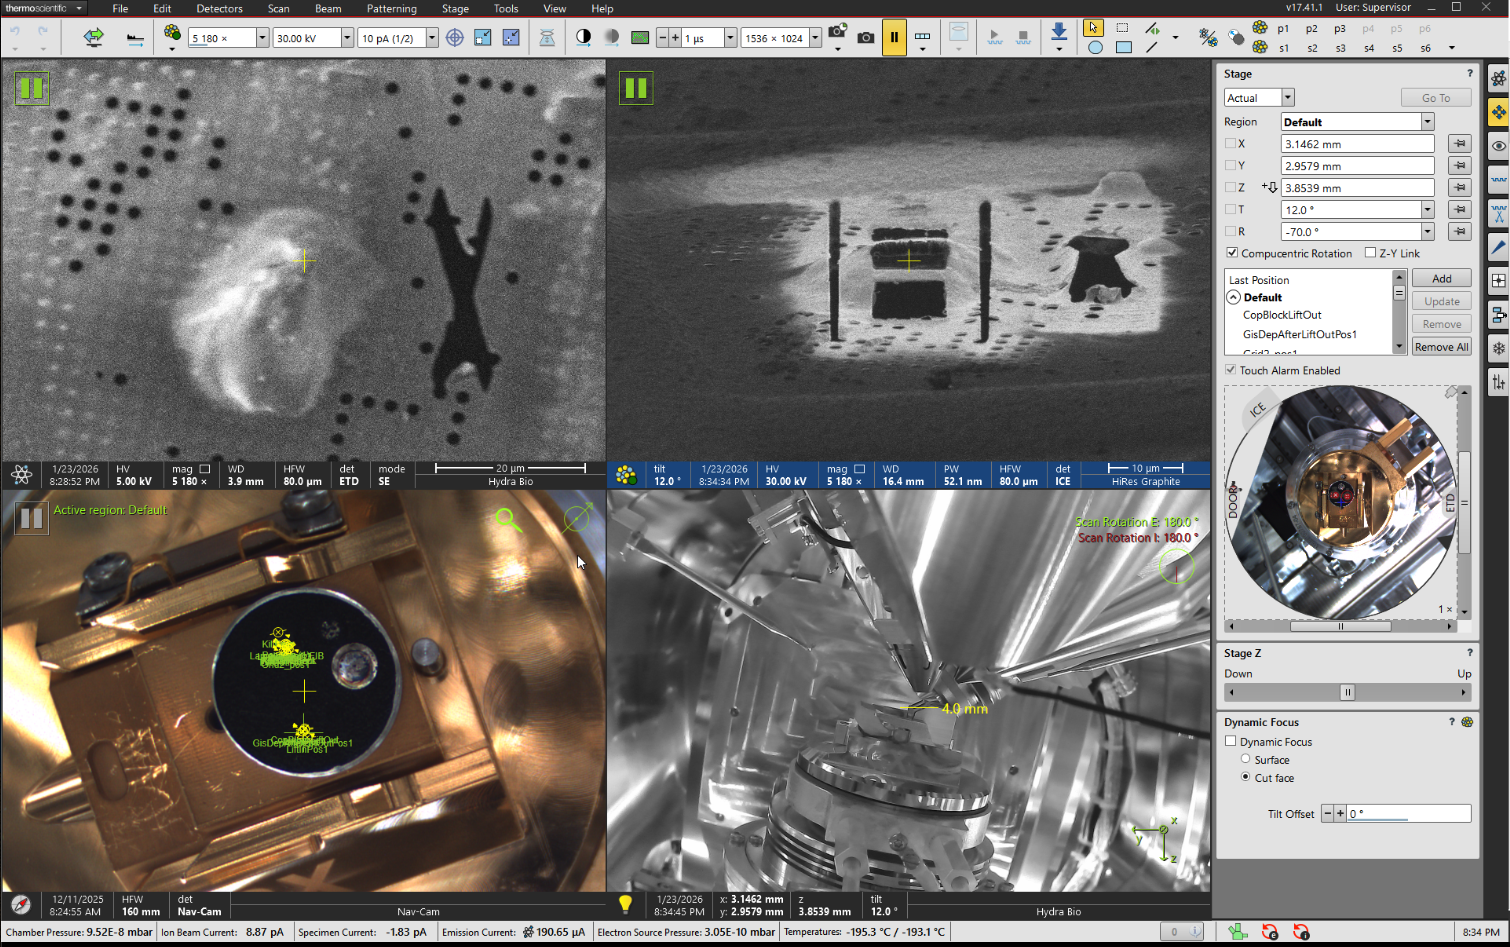
User Interface
Connection Tab
- The Connection tab is used to select the microscope configuration and connect / disconnect from the microscope.
- Most actions are restricted until you connect to the microscope.
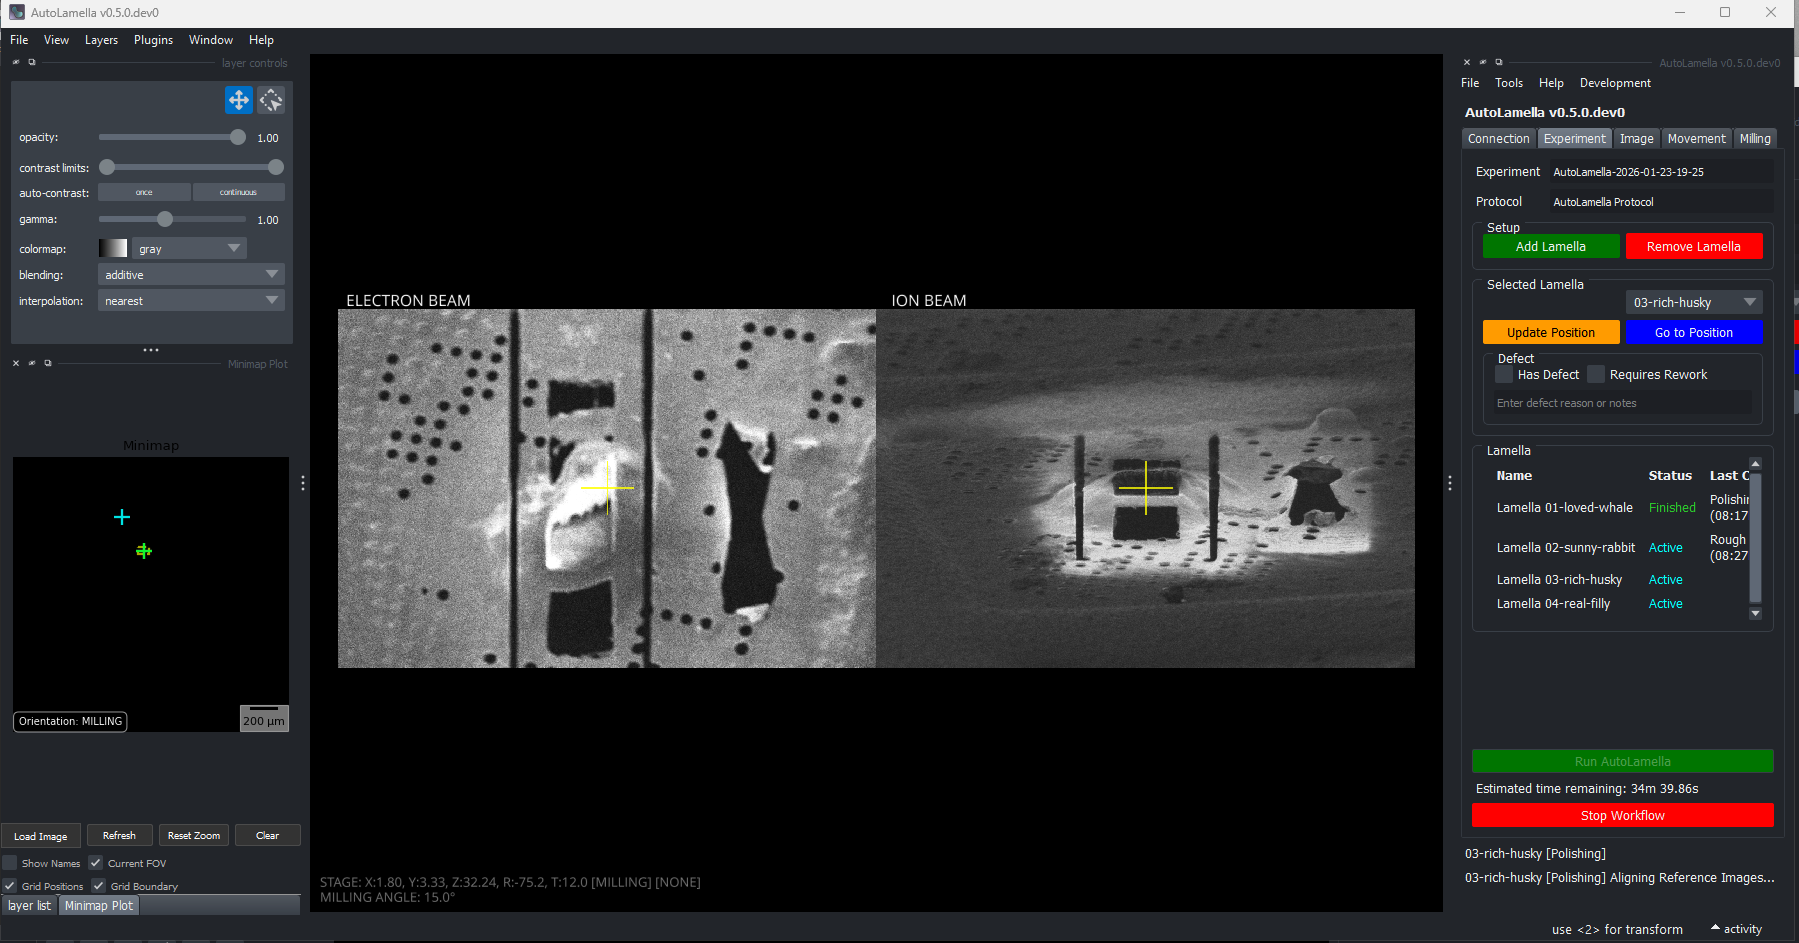
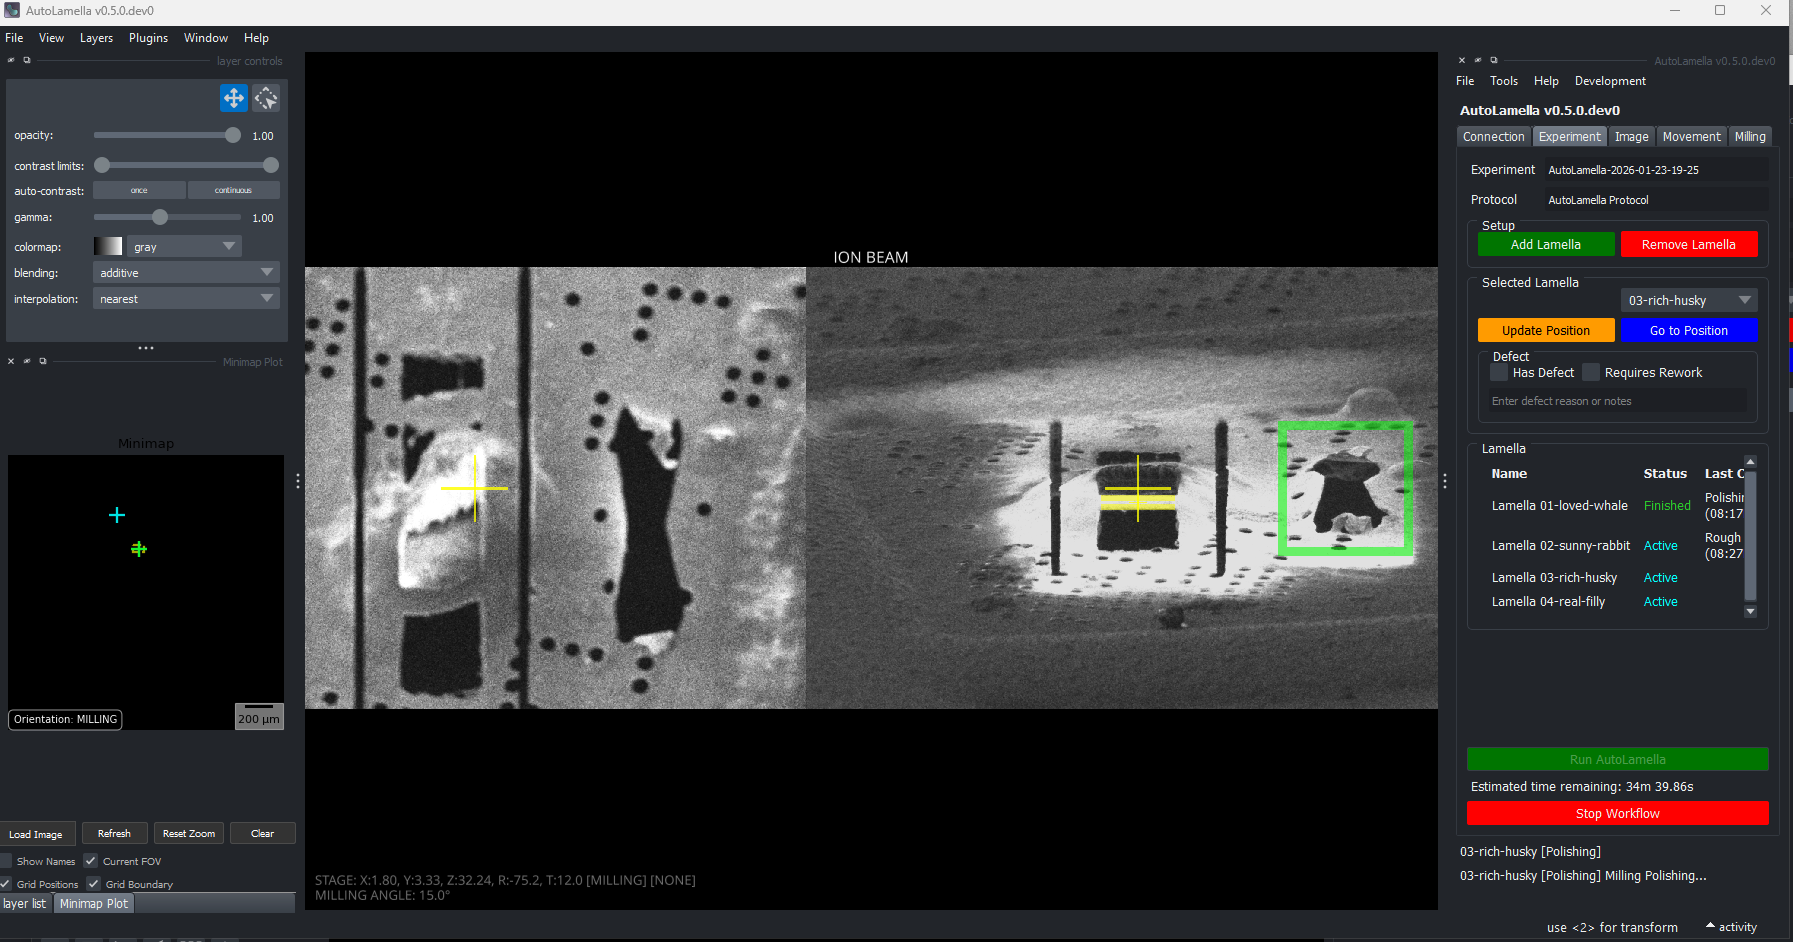
Experiment Tab
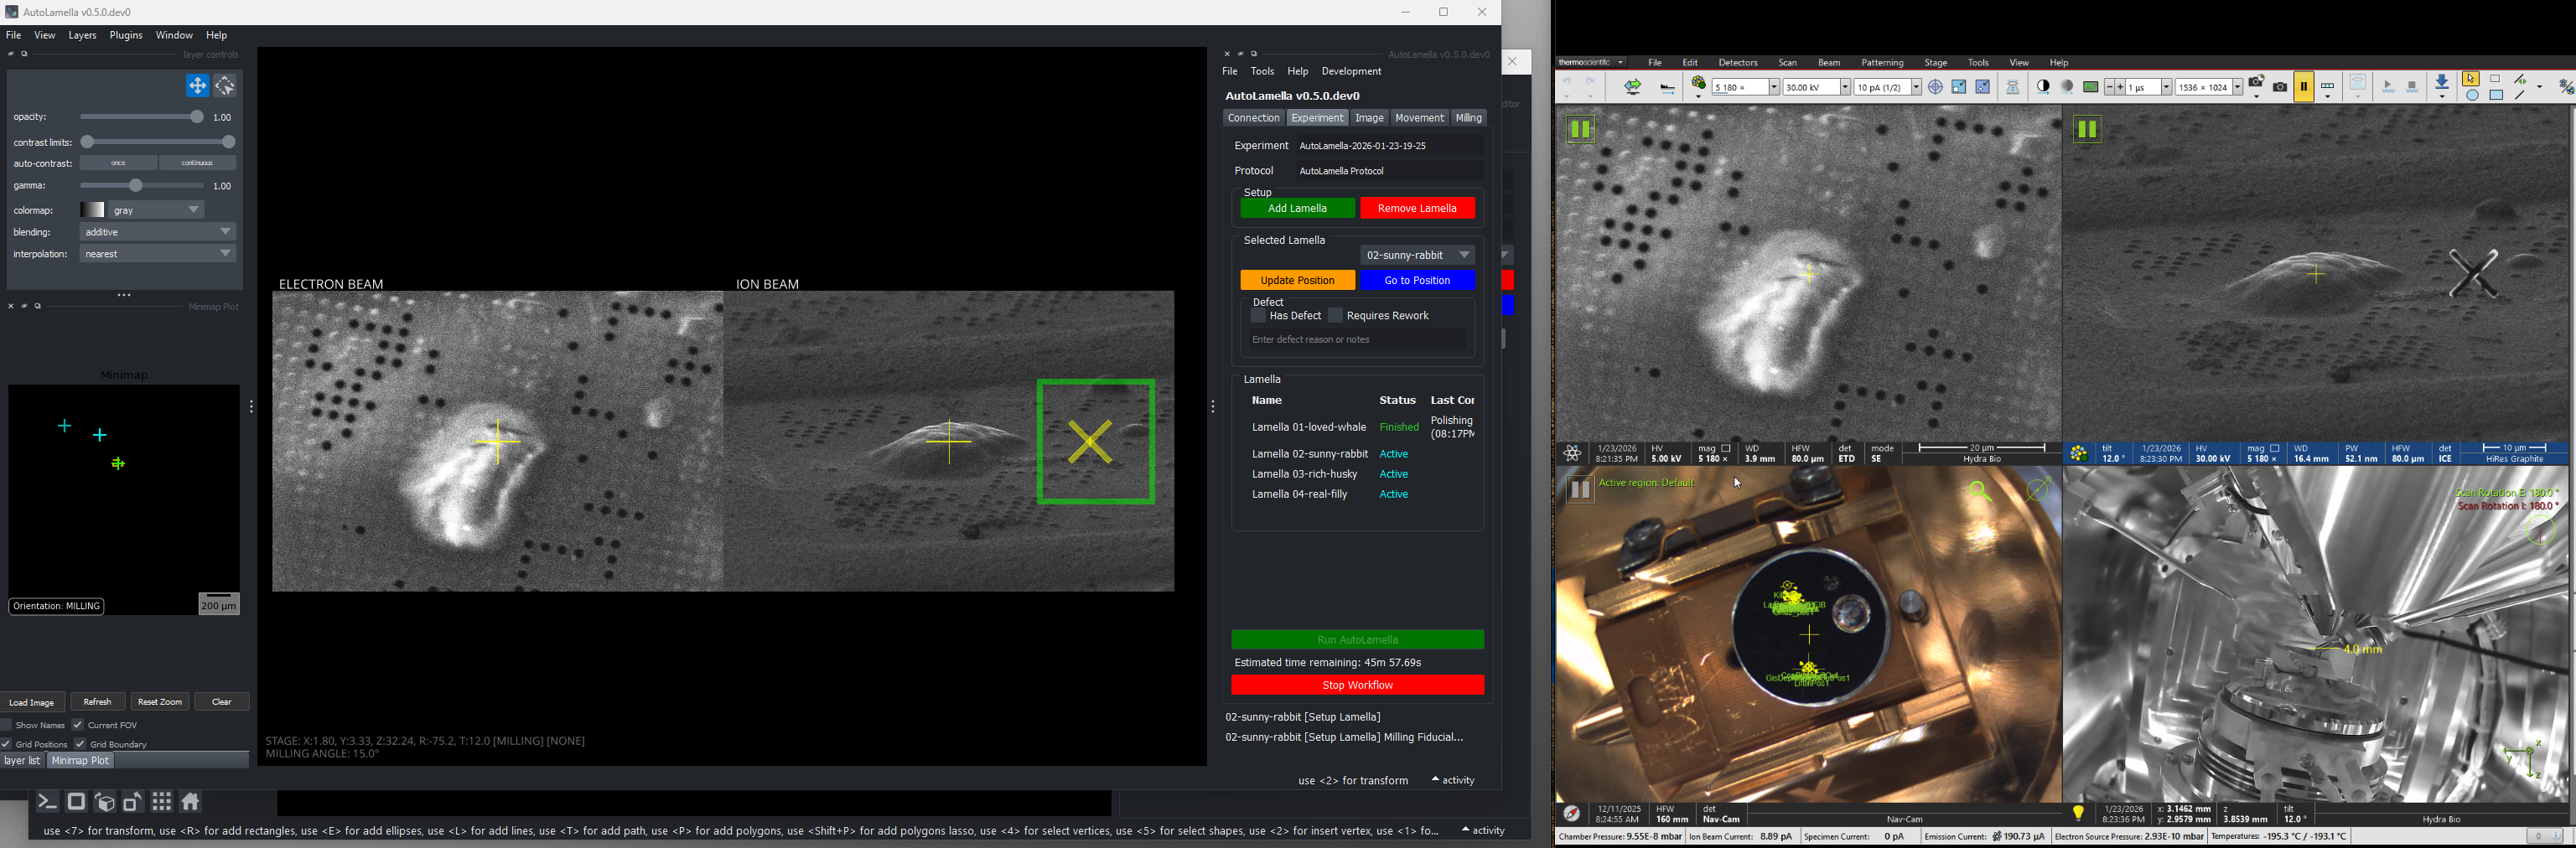
The experiment tab shows information about lamella and controls the execution of the workflow.
- Lamella Controls: Add, remove, and select lamellae for the experiment.
- Lamella Status: View the current state and progress of each lamella.
- Workflow Controls: Start, pause, and manage the automated workflow execution.
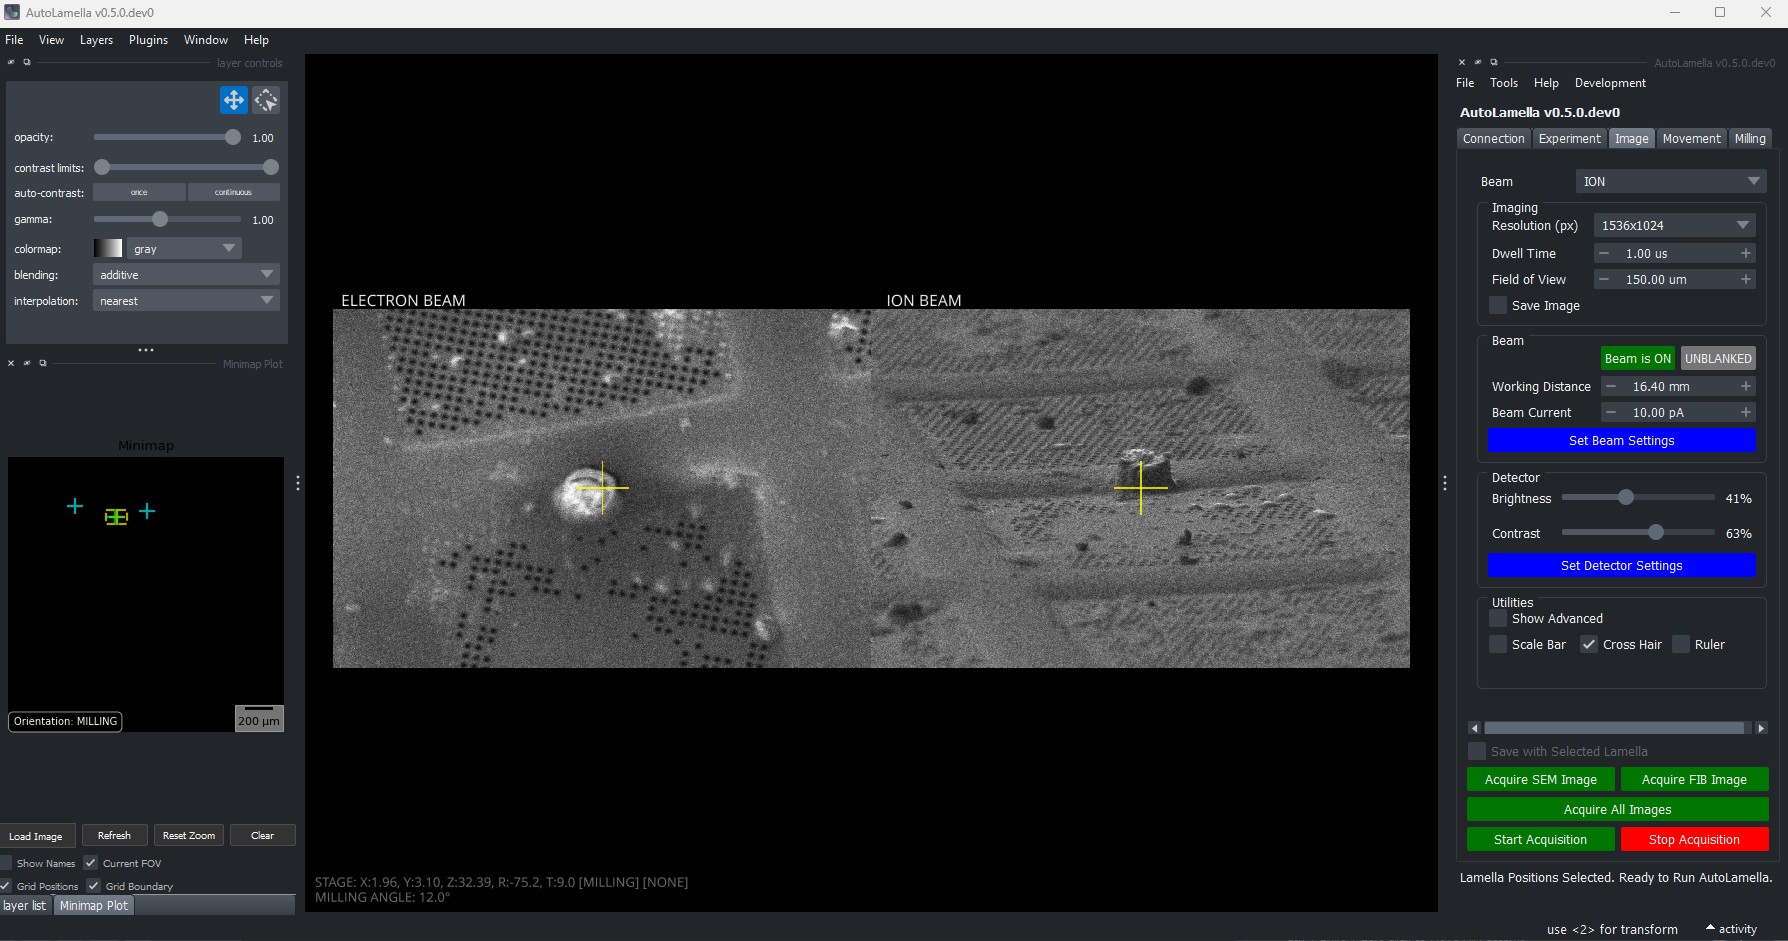
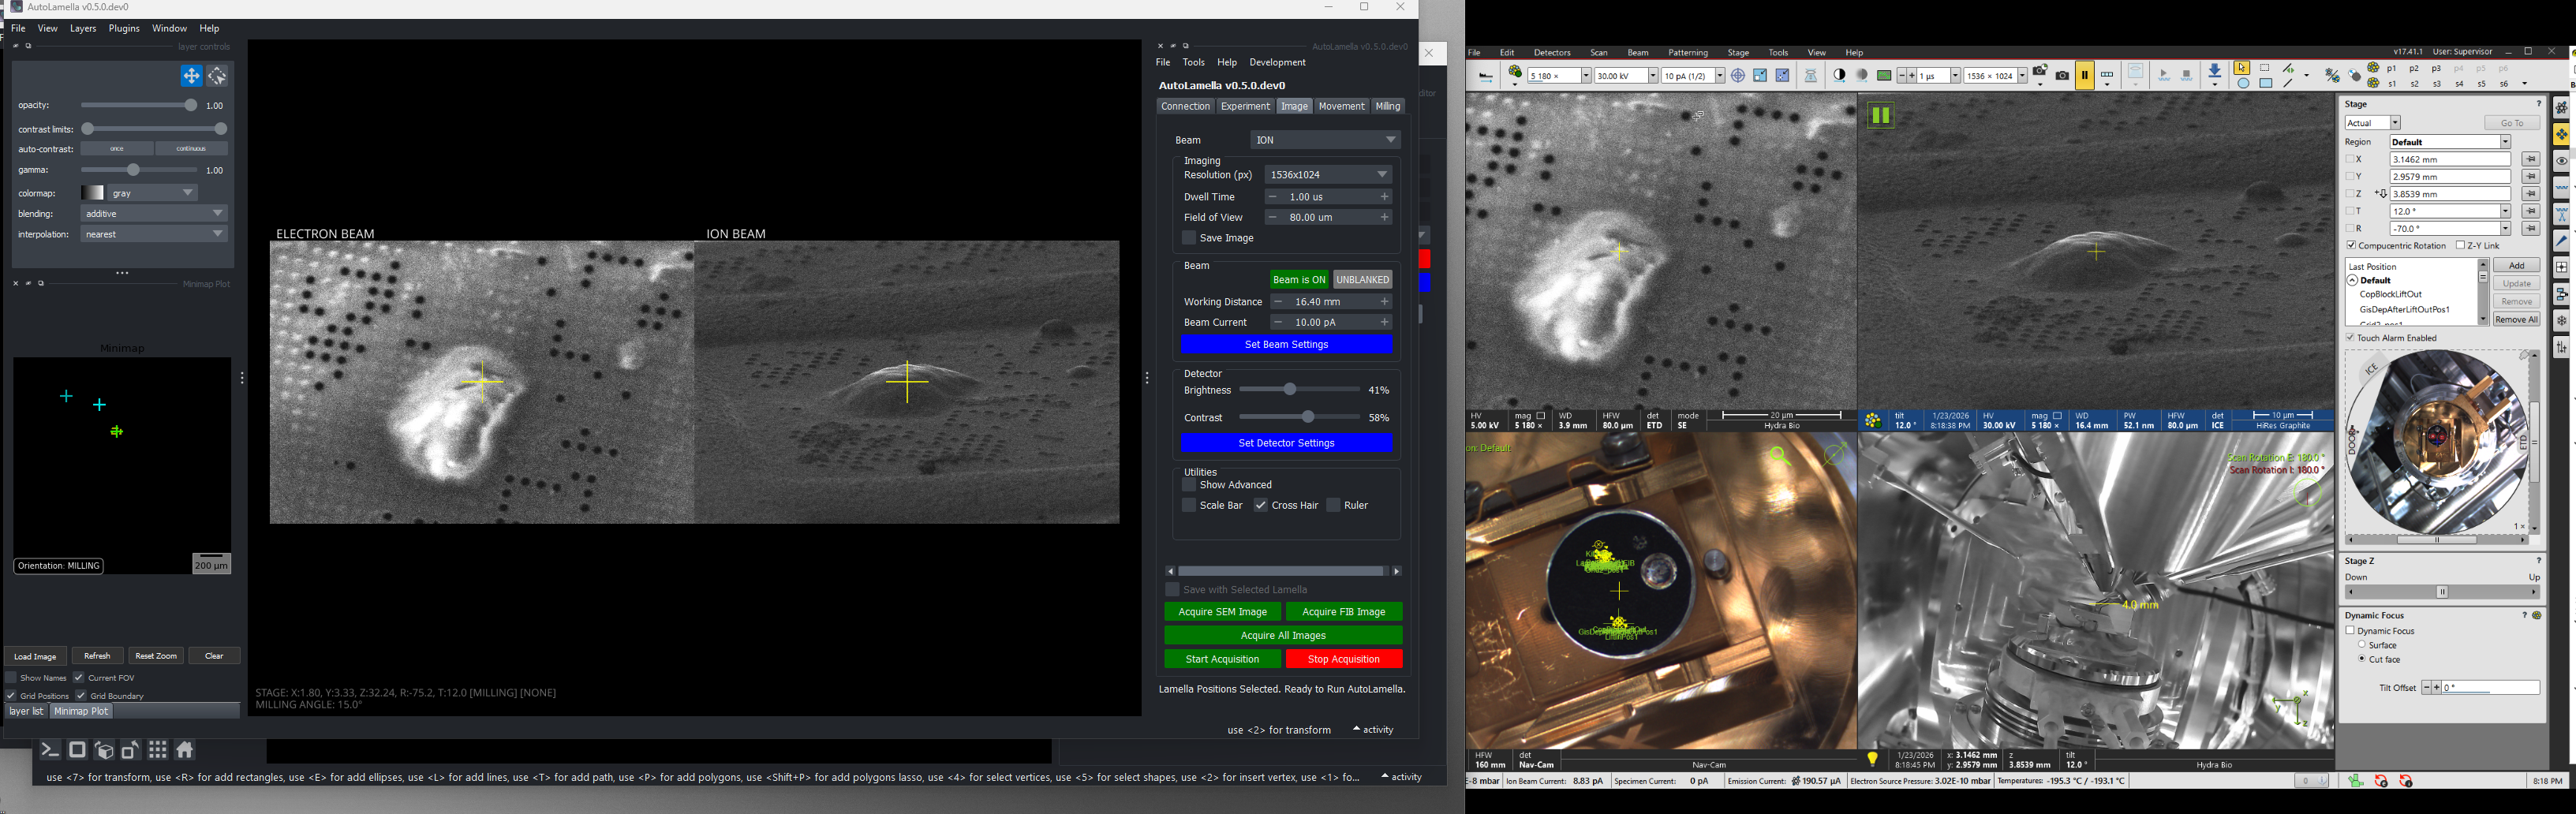
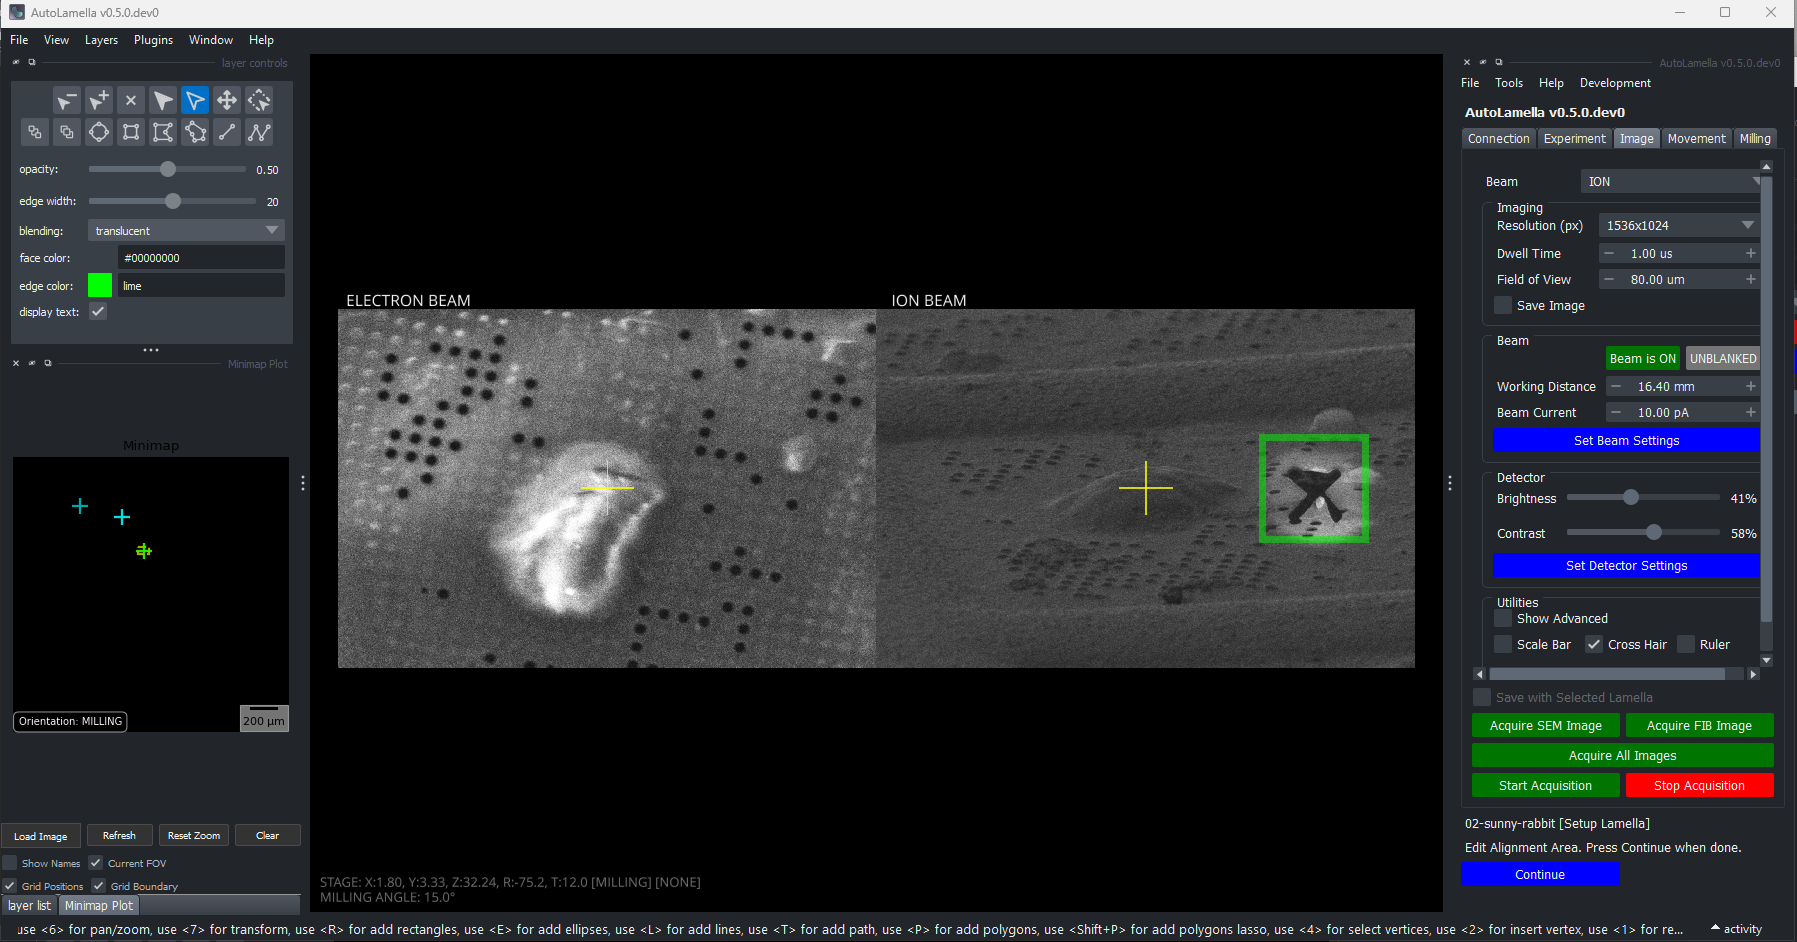
Imaging Tab
- The imaging tab is used to acquire images (SEM and FIB) and set beam parameters (e.g. current, voltage, detectors)
Movement Tab
- The movement tab is used to control the stage movement of the system.
- You can control each axis individually, move to specified orientations (SEM, FIB, MILLING) and save known positions.
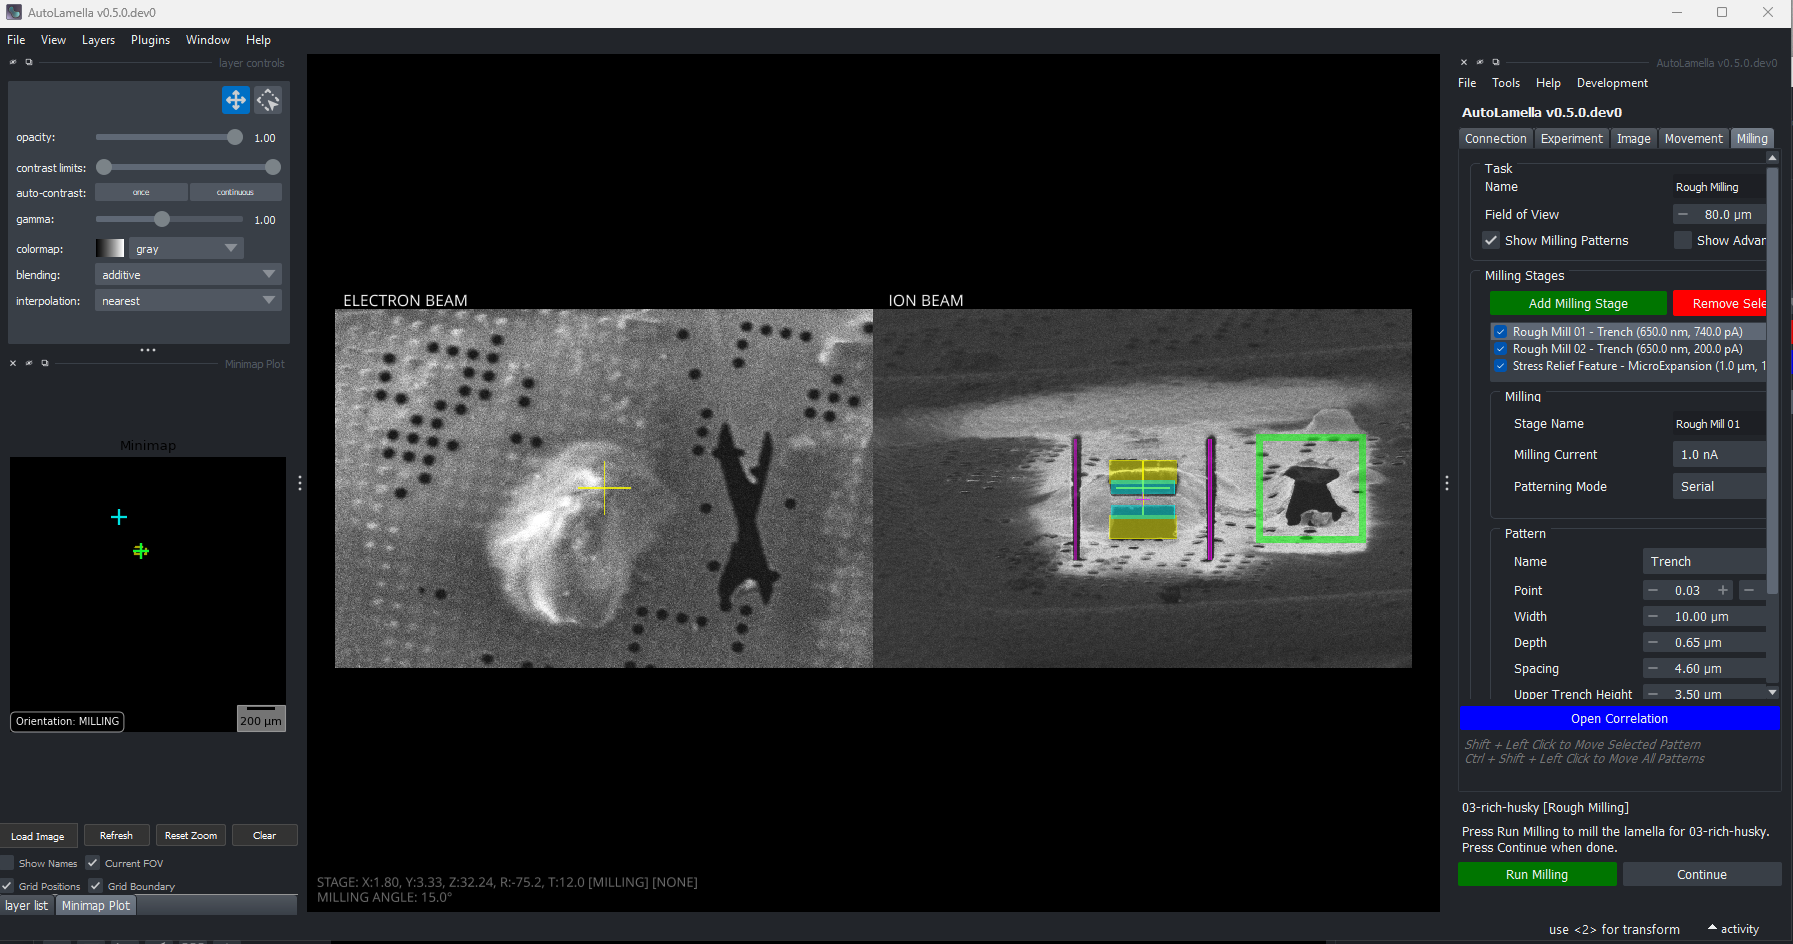
Milling Tab
- The milling tab is used to control milling patterns and the milling execution.
- Milling is a complicated topic, please see the dedicated milling page for details.
Tools
There are two other windows that are used in the workflow. The Overview Acquisition Widget and Protocol Editor.
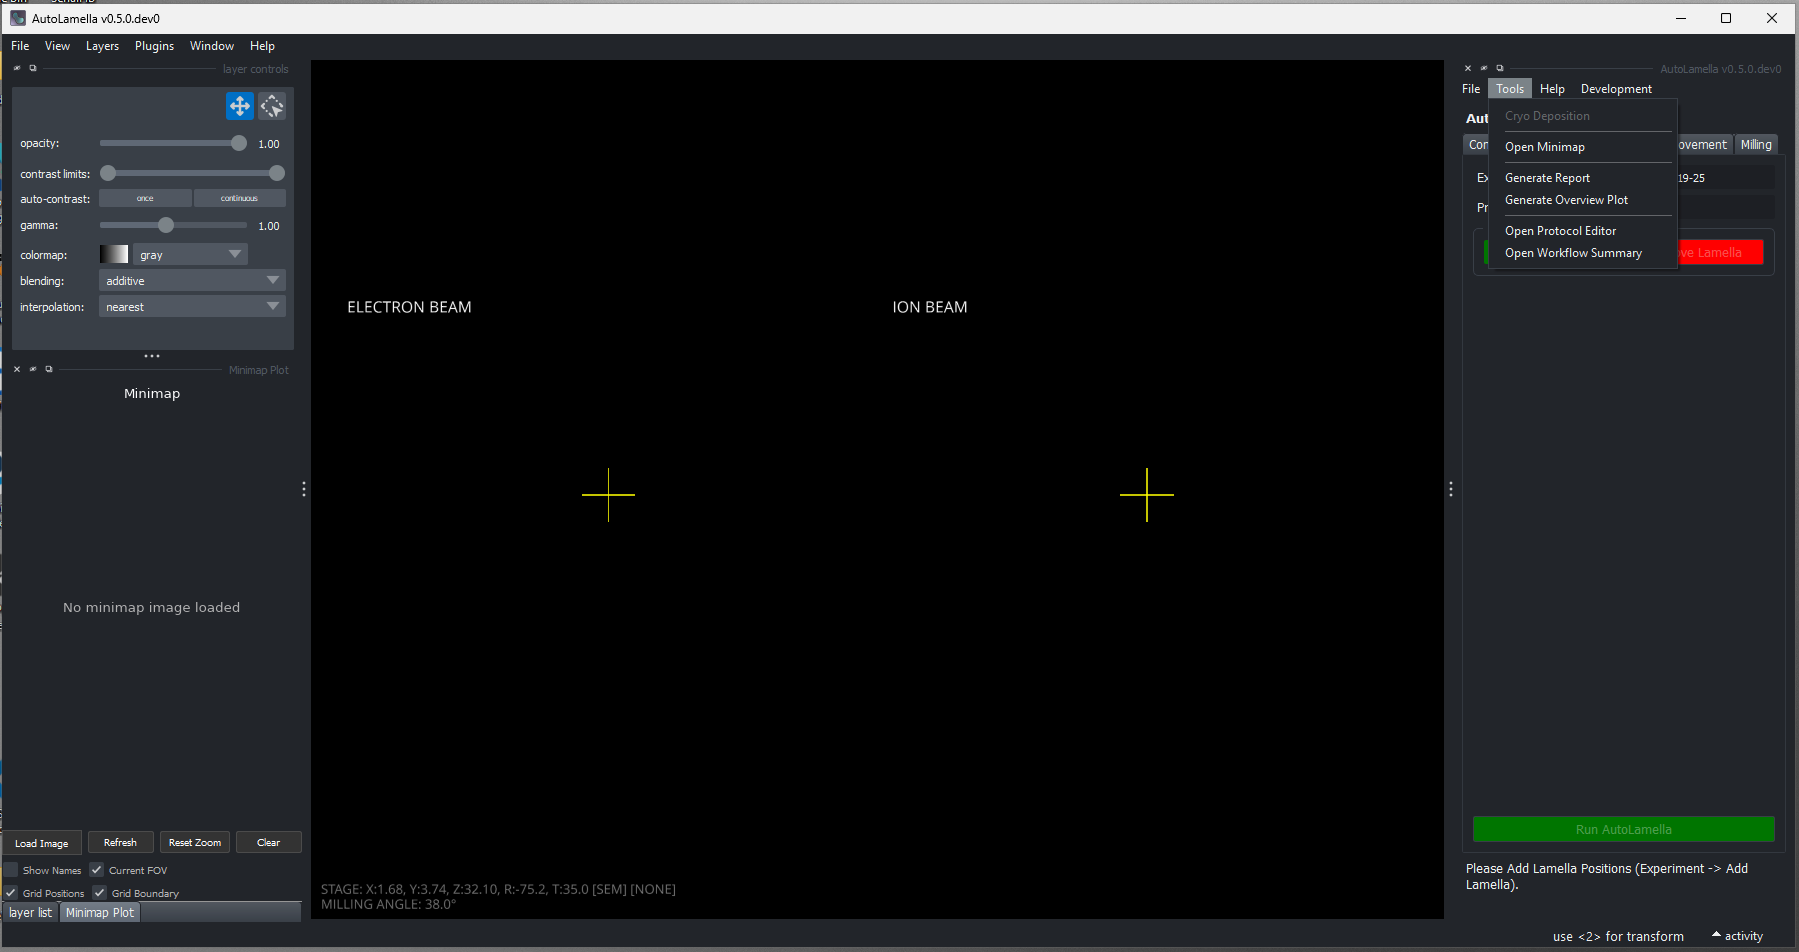
Overview Acquisition Widget
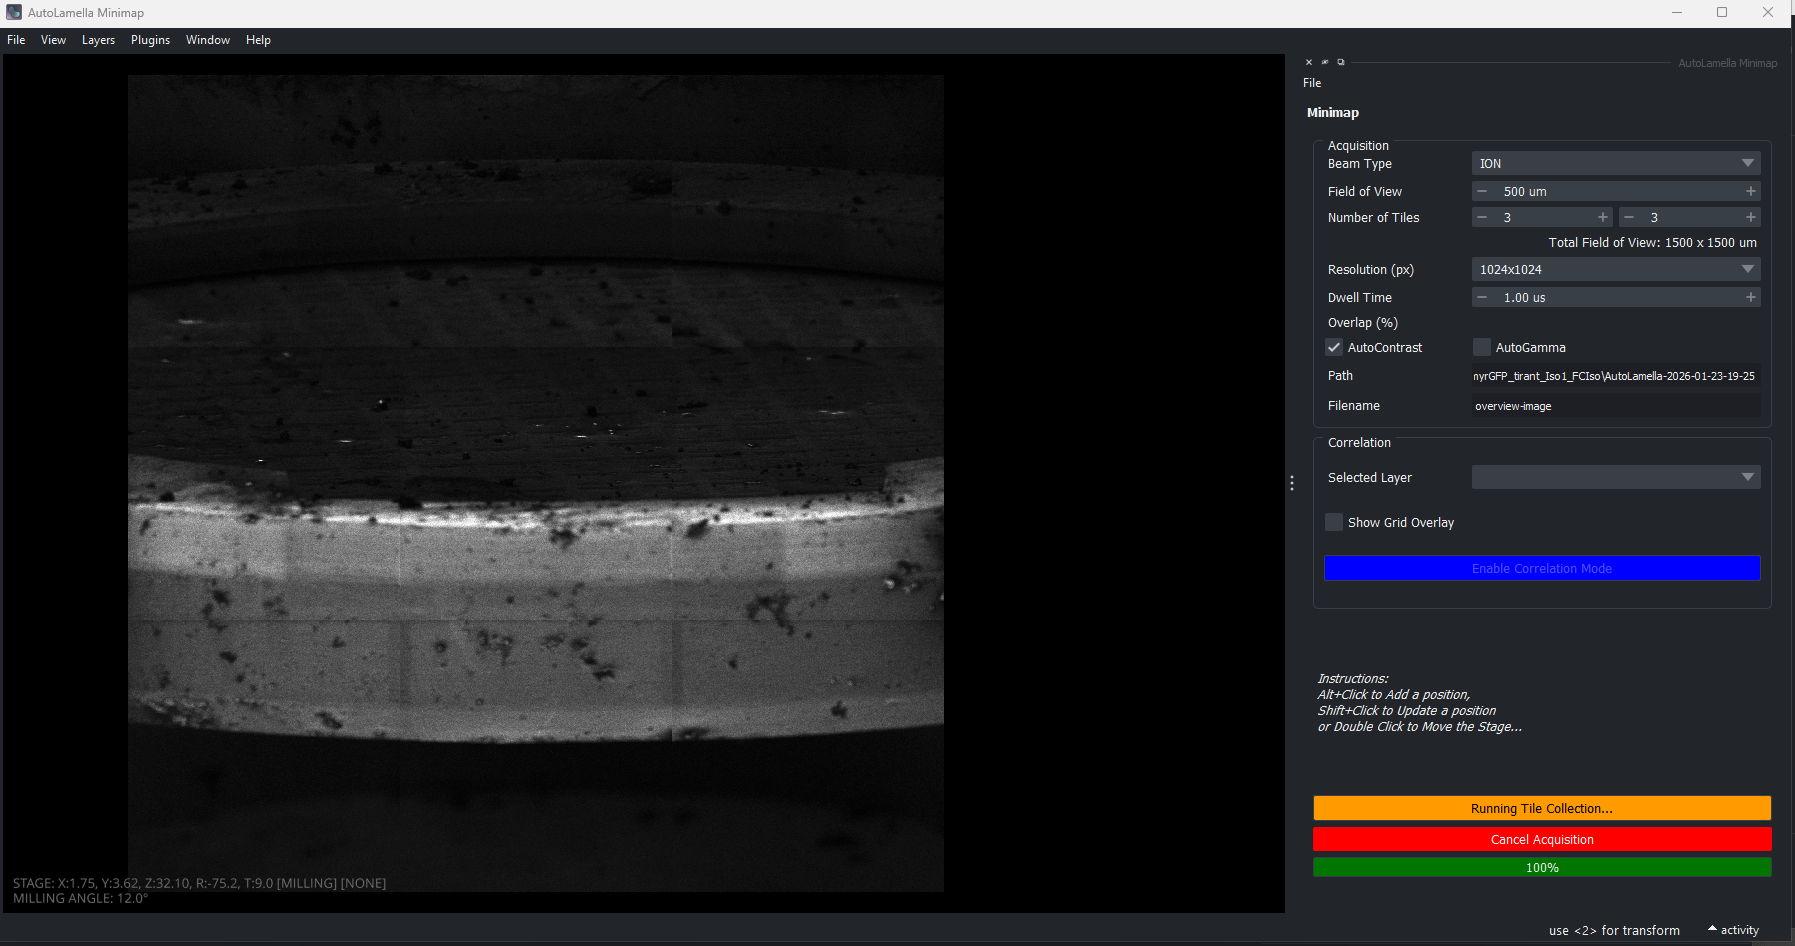
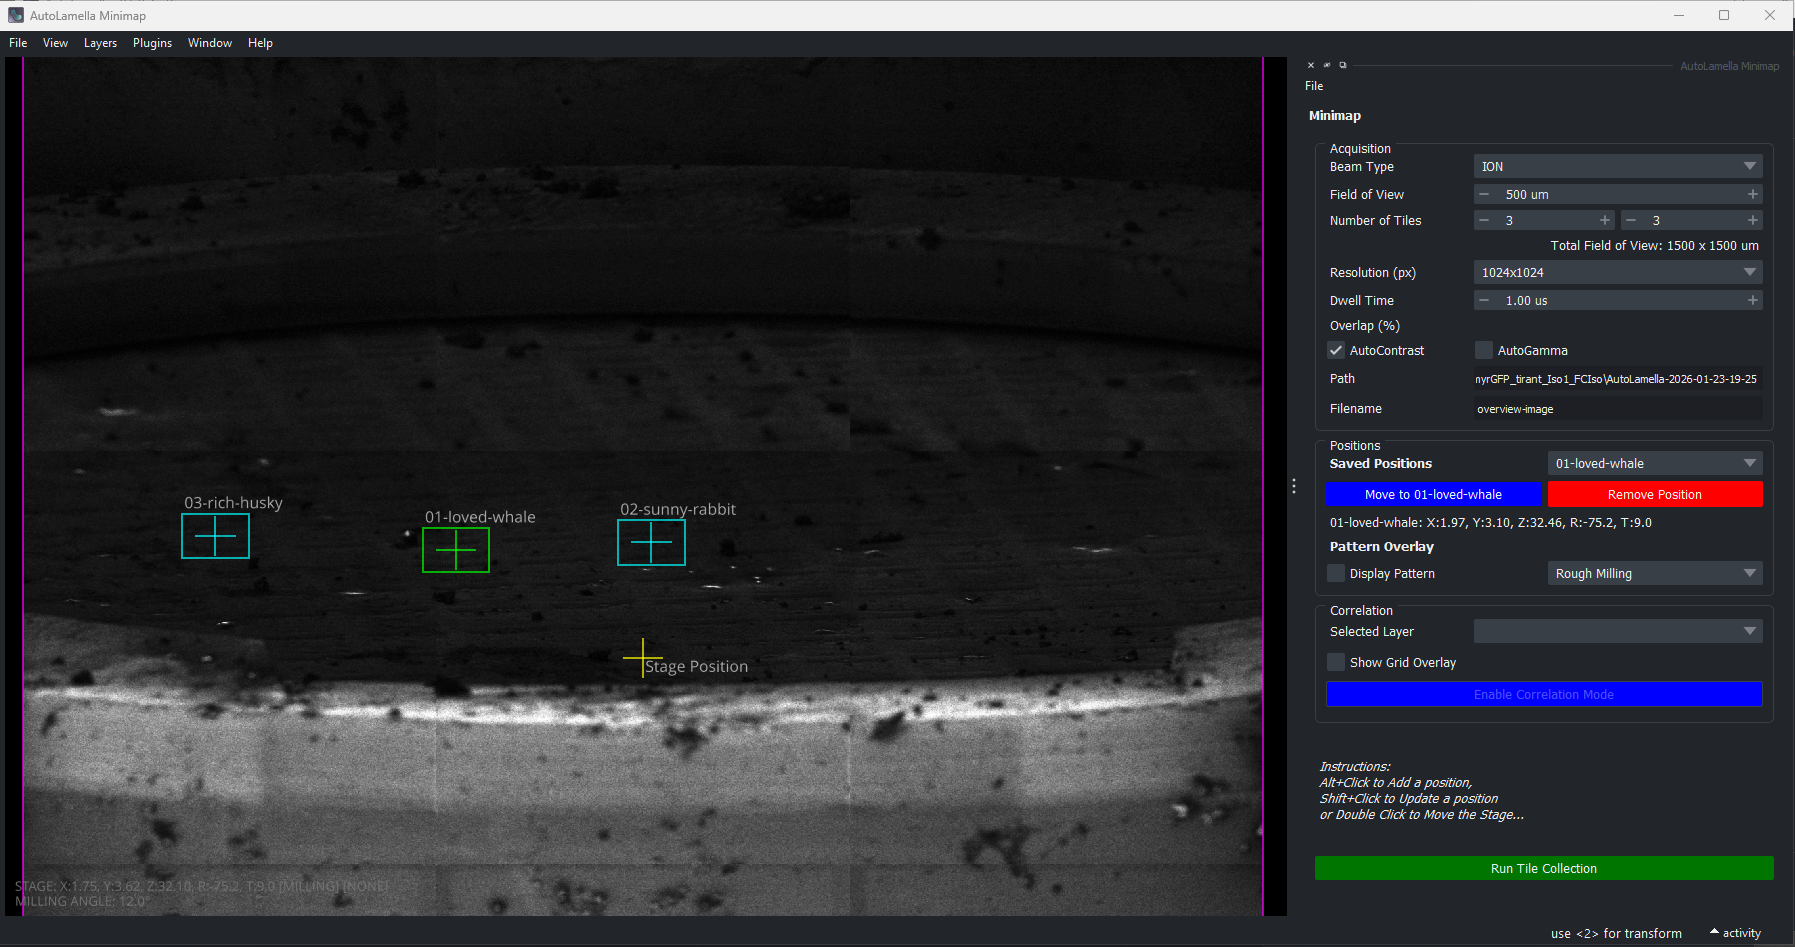
The overview widget controls overview (tiled) image acquisition and allows selecting lamella positions. To open the overview acquisition: Tools -> Open Overview Acquisition
Prepare for overview acquisition in the main GUI.
- Move to SEM Orientation (sample-grid is perpendicular to SEM)
- Move to centre of the grid
- Ensure SEM/FIB coincidence
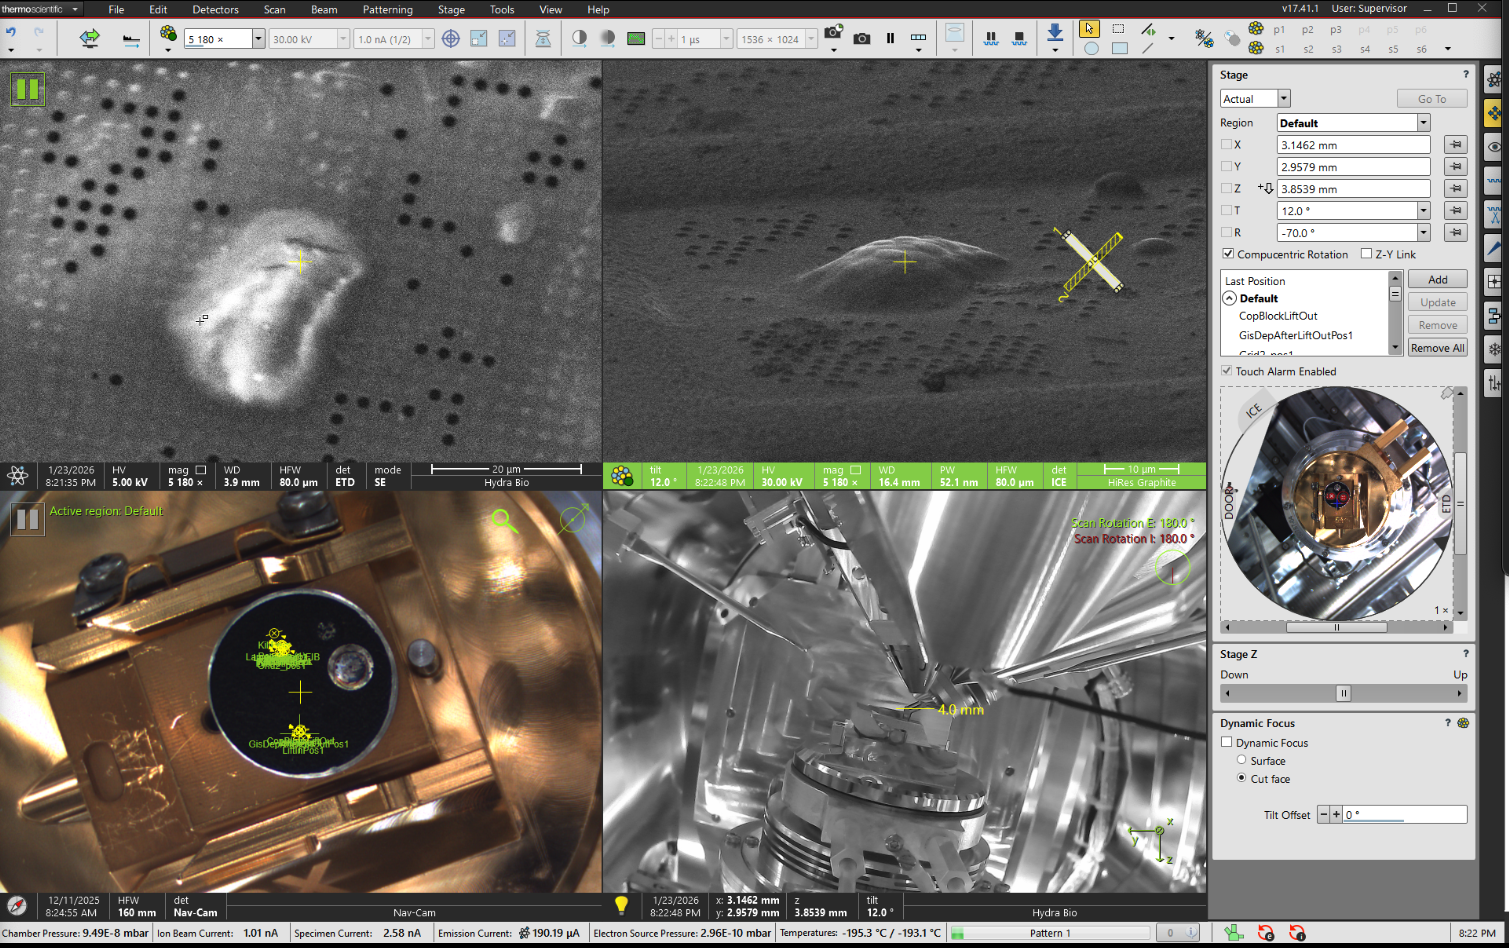
Note: the overview image in the screenshots is acquired at the milling angle orientation. This is possible, but it’s recommended when first starting you acquire at the SEM orientation.
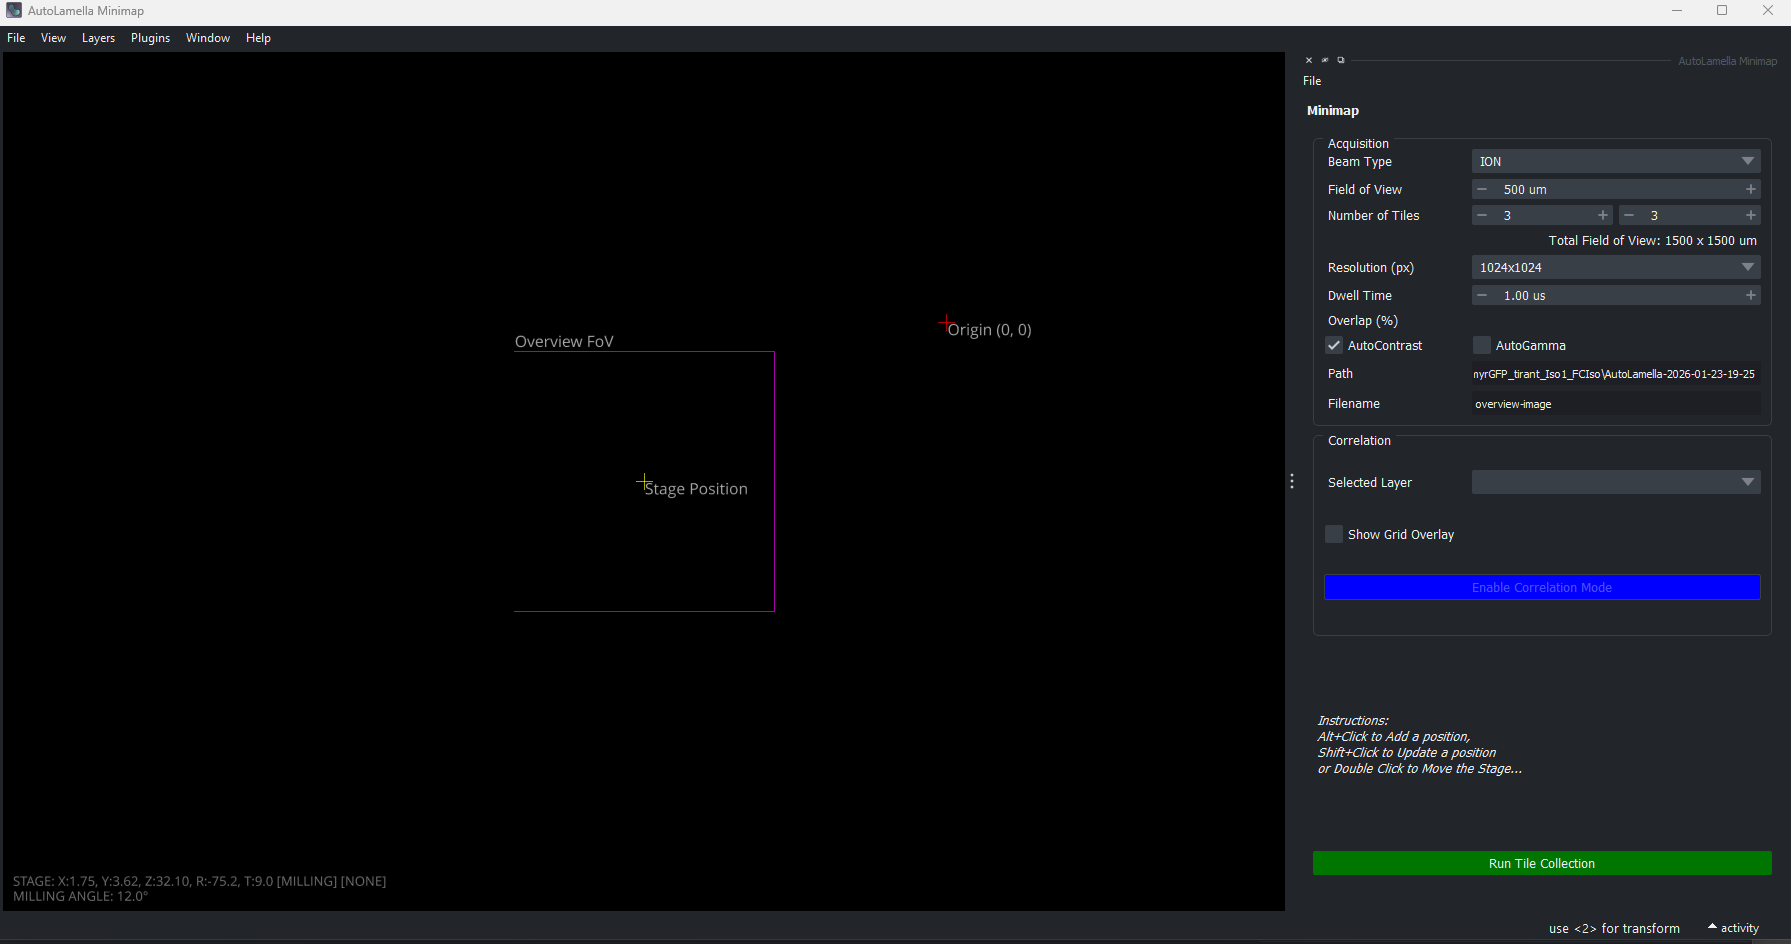
Tiled Image Acquisition
To acquire an overview image of the grid:
- Select imaging parameters, beam type, rows, columns, etc
- Press ‘Run Tile Collection’
- Wait for acquisition and stitching
You can choose to acquire an overview with the SEM or FIB. Currently only one overview image can be displayed at a time.
Selecting Lamella Positions
From the overview, you can add lamella positions by clicking on the image.
- Press Alt + Left Click to add a new position.
- The position will be added at the orientation the image was acquired at.
- You can only add positions inside the image area.
From the main UI, you can add lamella positions in the Experiment tab.
- Press ‘Add Lamella’ in the Setup section
- The position will be added at the current stage position.
Reviewing the Lamella Positions
If you want to review the lamella positions selected from the overview, you can do it from the main GUI.
Press Go to Position to move to the selected lamella position
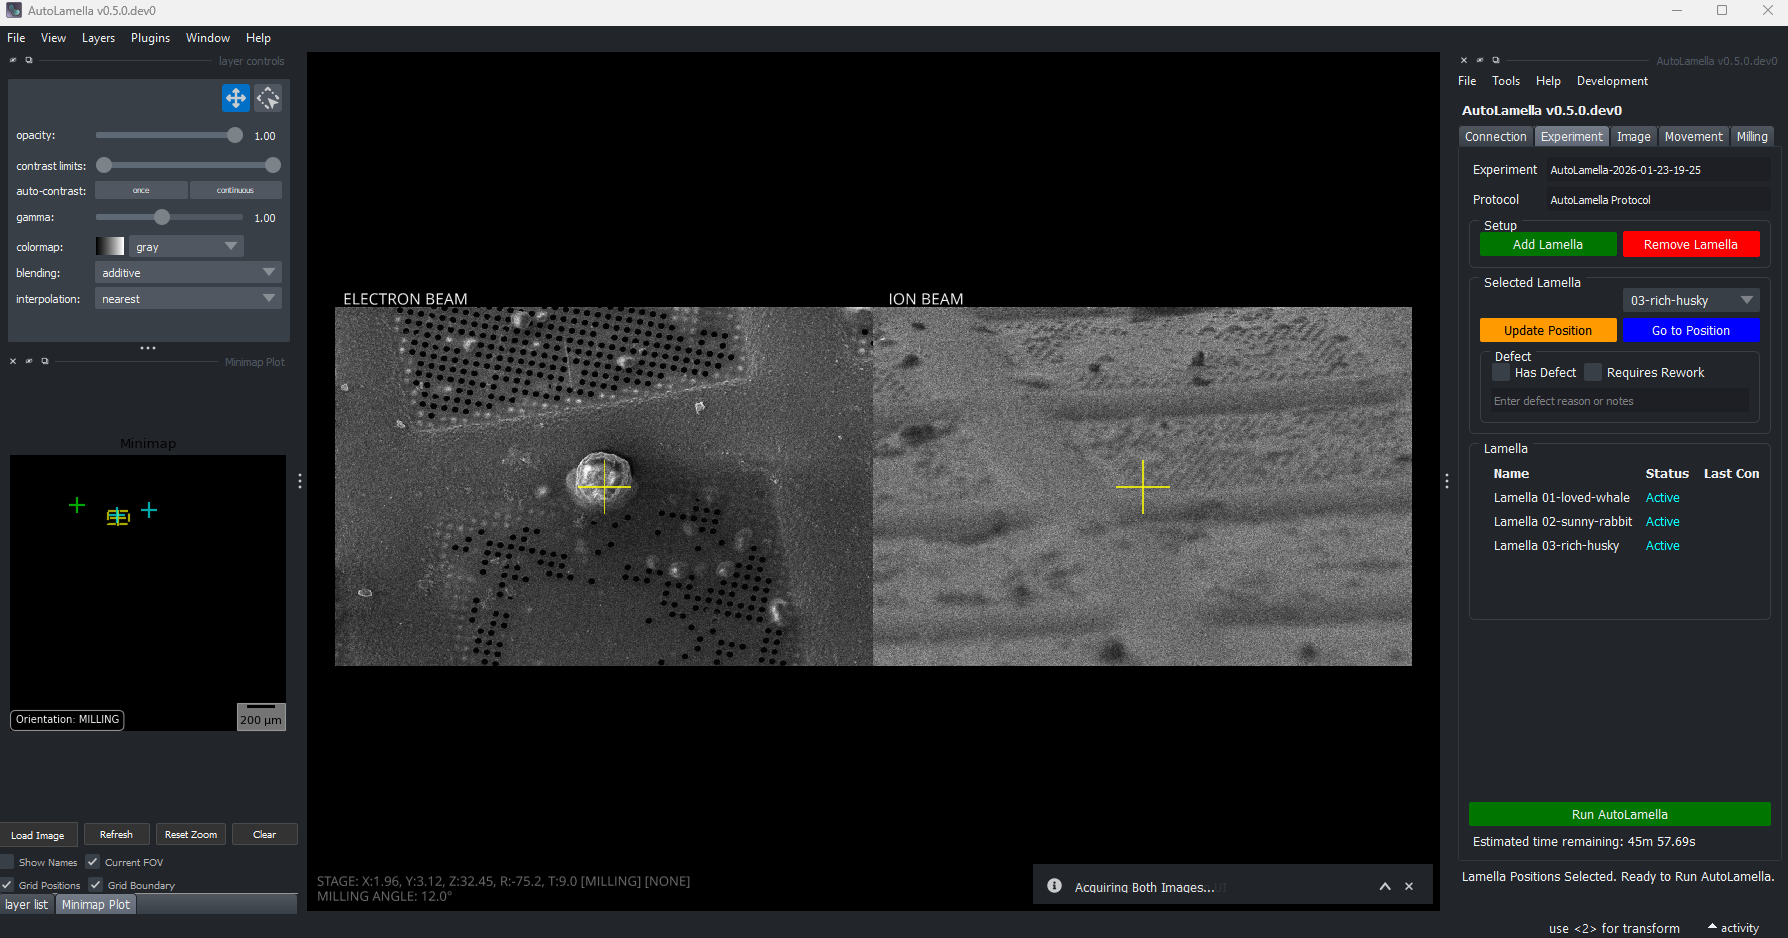
You can adjust the position, by double-clicking on the images. You can adjust coincidence by holding Alt + Double Click in the FIB image.
To save the current stage position press the orange Update Position button

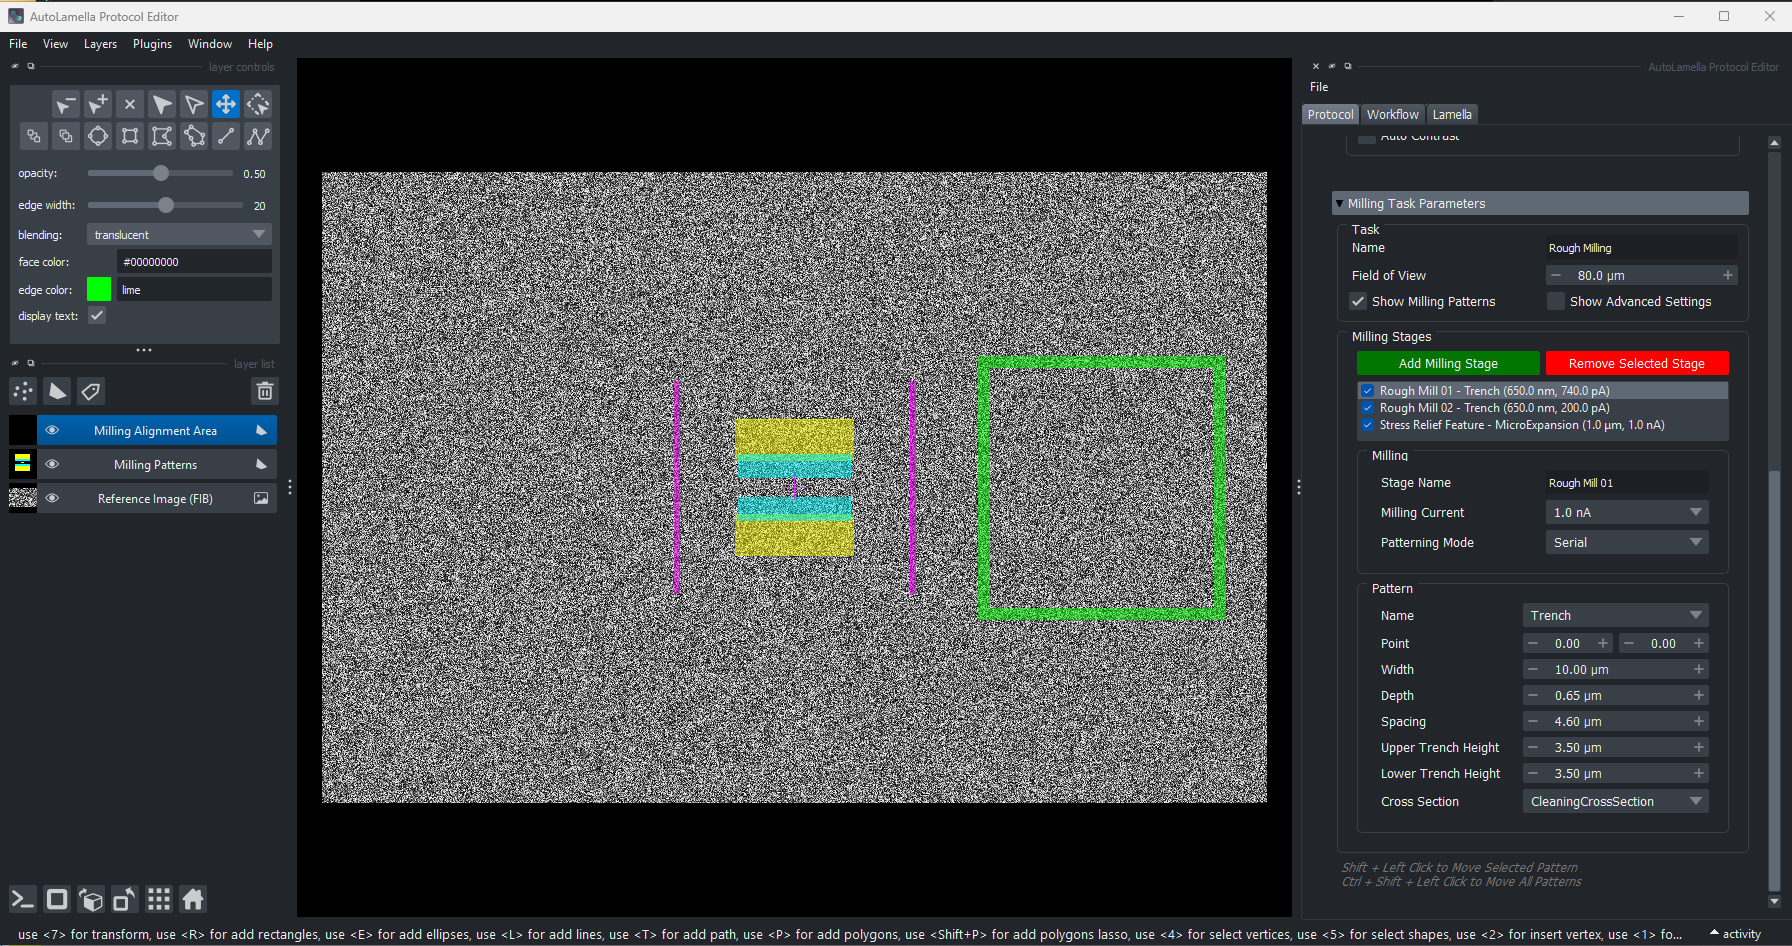
Protocol Editor
The protocol defines the configuration for the tasks and workflow. Each lamella receives a copy of the task configuration, that can be edited individually. The Protocol Editor enables editing the task configurations, workflow and each lamella’s individual configuration.
Tasks
Defines the complete task-based workflow protocol for an AutoLamella experiment. Contains task configurations (milling patterns, imaging parameters), workflow definition (task order, dependencies, supervision requirements), and workflow options. Can be saved/loaded from YAML files and shared across experiments. Supports conversion from legacy protocols.
Task configuration can be edited in the ‘Protocol’ tab.
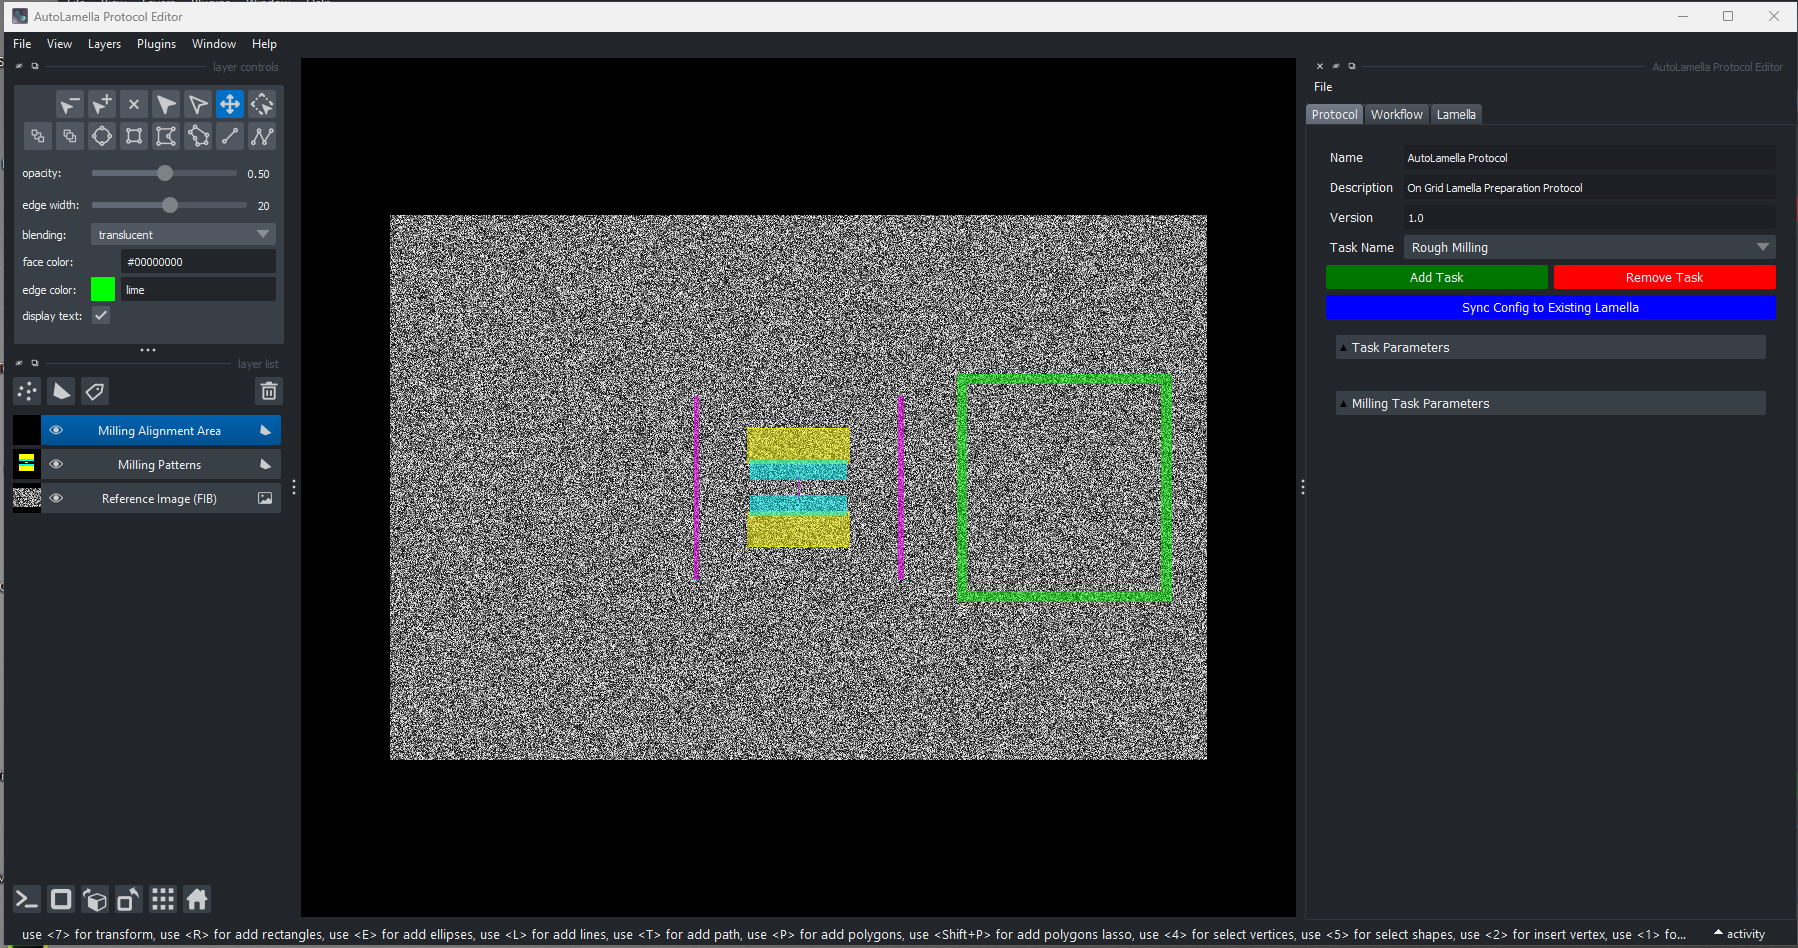
To apply the protocol to existing lamellae press ‘Sync Config to Existing Lamella’. This will update the parameters, and milling parameters but not the position of the milling patterns.
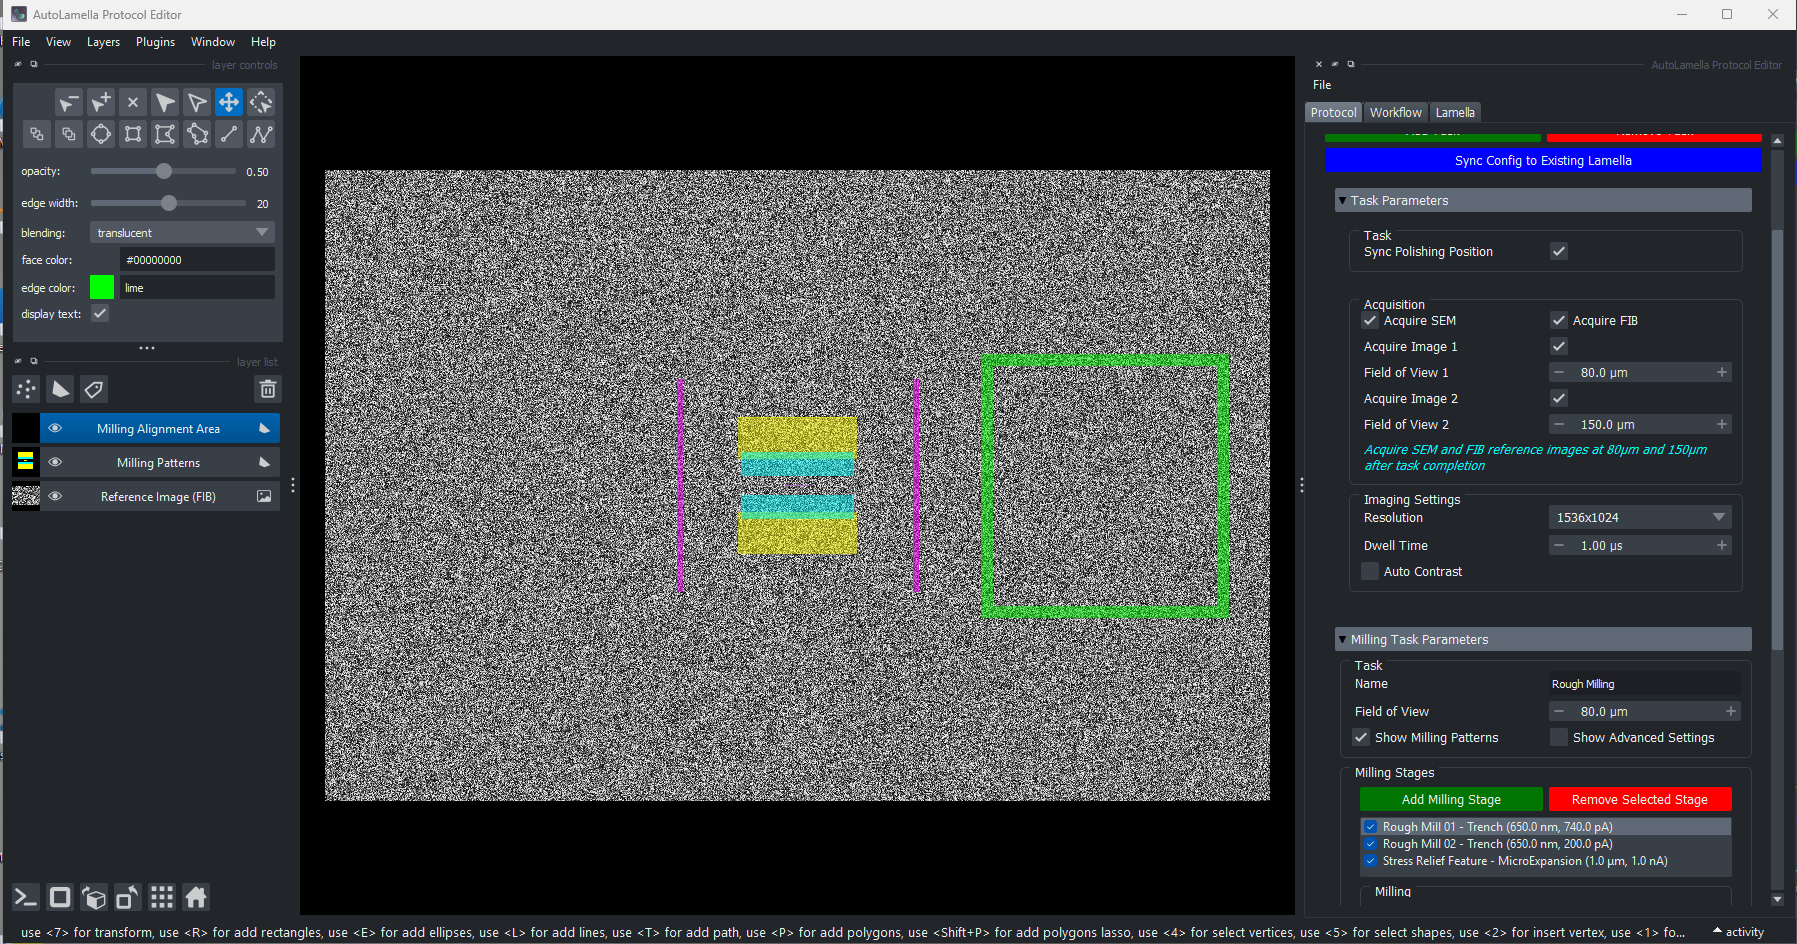
To globally edit some parameters (imaging conditions) for all tasks, use File -> Global Edit…
To export the protocol to a file, use File -> Export Protocol. The protocol is automatically saved to the experiment directory, so you don’t need to save these changes manually. This option is primarily for exporting a protocol to another location, or for use in another experiment.
Workflow
Defines the execution order and dependencies between tasks in an AutoLamella workflow. Specifies which tasks are required, which need user supervision, and their prerequisite relationships. Validates task dependencies and tracks completion status for individual lamellae. Provides methods to query remaining tasks and workflow completion status.
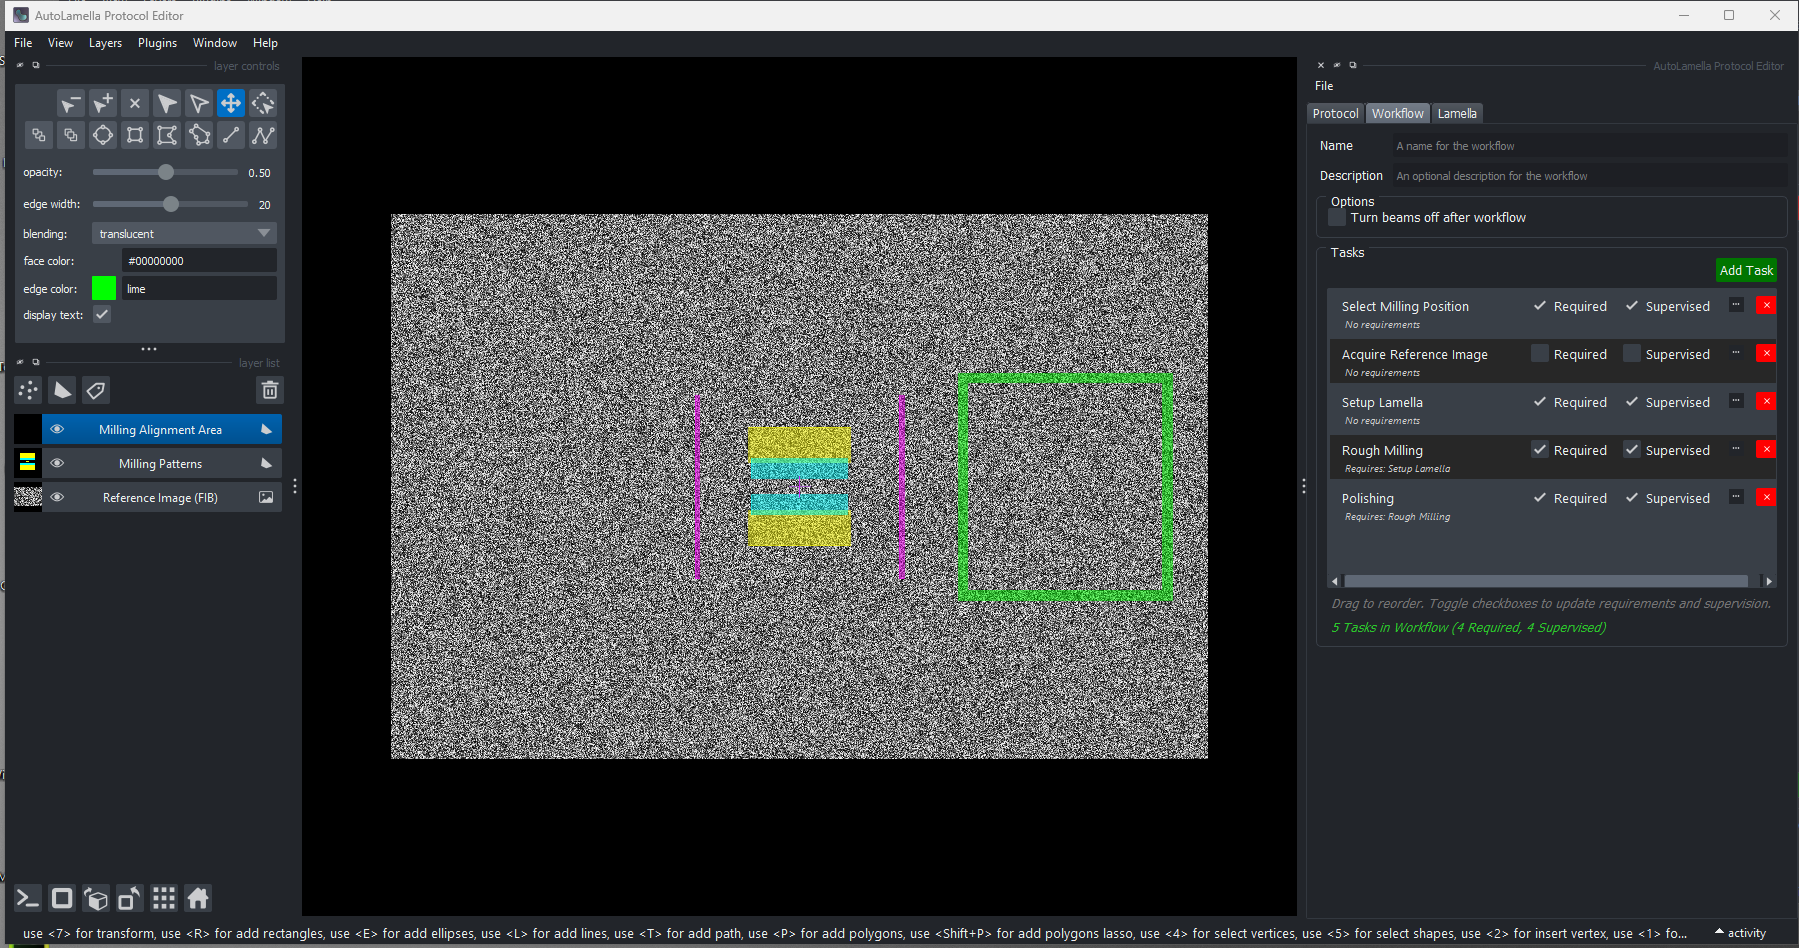
Workflow Tasks
- Task Name: The name of the task. Must match the corresponding task in the task-config.
- Required: Flag whether the task is required for the workflow to be complete. Allows for ‘optional’ tasks that may only be required for some specific workflows or samples.
- Supervised: When a task is run in ‘supervised’ mode the execution will pause at pre-determined points (before milling, before/after stage movements) allowing you to control the microscope to modify. For example, you can adjust the stage position, or re-run milling.
- Requirements: Specifies which tasks must be run before this task can be run. For example, ‘Rough Milling’ requires ‘Mill Fiducial’ which means that must be run beforehand.
You can edit the workflow tasks in the Workflow tab of the Protocol Editor.
Options
Contains optional workflow-level settings that apply globally to all tasks. Currently includes options like whether to turn beams off after workflow completion. Extensible for adding future global workflow parameters such as safety settings or default behavior configurations.
You can edit the options in the Workflow tab of the Protocol Editor.
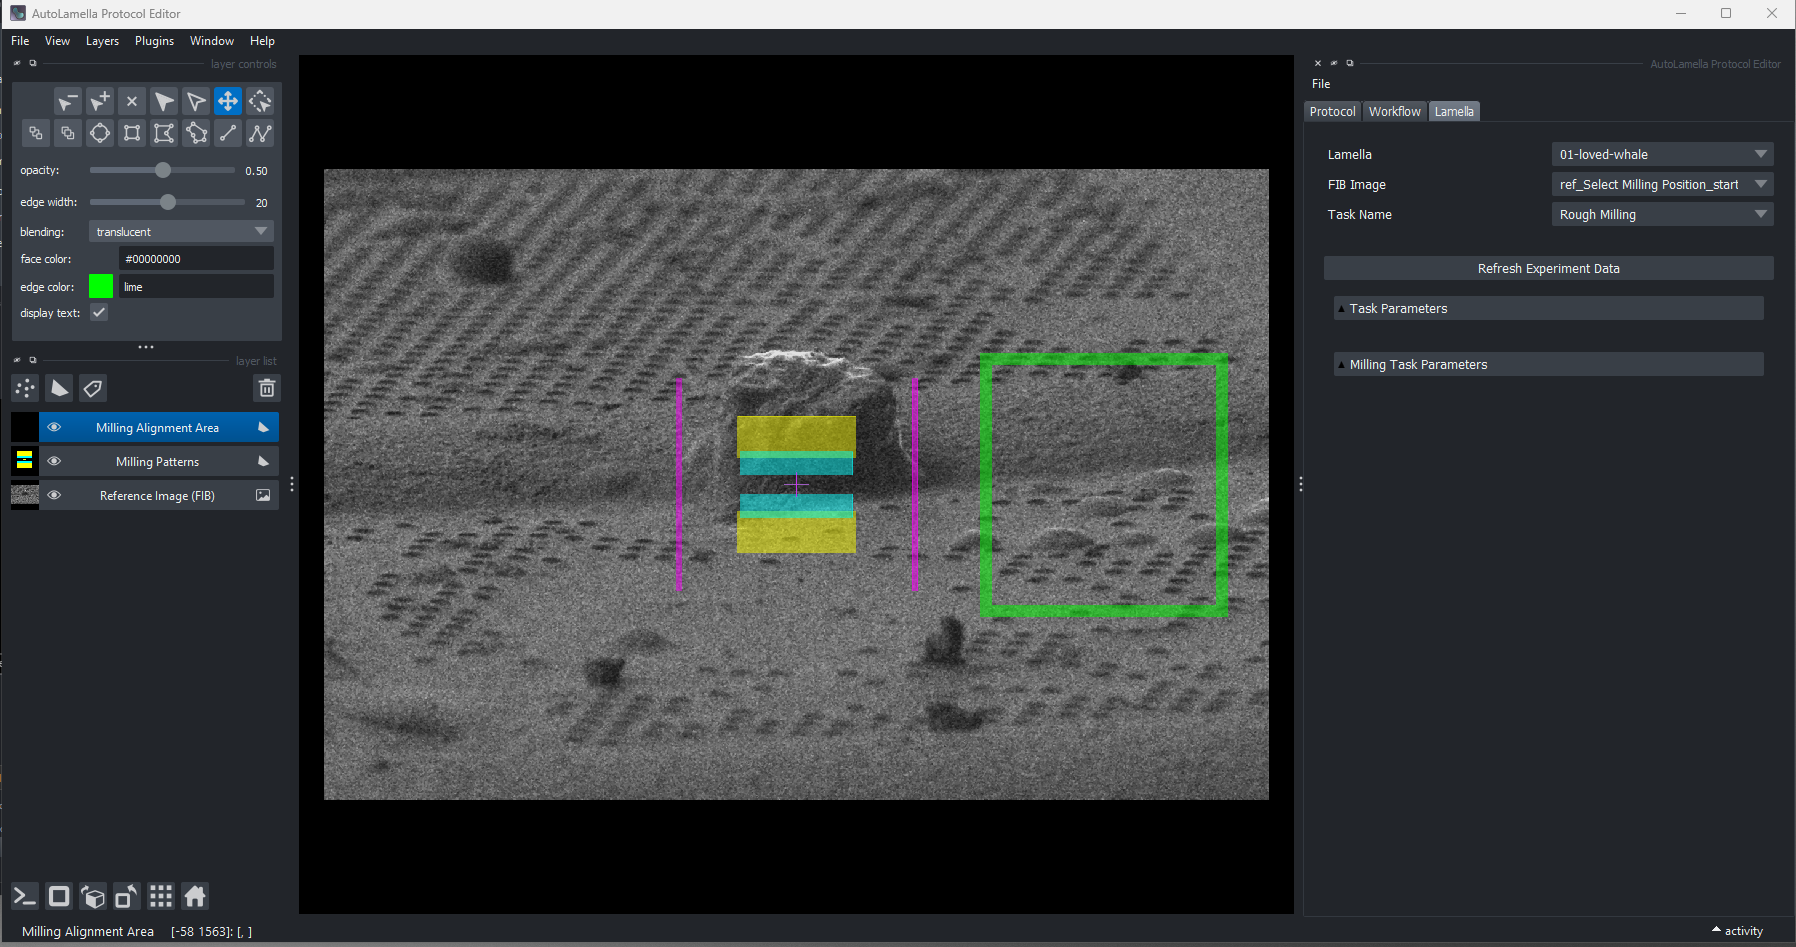
Lamella
The lamella tab allows editing the configuration for each individual lamella.
As the workflow is executed, acquired images will be available to view in this tab. You can then edit the configuration viewing the real images. In particular, you will want to adjust the position of the milling patterns (Rough Milling and Fiducial) for each cell.
It is recommended to select the milling position before starting to edit each lamella. The lamella configurations can be edited while the workflow is running.
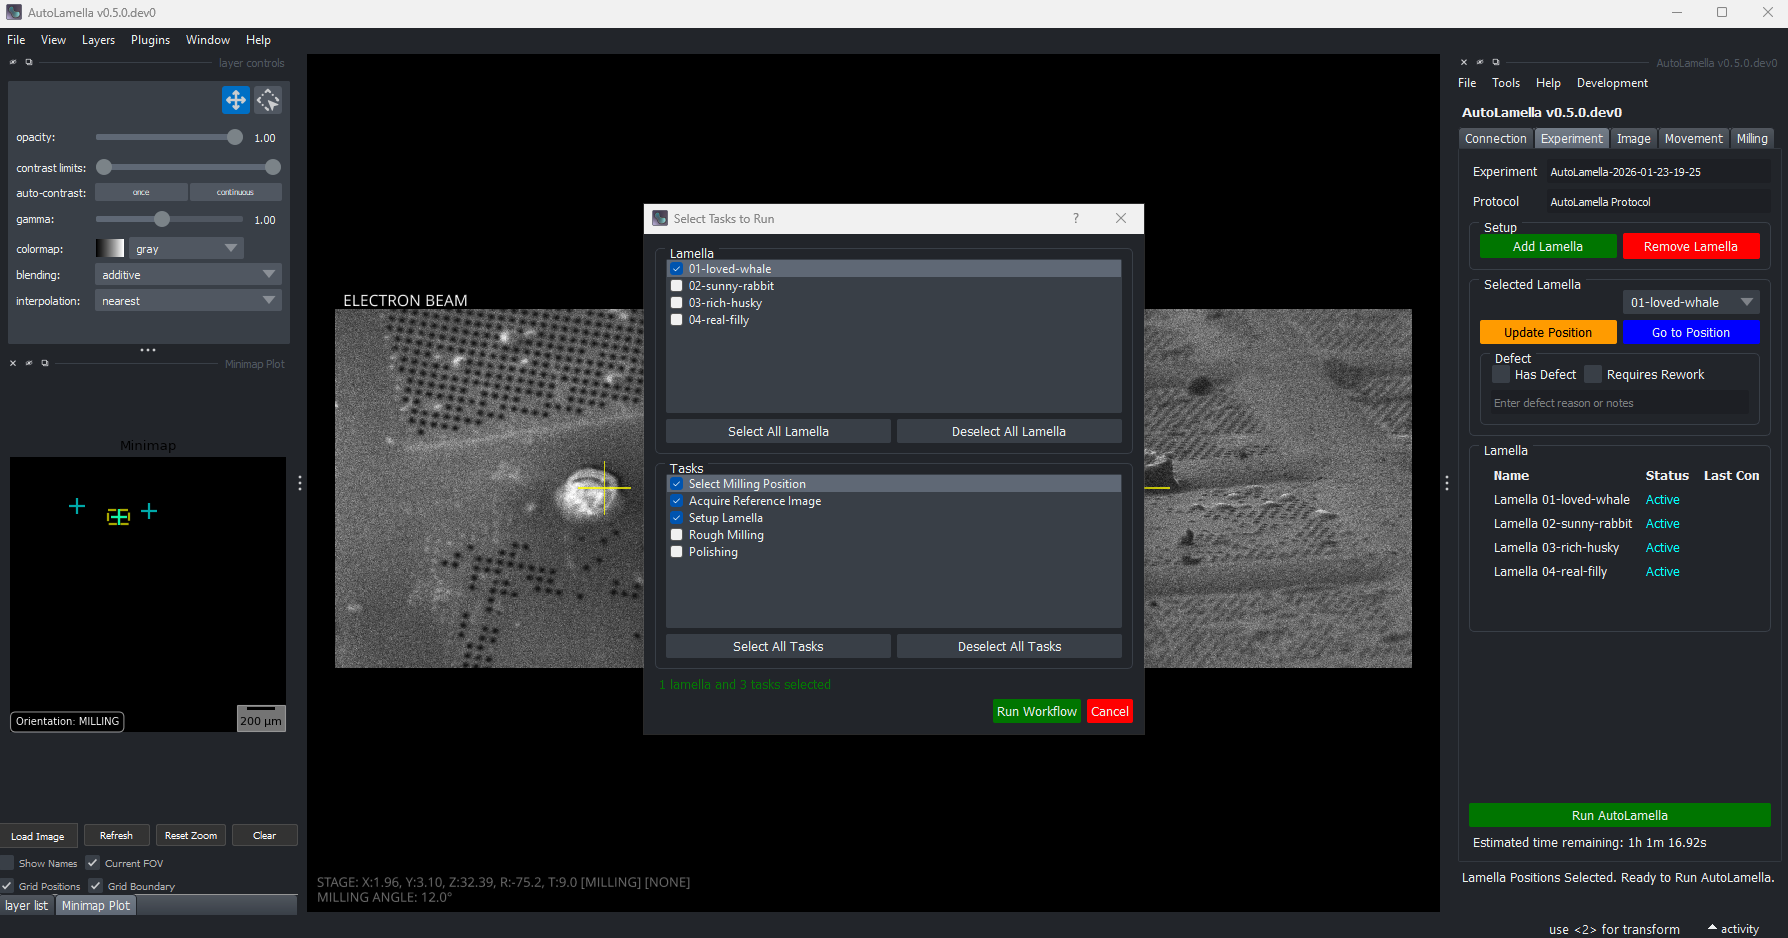
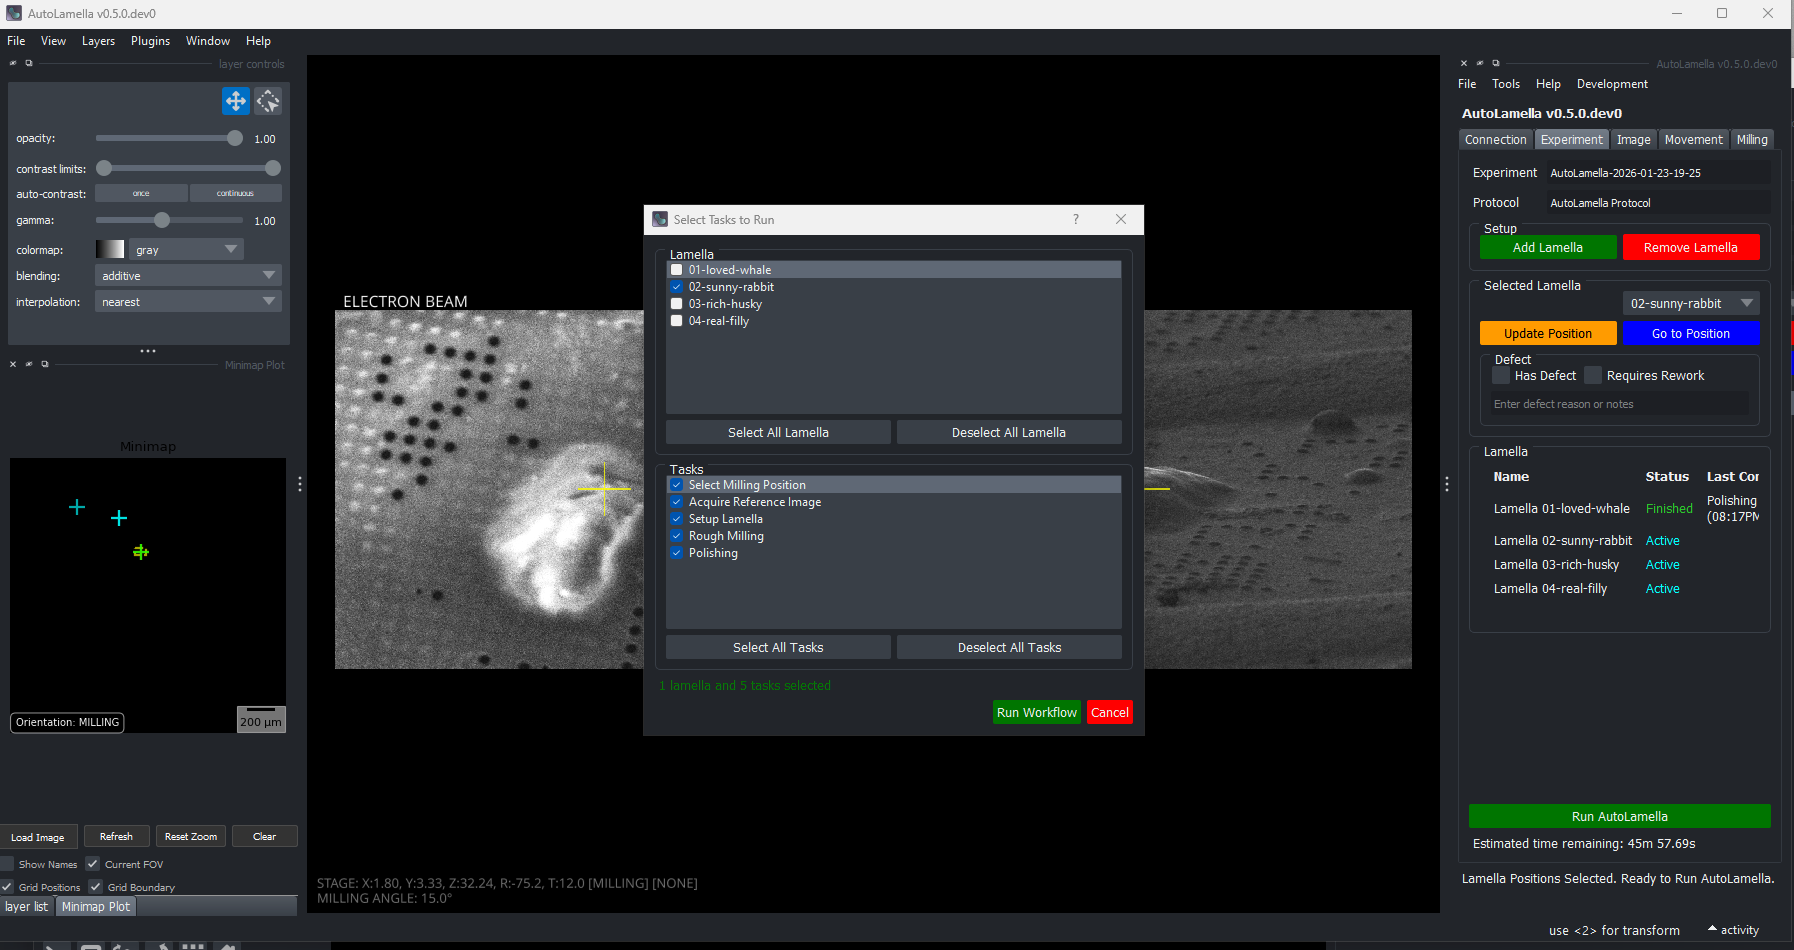
Running the Workflow
The workflow tasks can be run individually or sequentially.
- To run the workflow, go to the Experiment Tab.
- Press ‘Run AutoLamella’. The Workflow dialog will open.
- You can select the lamella and task combinations you want to run.
Workflow Tasks
The on-grid lamella milling workflow consists of the following tasks:
- Setup Lamella Position
- Mill Fiducial
- Rough Milling
- Polishing
When first starting a new protocol, it is recommended you run each step supervised for a lamella to confirm it works as expected. Once you have adjusted the protocol to your sample, you can run everything except Setup Lamella Position in automated mode, and adjust pattern positions in the protocol editor.
These are included in the default protocol file (task-protocol.yaml).
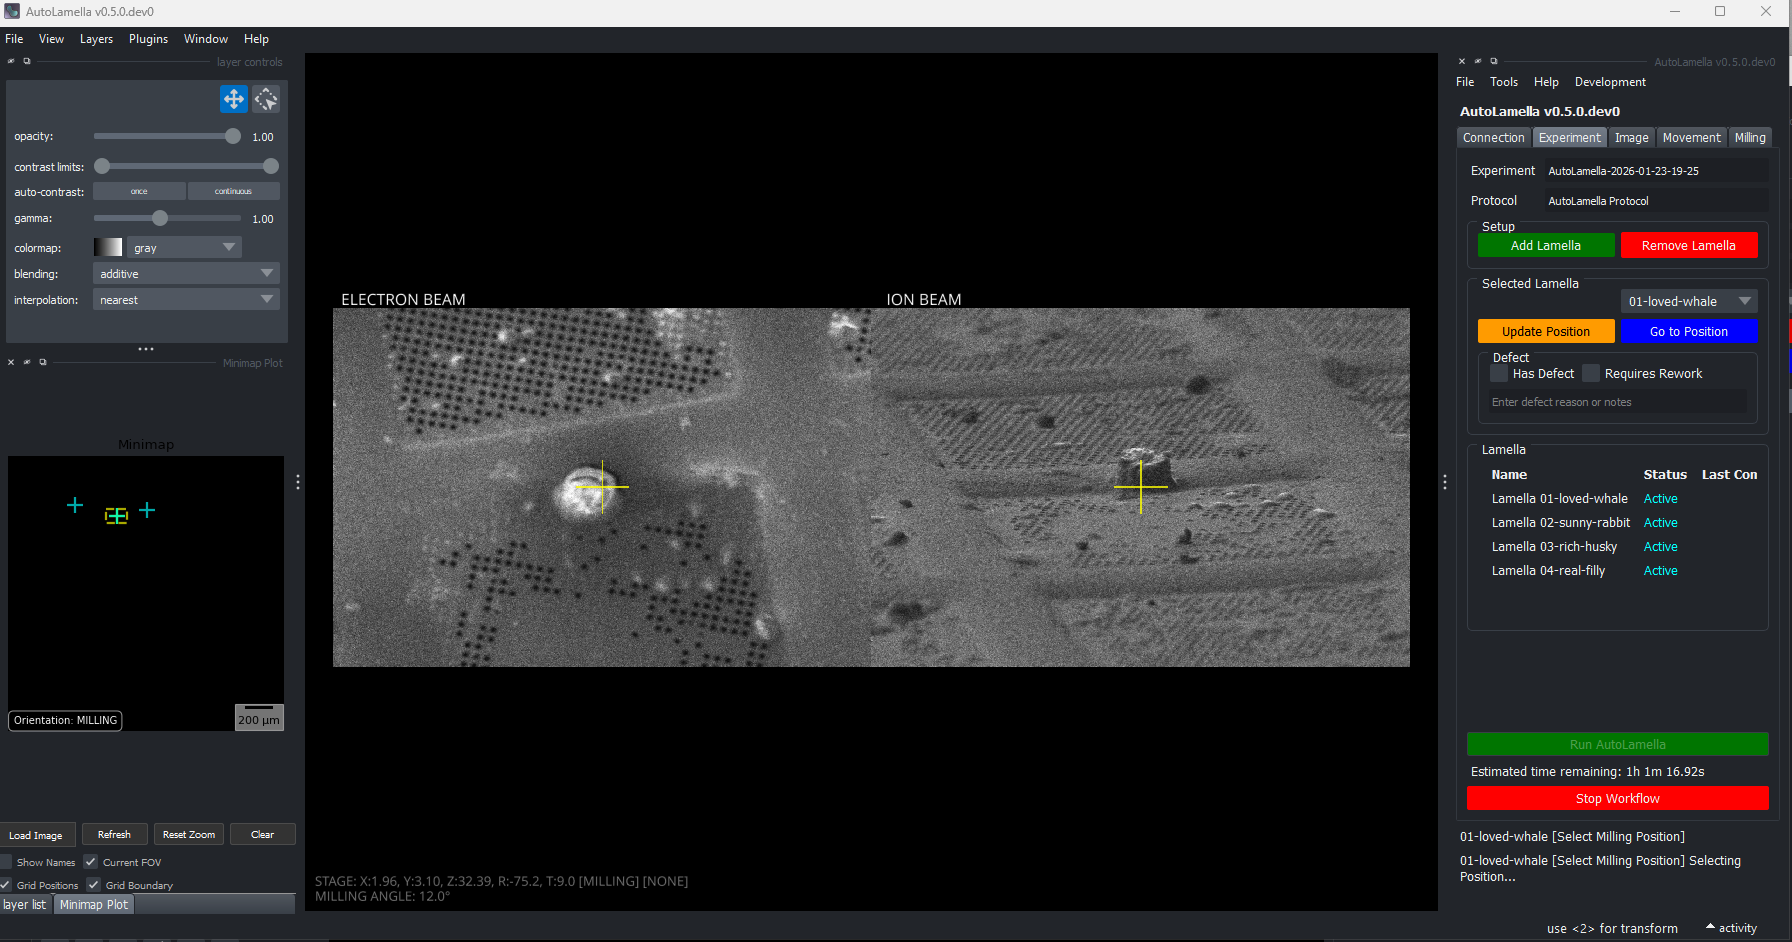
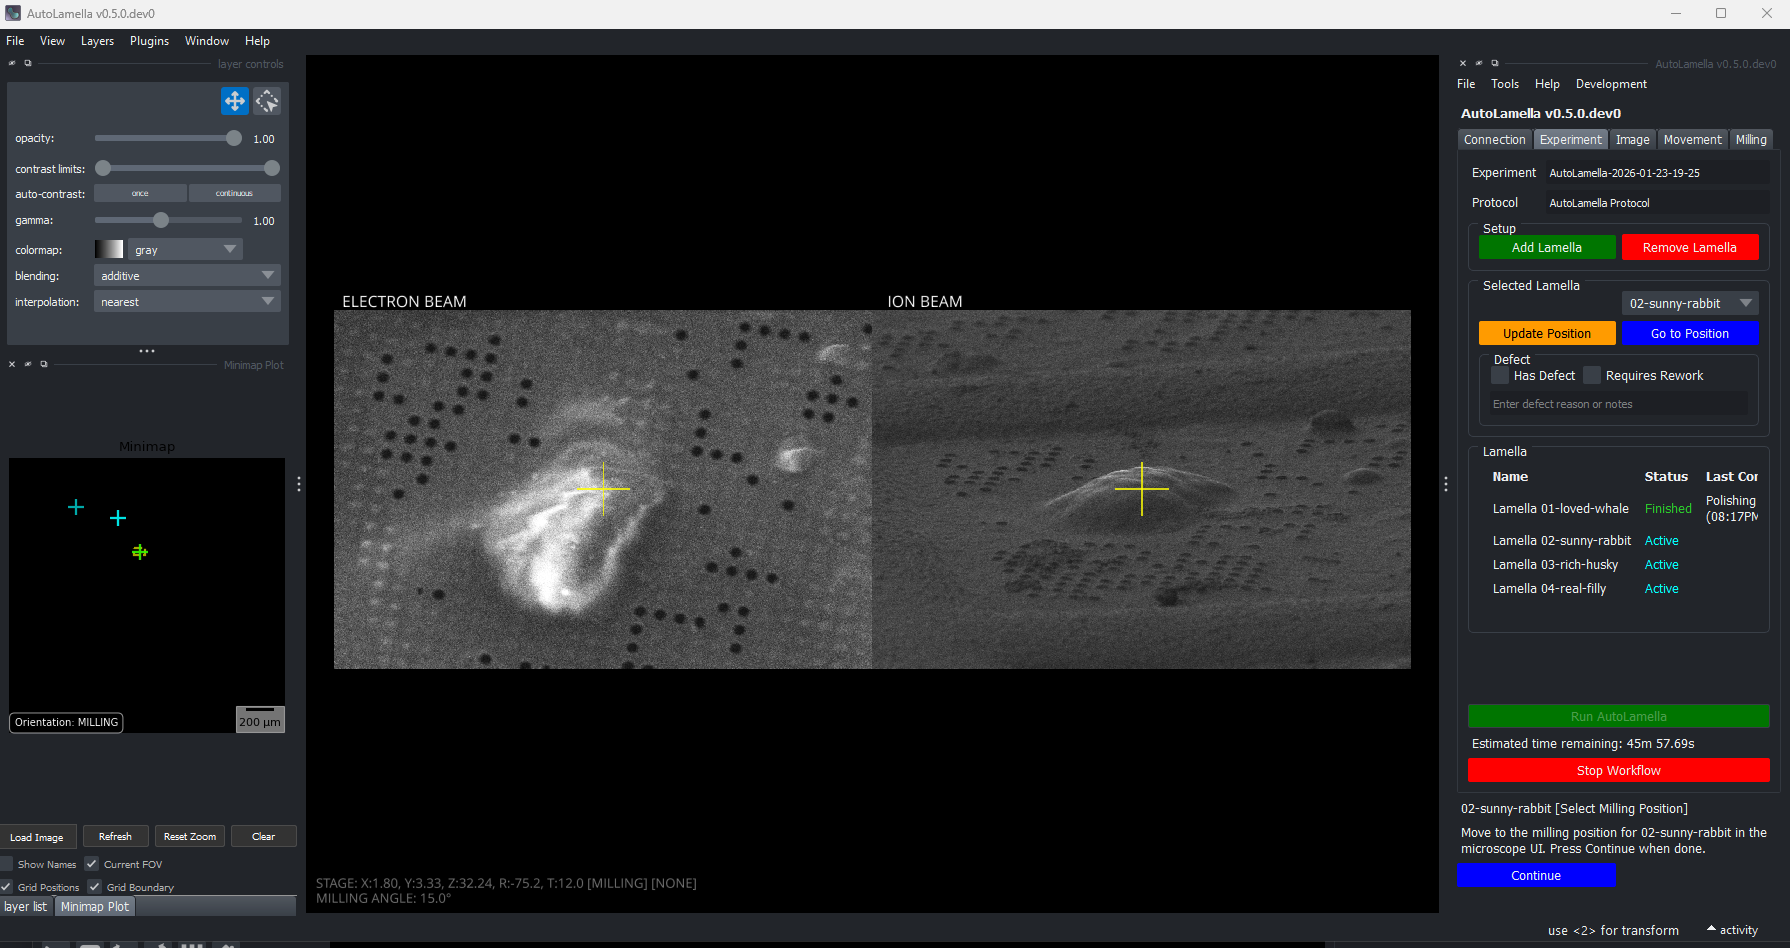
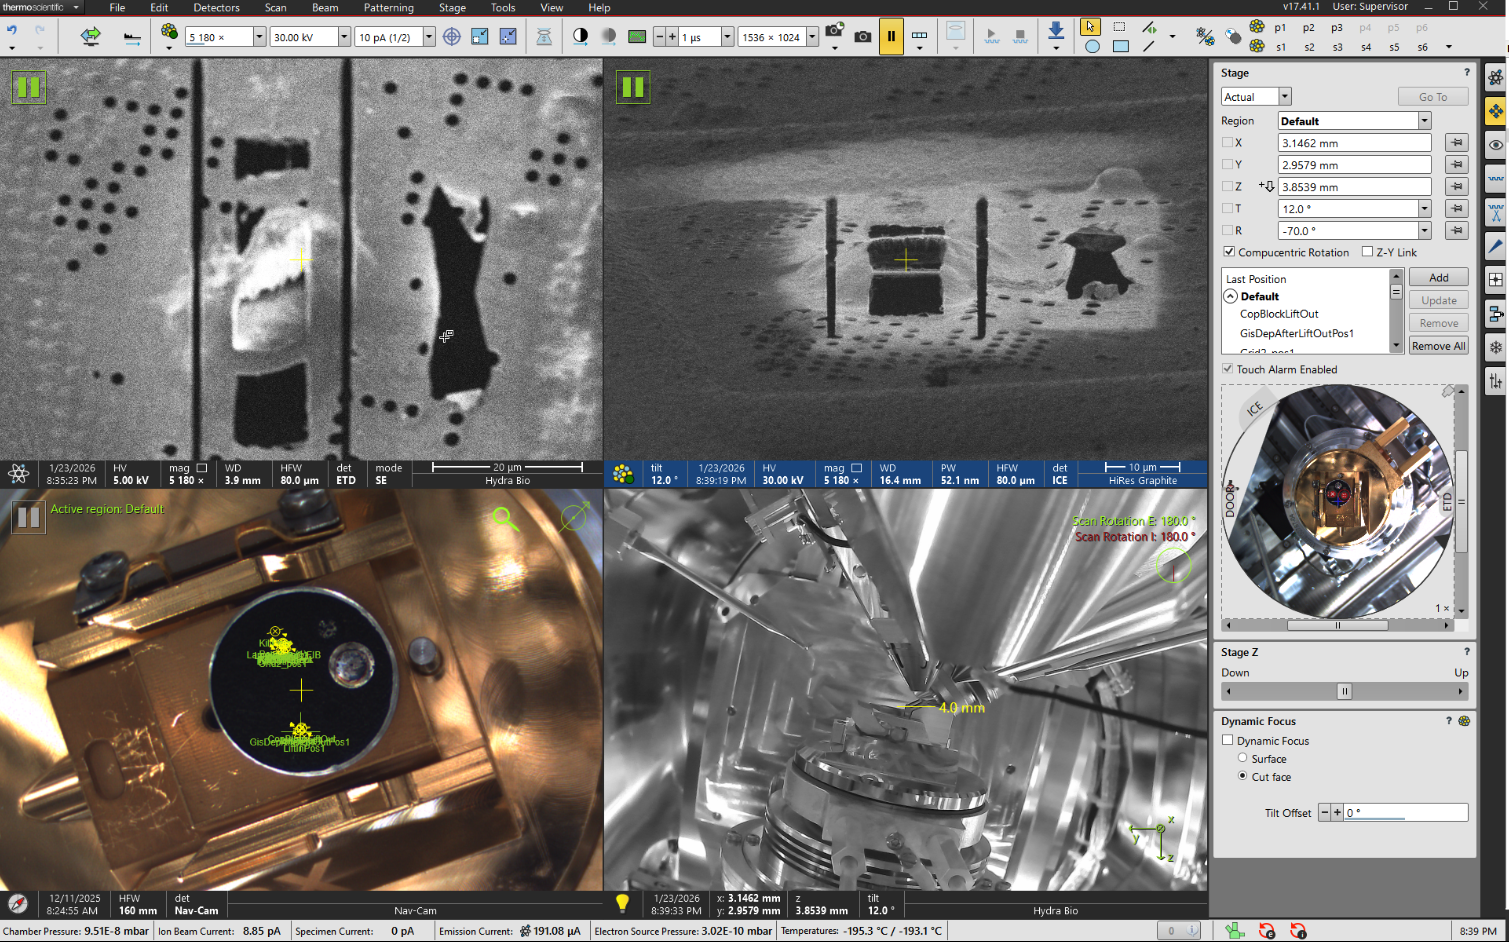
Supervision
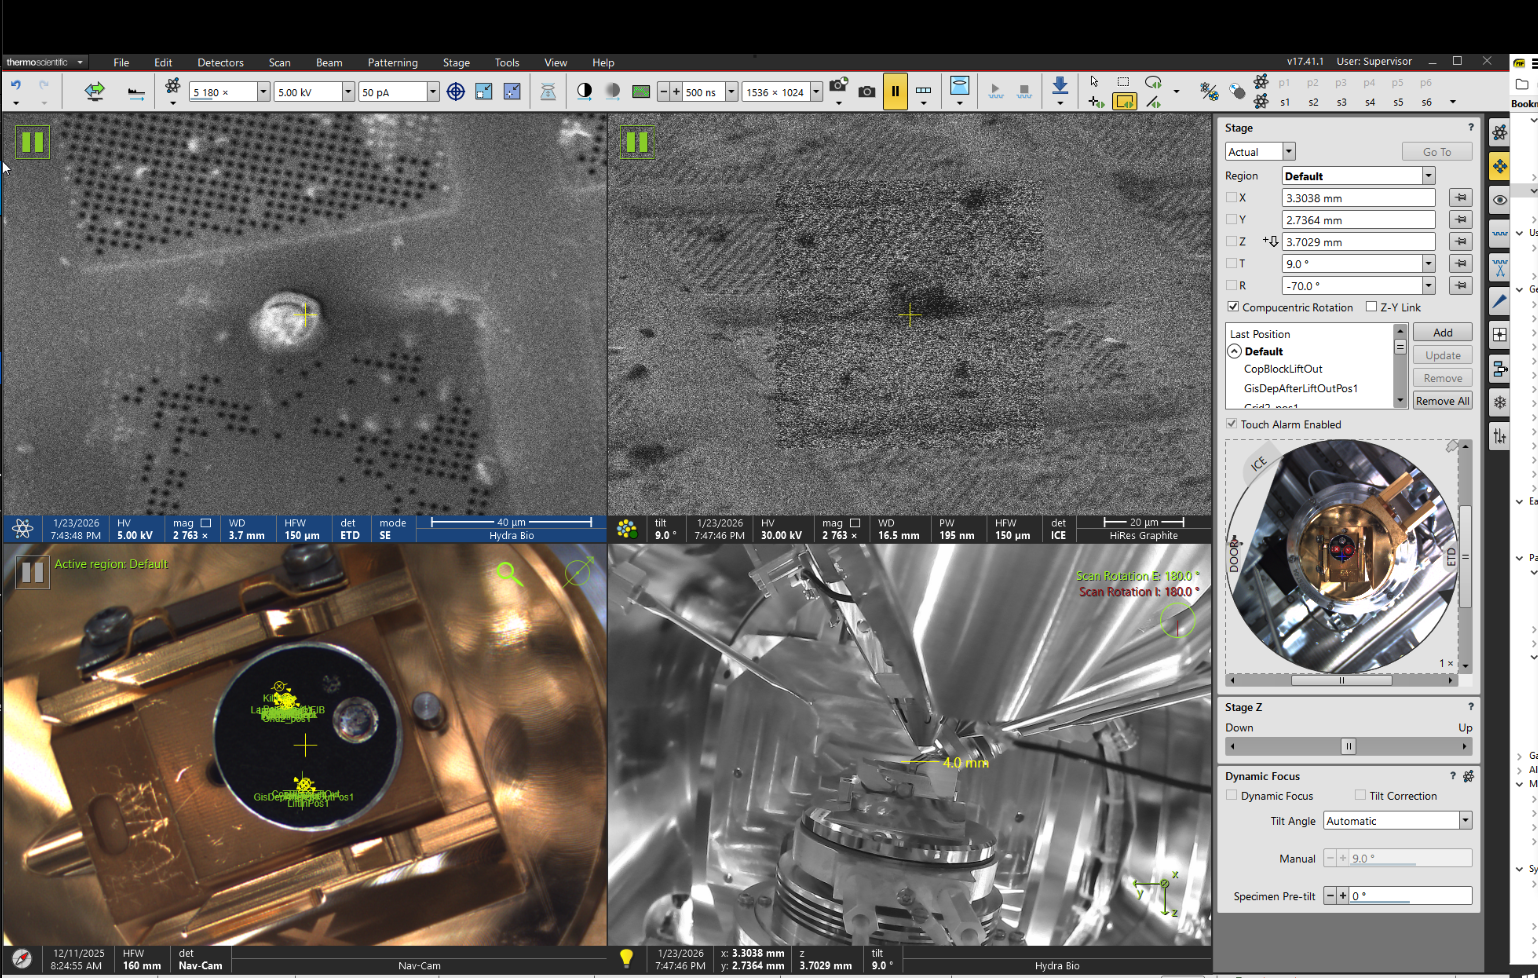
Supervision is a mode you can enable for each task, that will ask you to confirm steps, and allow adjustment during the workflow. Supervised instructions are shown in the bottom right corner of the main GUI window. Typical points of supervision are before milling tasks, after moving the stage, etc.
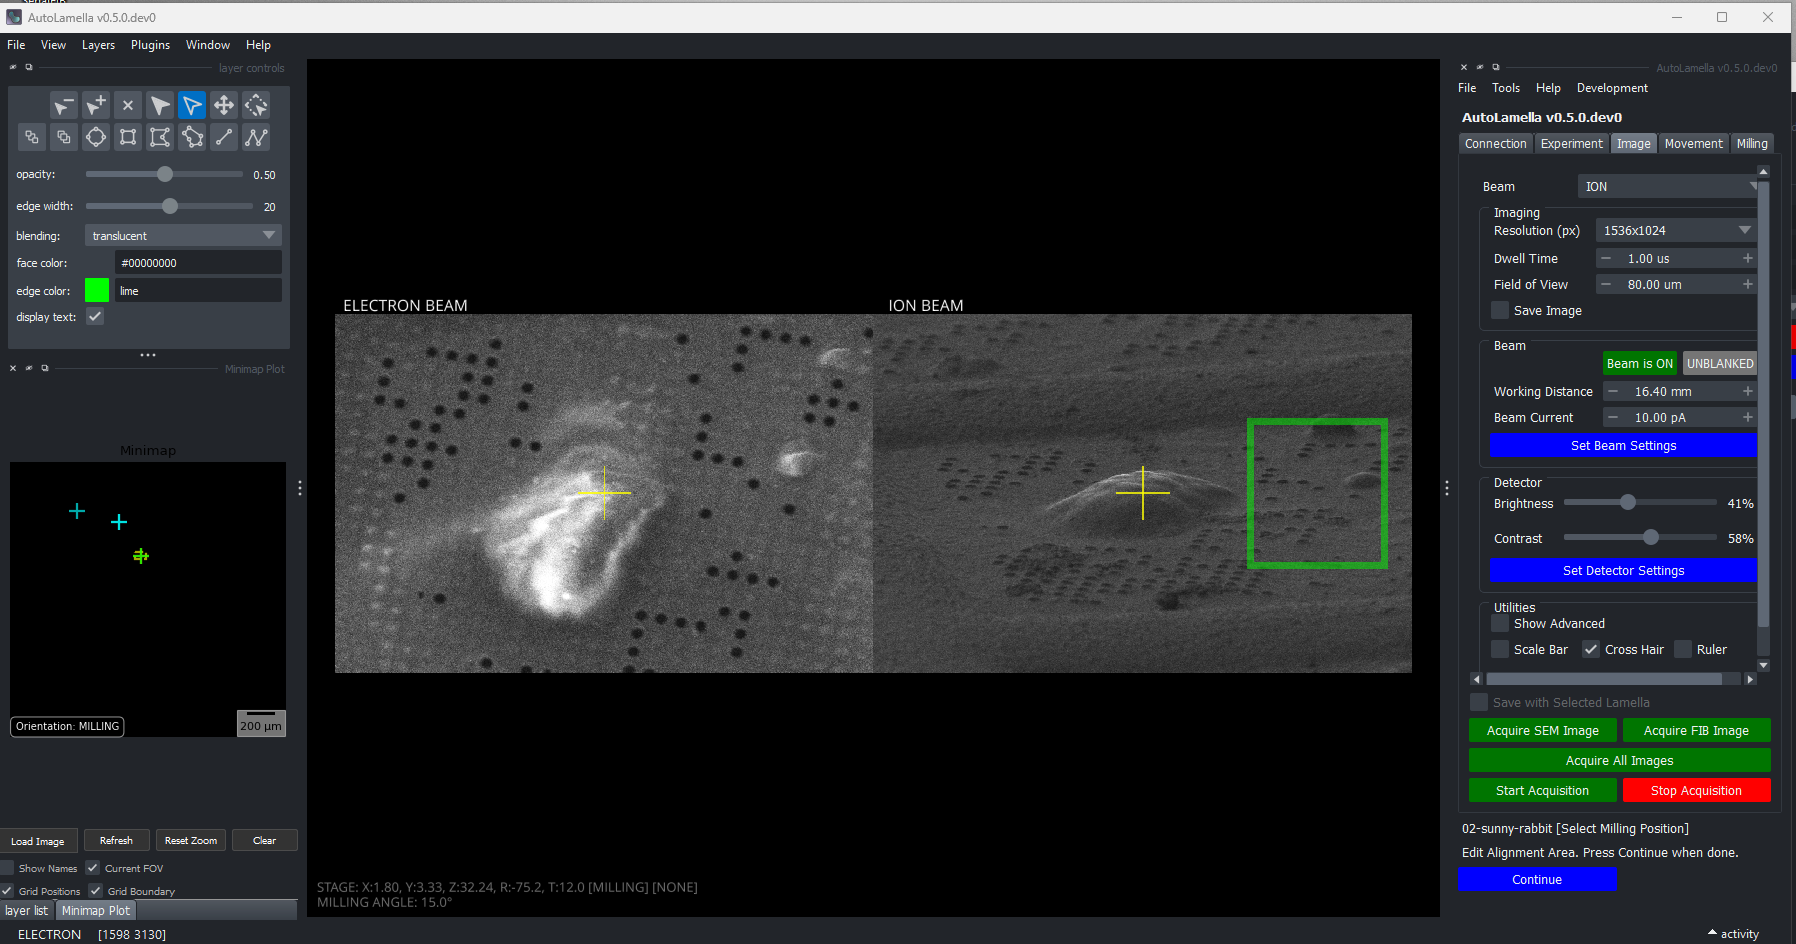
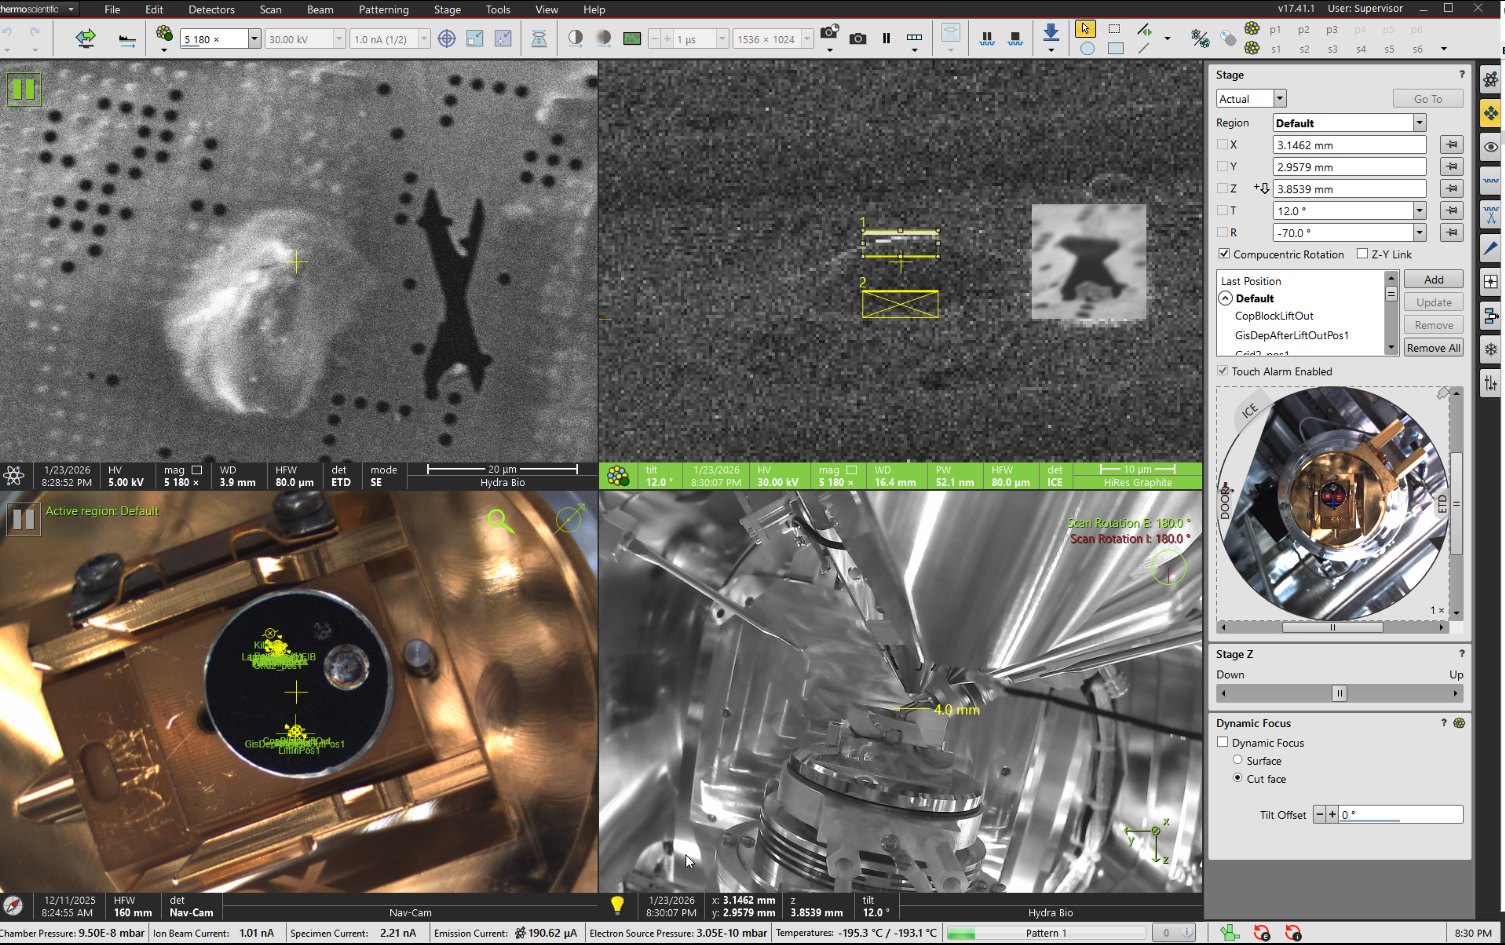
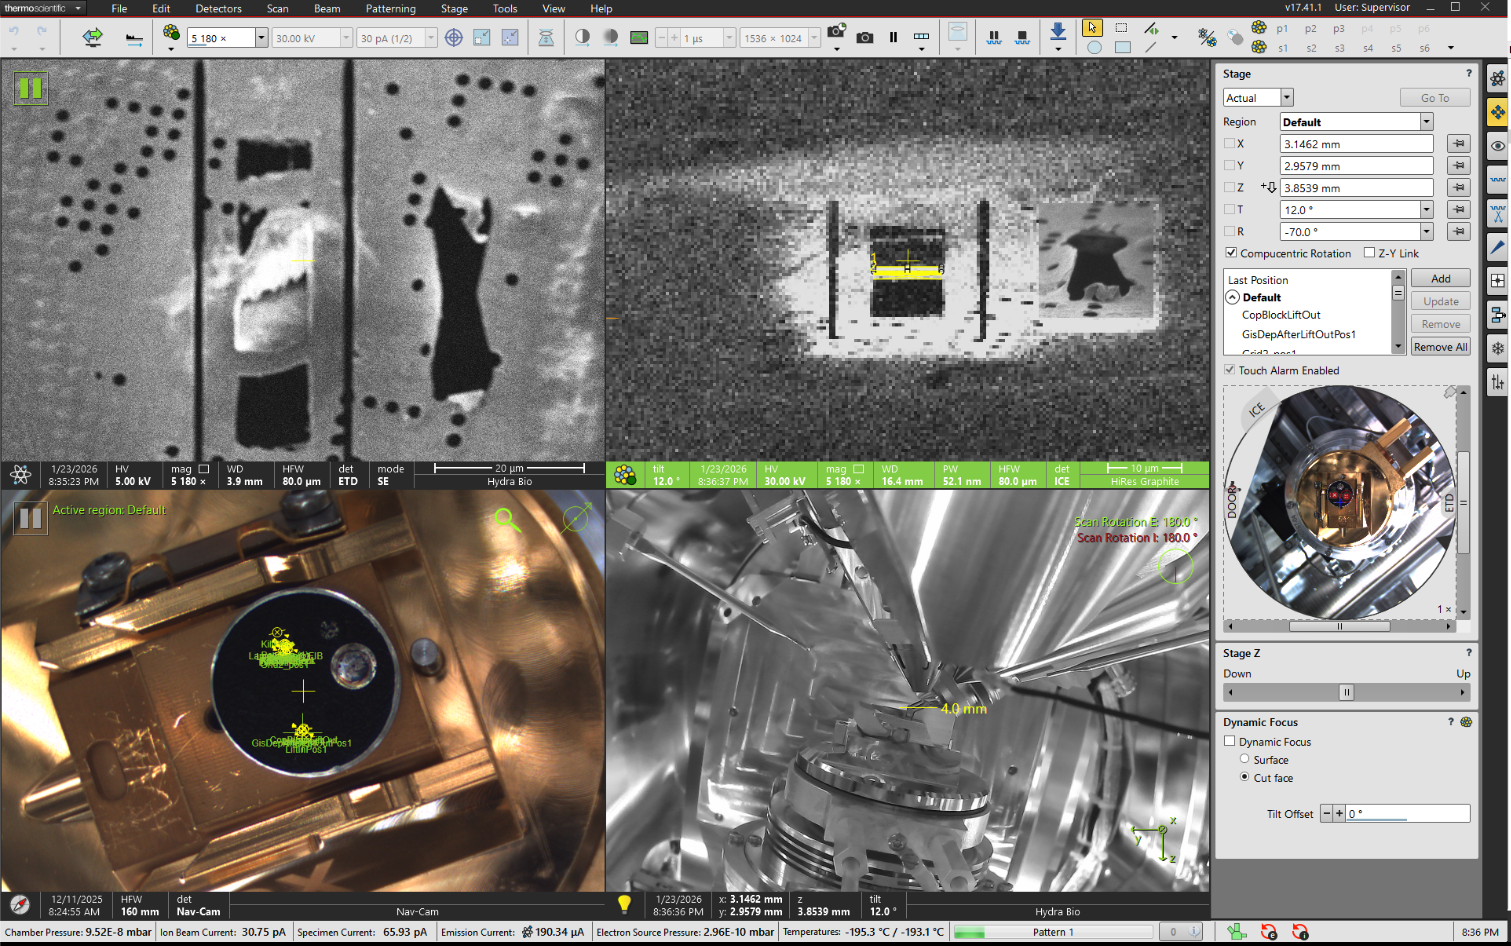
For example, the following shows the supervised mode for ‘Setup Lamella Position’
Confirm Tilt to the milling angle

Confirm milling position after tilt

Adjust the alignment area:
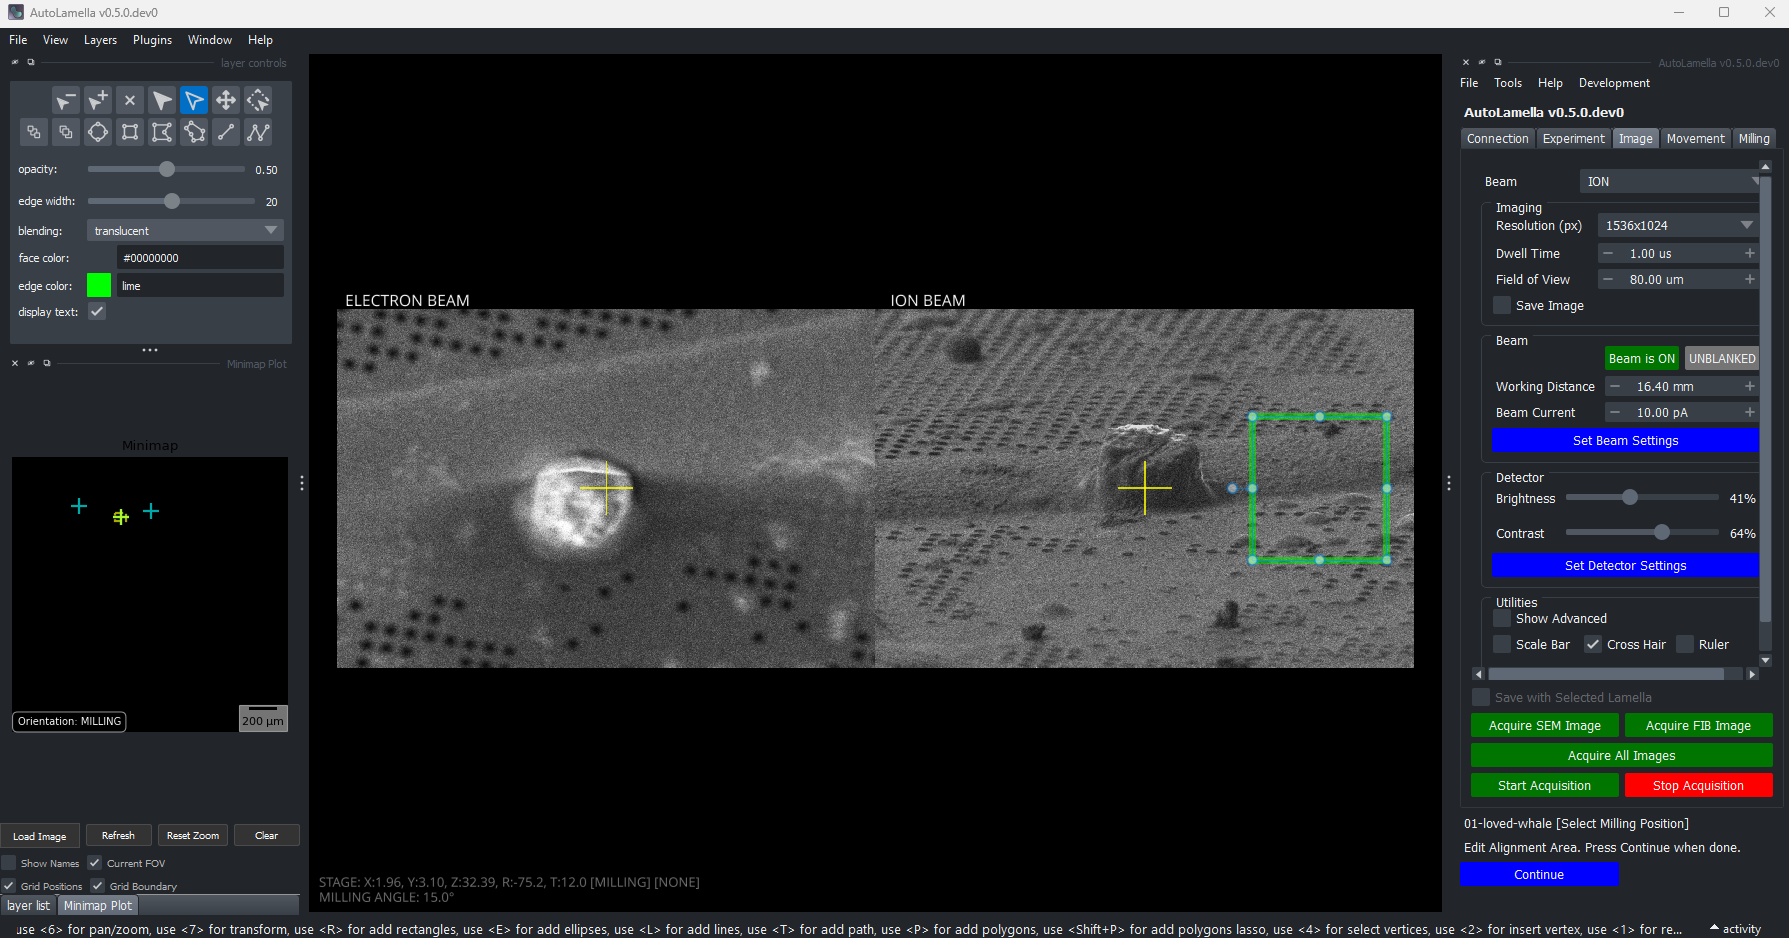
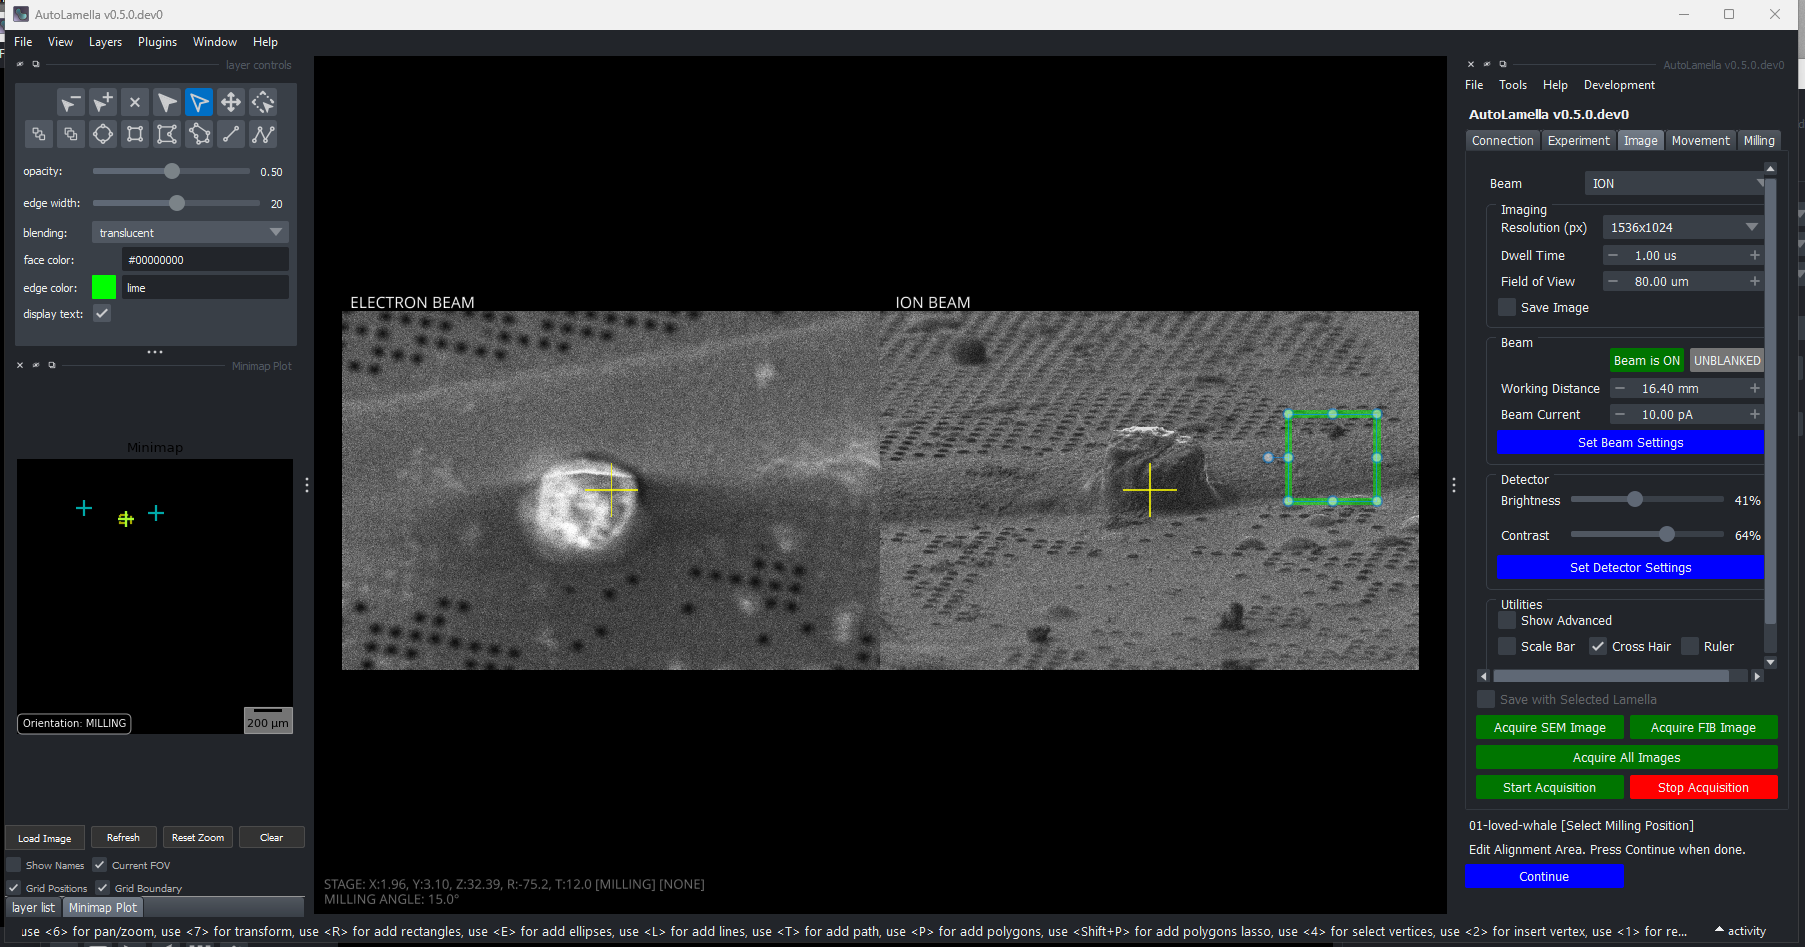
Setup Lamella Position
Summary: Selects and validates the milling position for the lamella by moving to the specified milling angle and allowing user confirmation. This task prepares the lamella for subsequent setup and milling operations by establishing the correct geometric orientation.
Note: in some of the screenshots, the task is labelled as “Select Milling Position”.
Steps:
- Move to the lamella’s stage position
- Check if microscope is at the specified milling angle, optionally auto-align or ask user to tilt
- Acquire reference image at the milling position
- Prompt user to fine-tune position in microscope UI (if supervision enabled)
- Save the milling angle and microscope state.
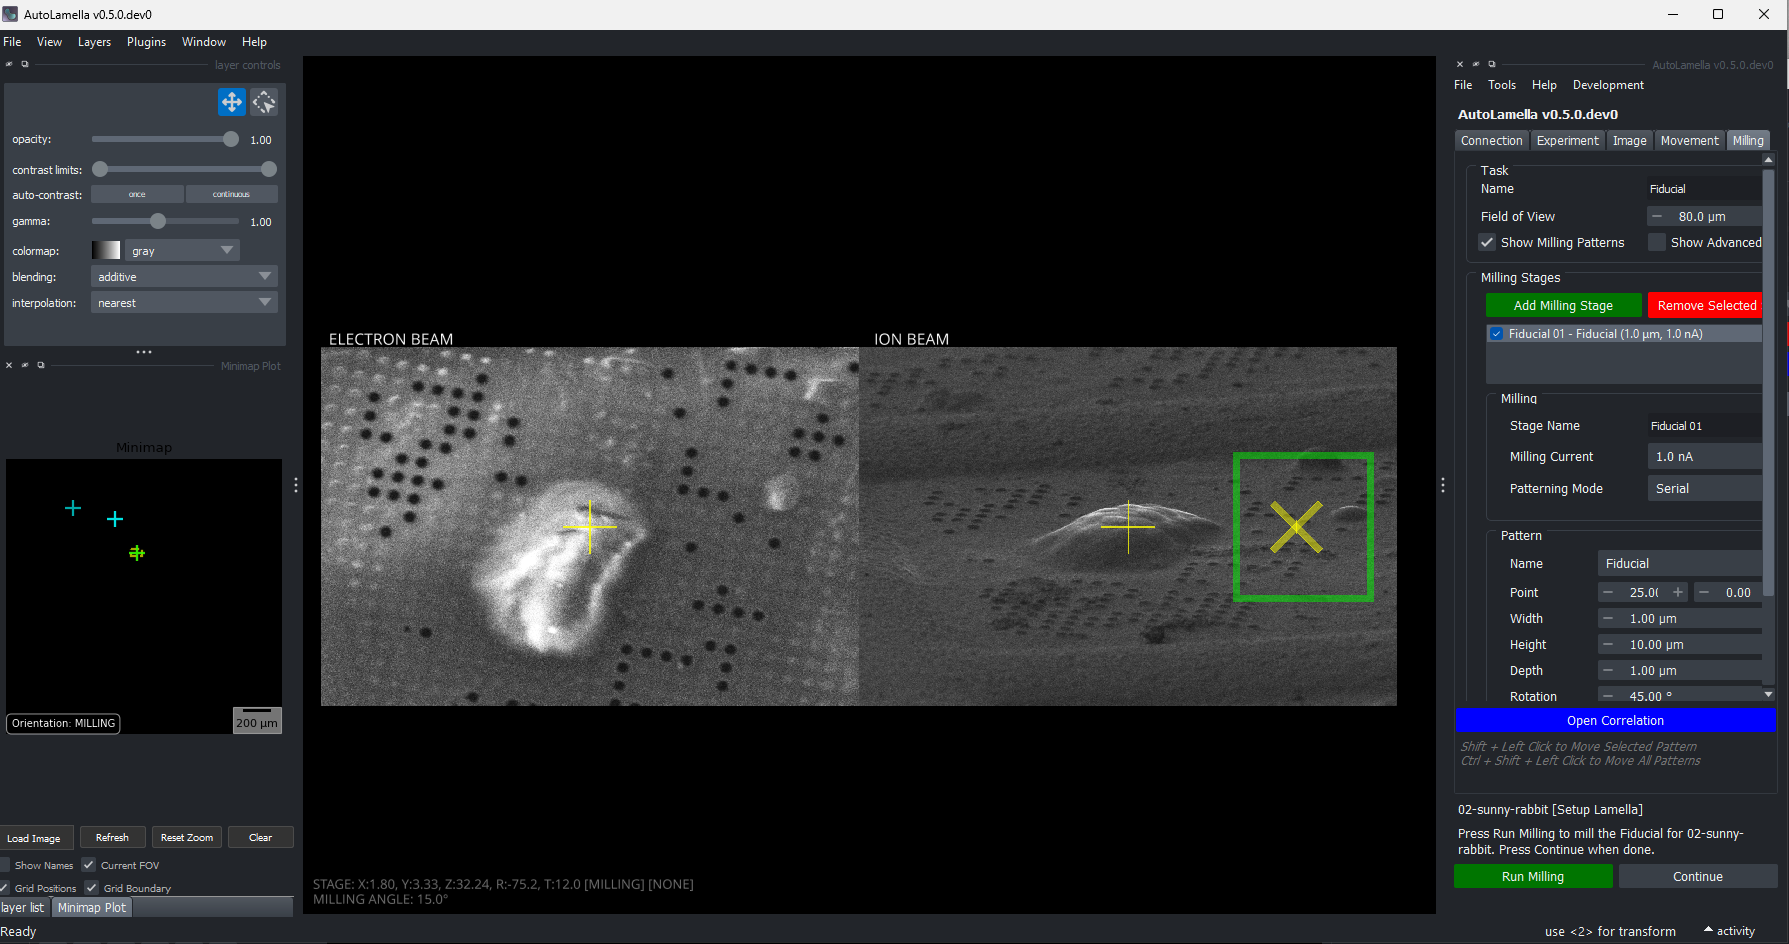
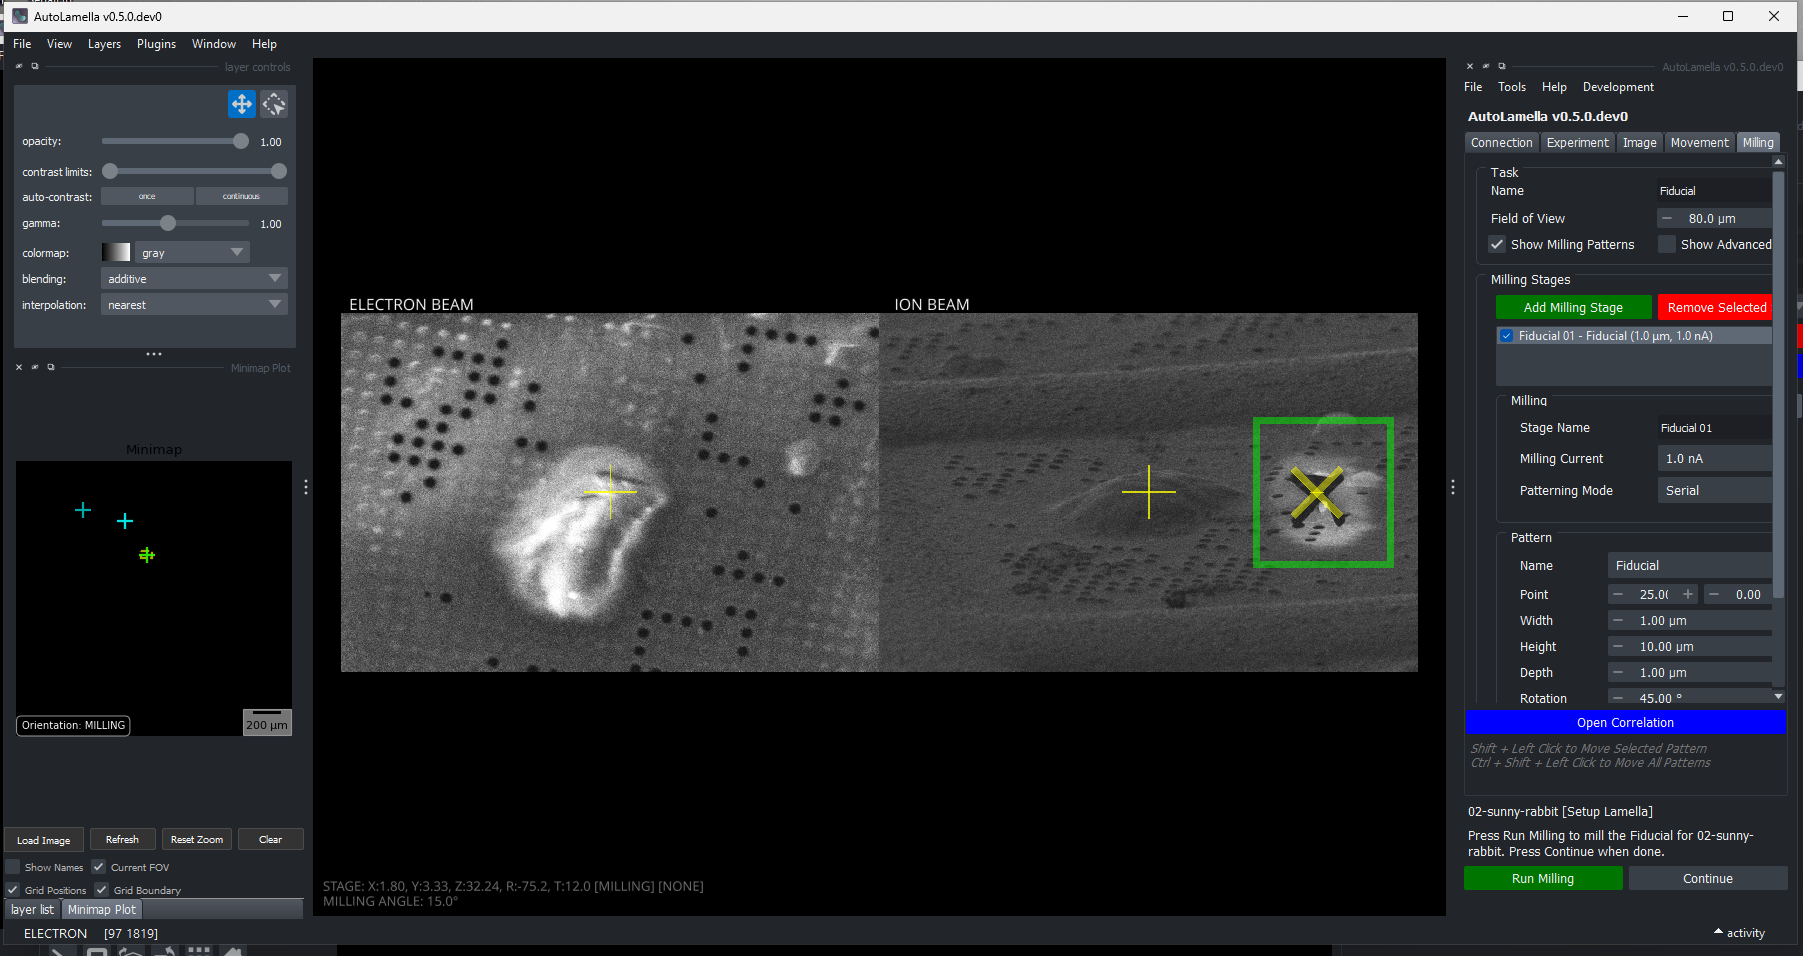
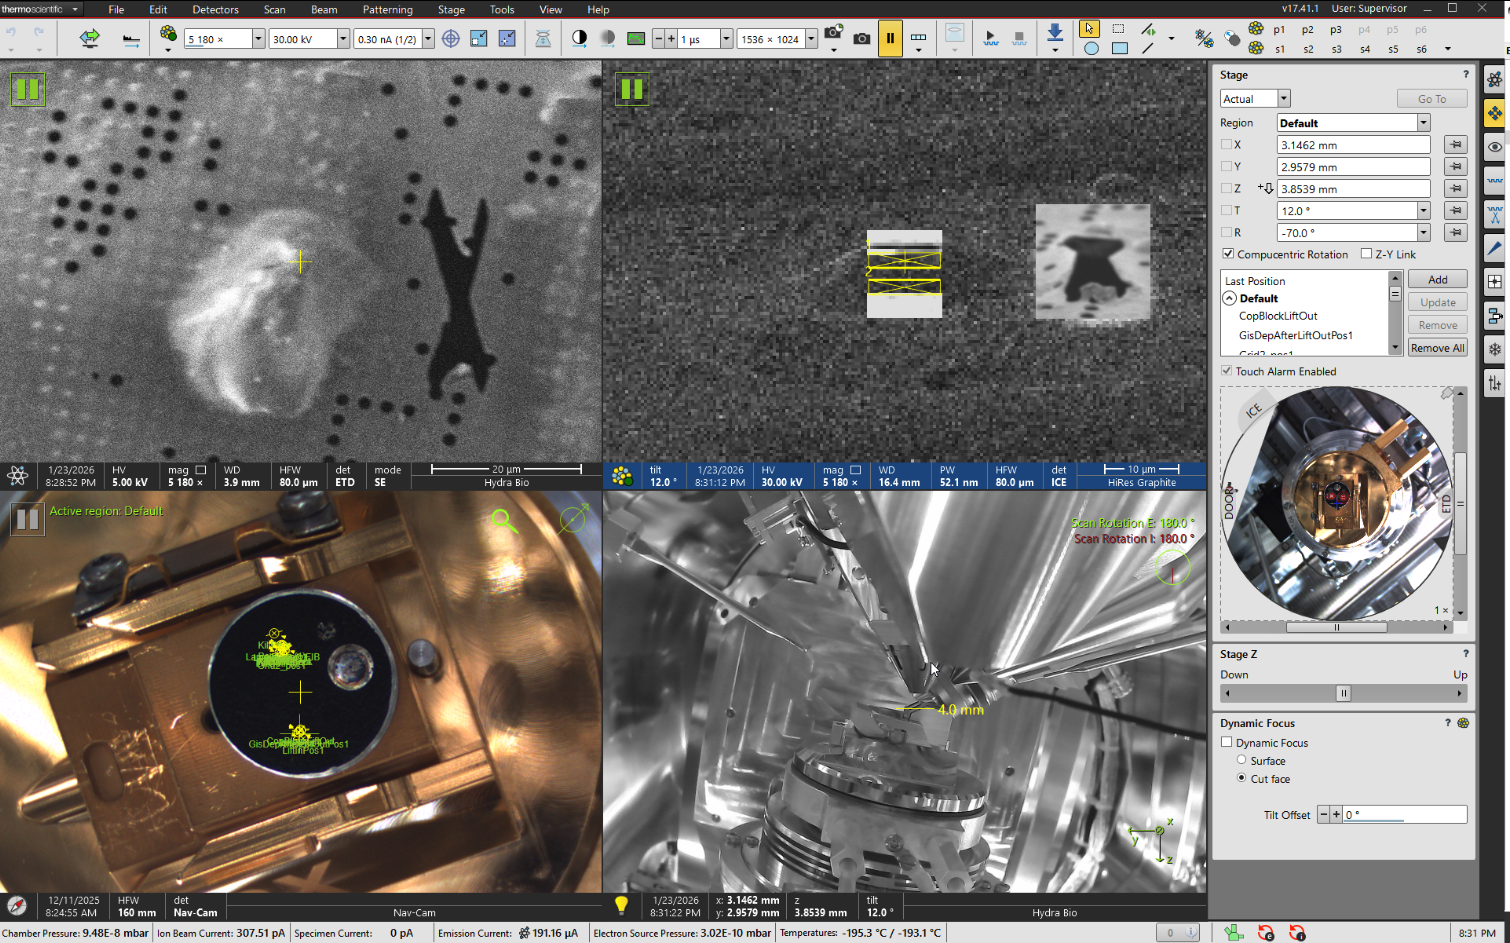
Mill Fiducial
Summary: Prepares the lamella for milling by optionally milling a fiducial marker, establishing an alignment area, and acquiring a reference image for beam-shift alignment. This task sets up all necessary references and parameters for subsequent automated milling operations.
Steps:
- Move to milling position and optionally align to previous reference image
- Optionally mill a fiducial marker for alignment purposes
- Define and update alignment area around the fiducial (or use default area)
- Acquire reference image within the reduced alignment area for beam-shift alignment
- Synchronize alignment area to rough and polishing milling tasks
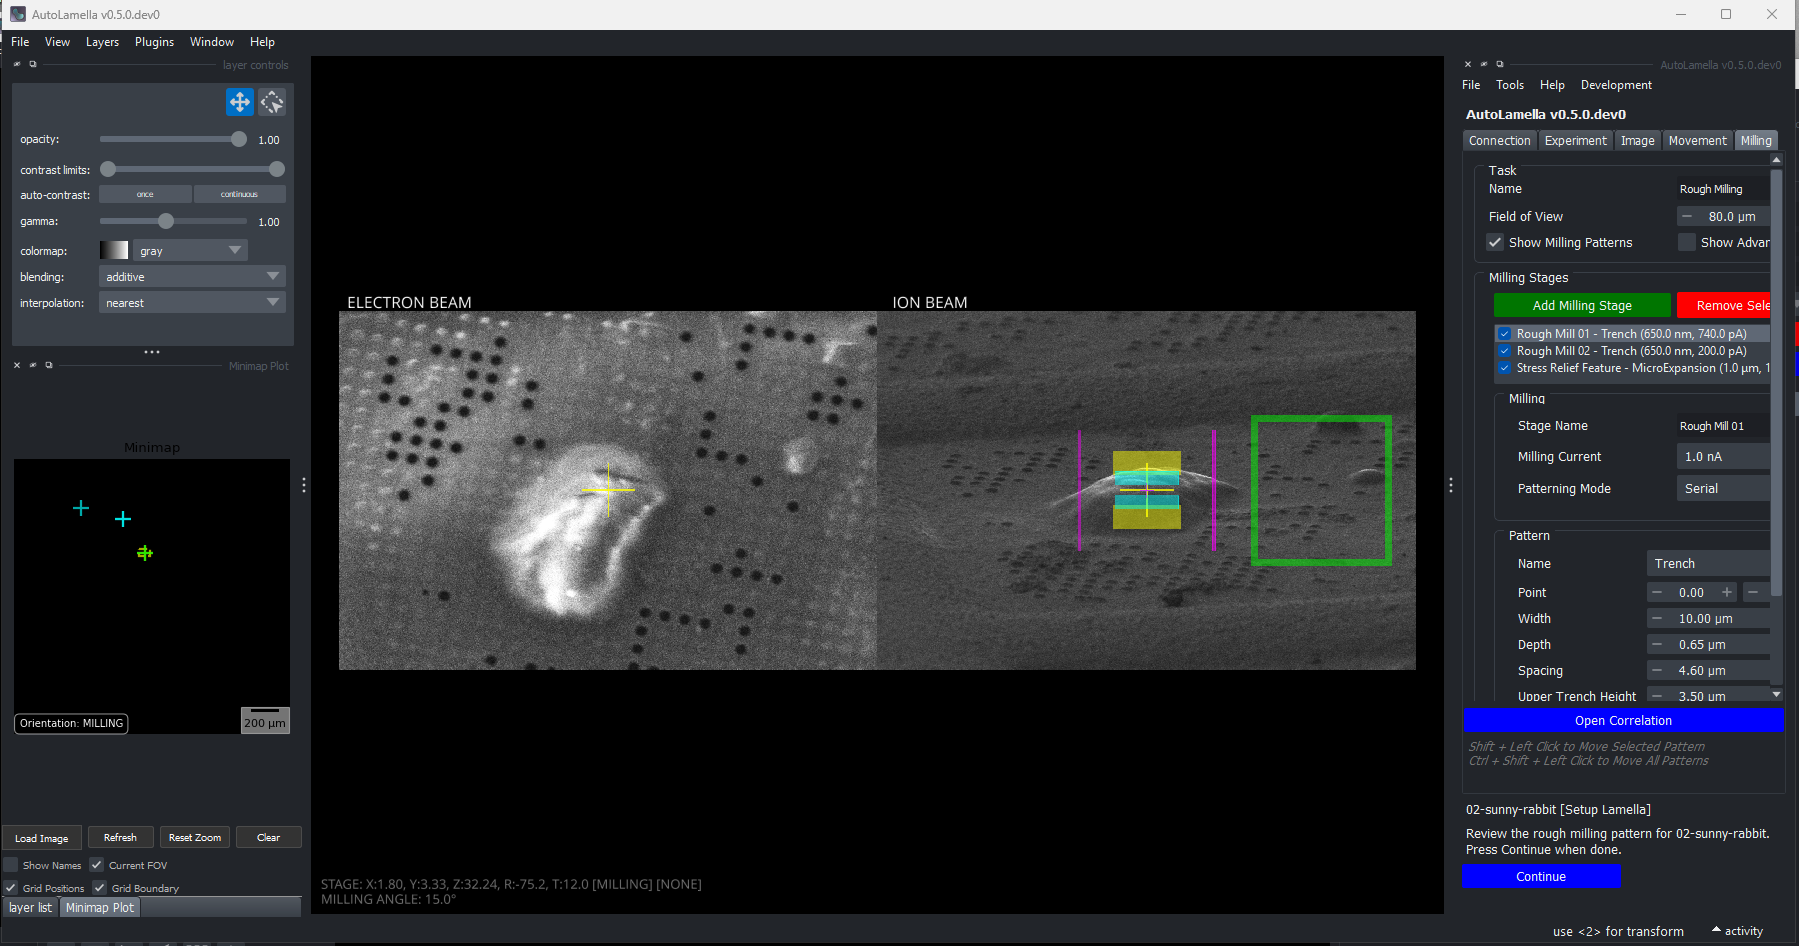
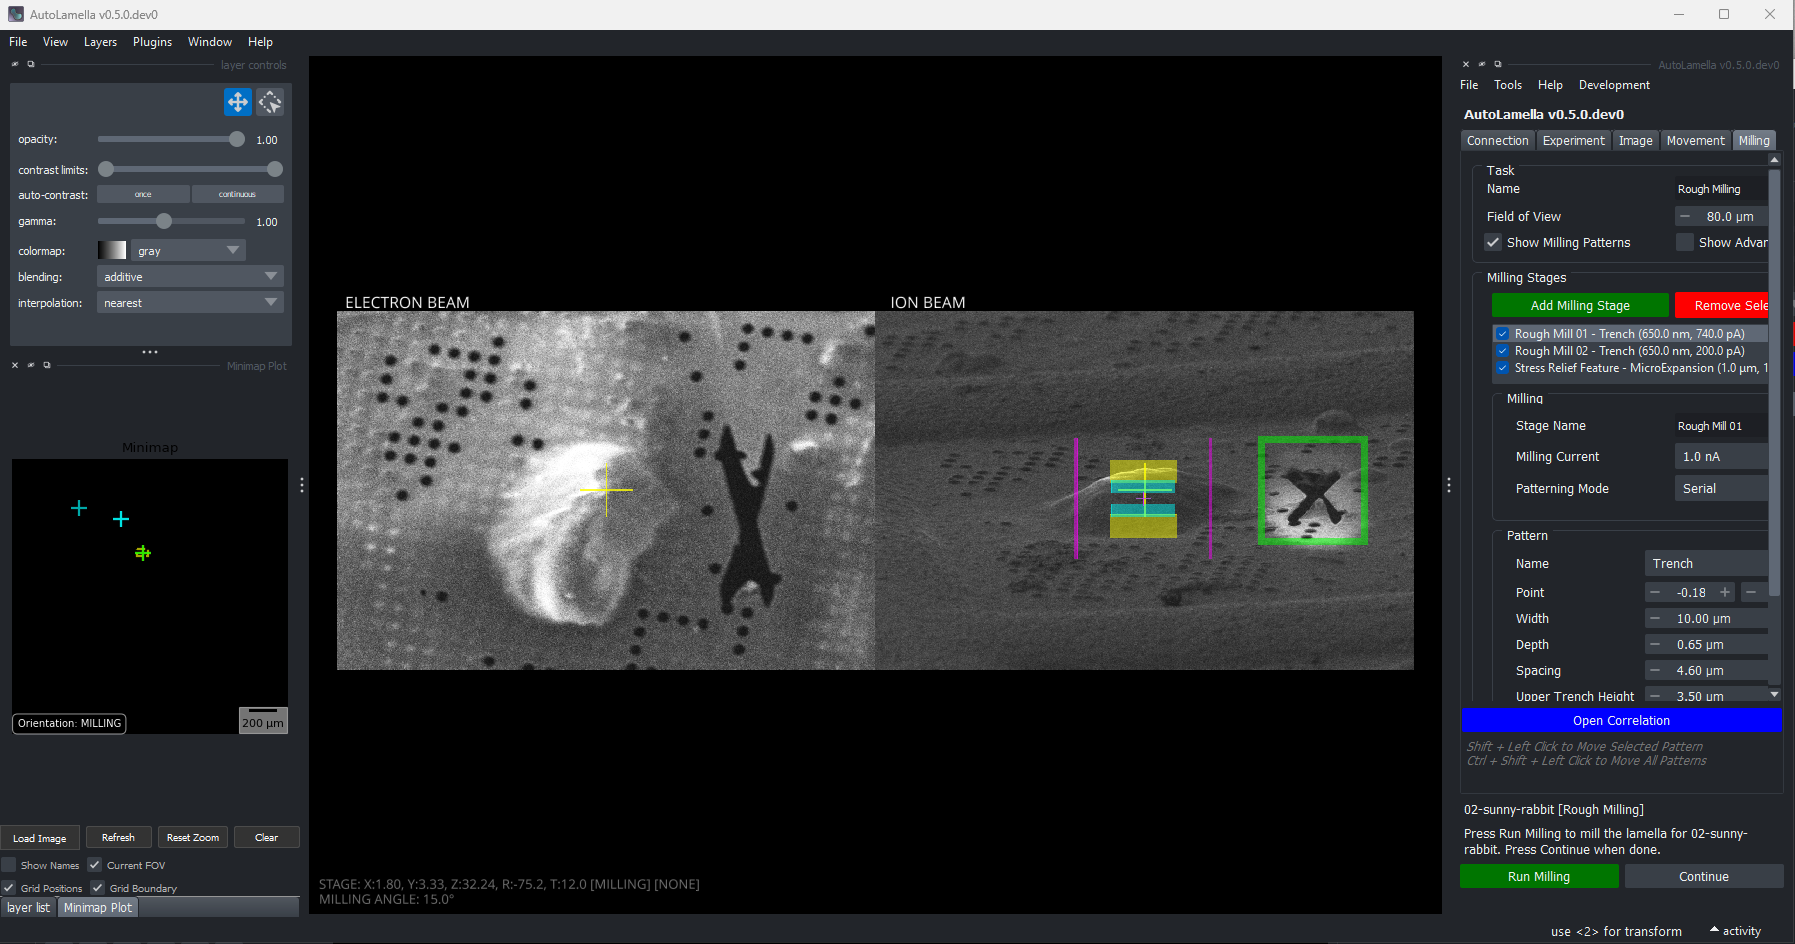
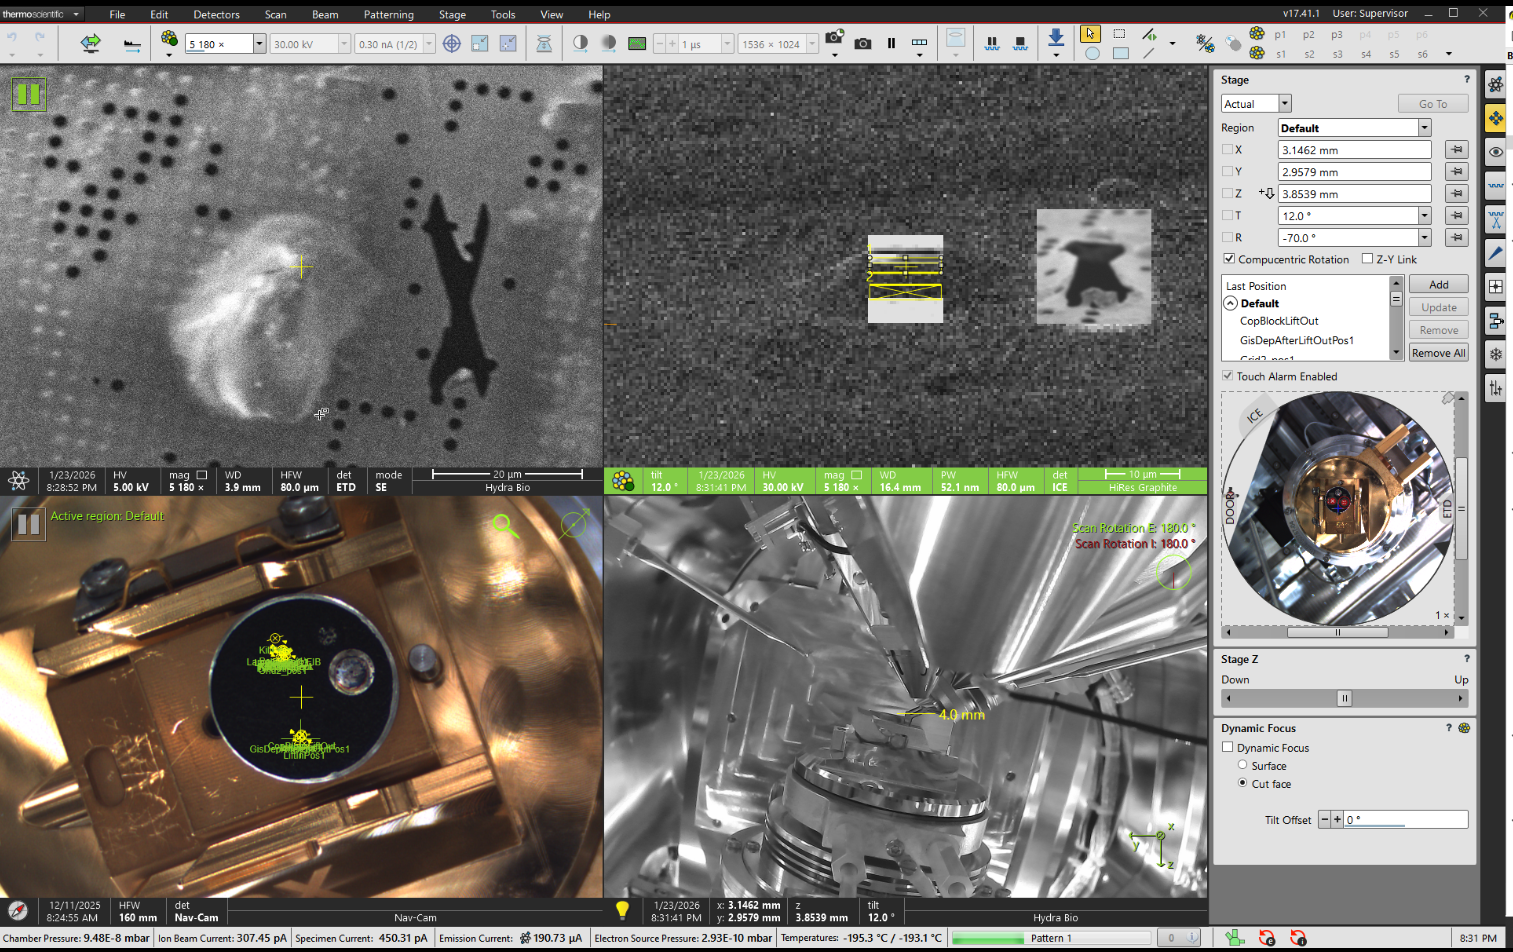
Rough Milling
Summary: Performs the initial high-current milling to create the rough lamella structure by removing bulk material. This task aligns to the fiducial marker and executes the rough milling patterns with optional stress relief features. Rough Milling includes what other software refer to as ‘Rough Milling’, ‘Fine Milling’, etc as ‘Rough Milling 01’, ‘Rough Milling 02’.
Steps:
- Move to the stored lamella milling pose
- Align to the reference alignment image using beam-shift
- Execute rough milling patterns using the configured milling stages
- Synchronize the milling position to the polishing task configuration
- Acquire final reference images documenting the milled lamella
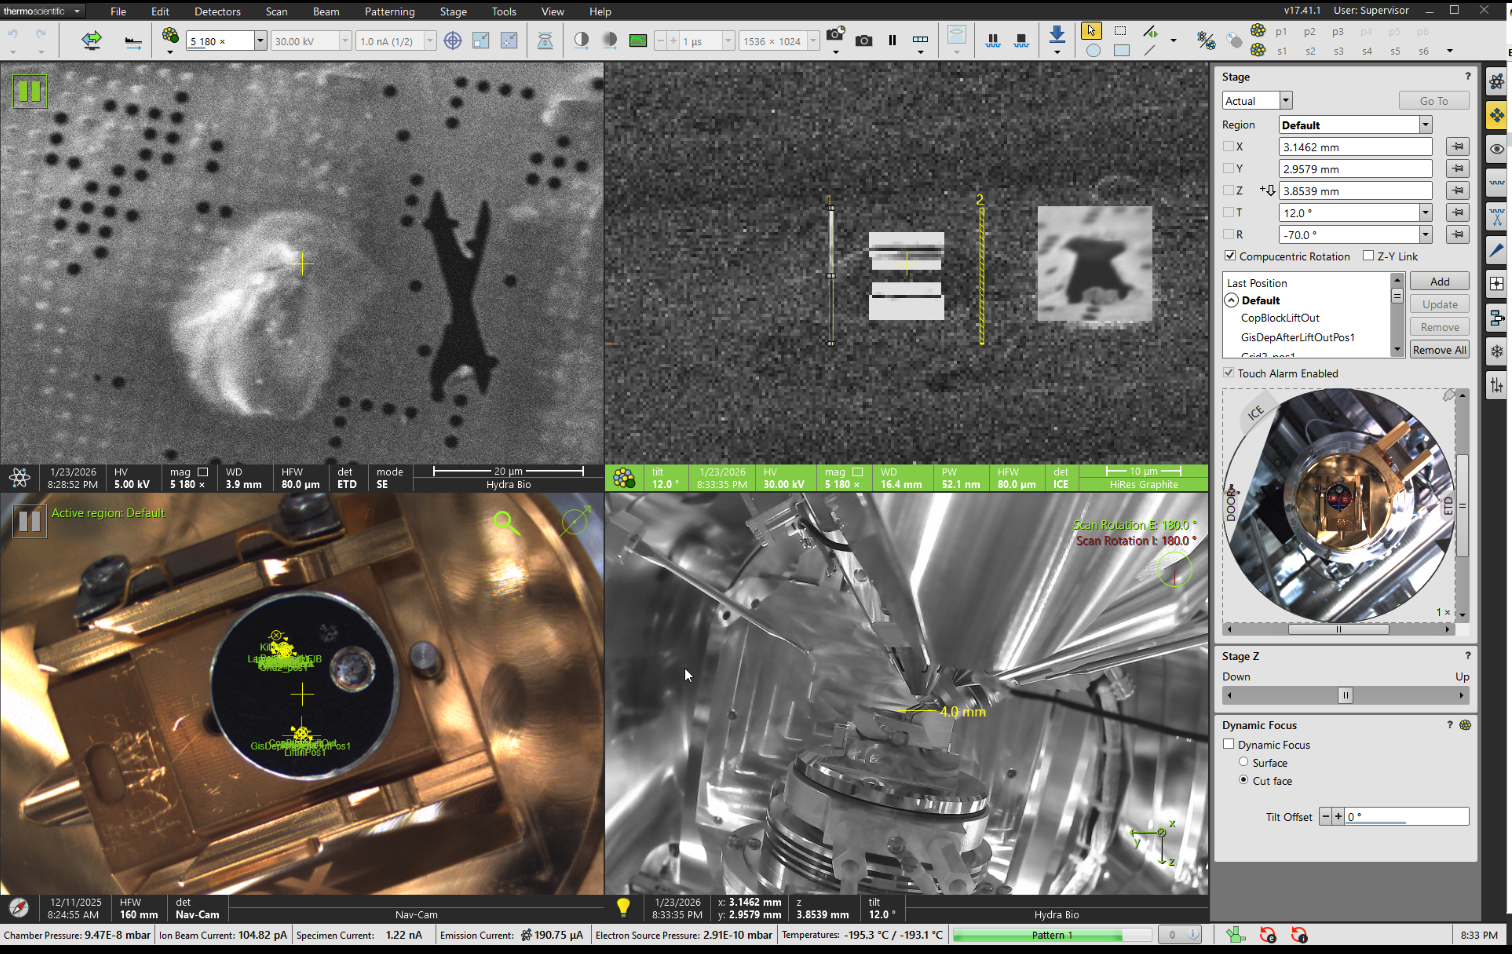
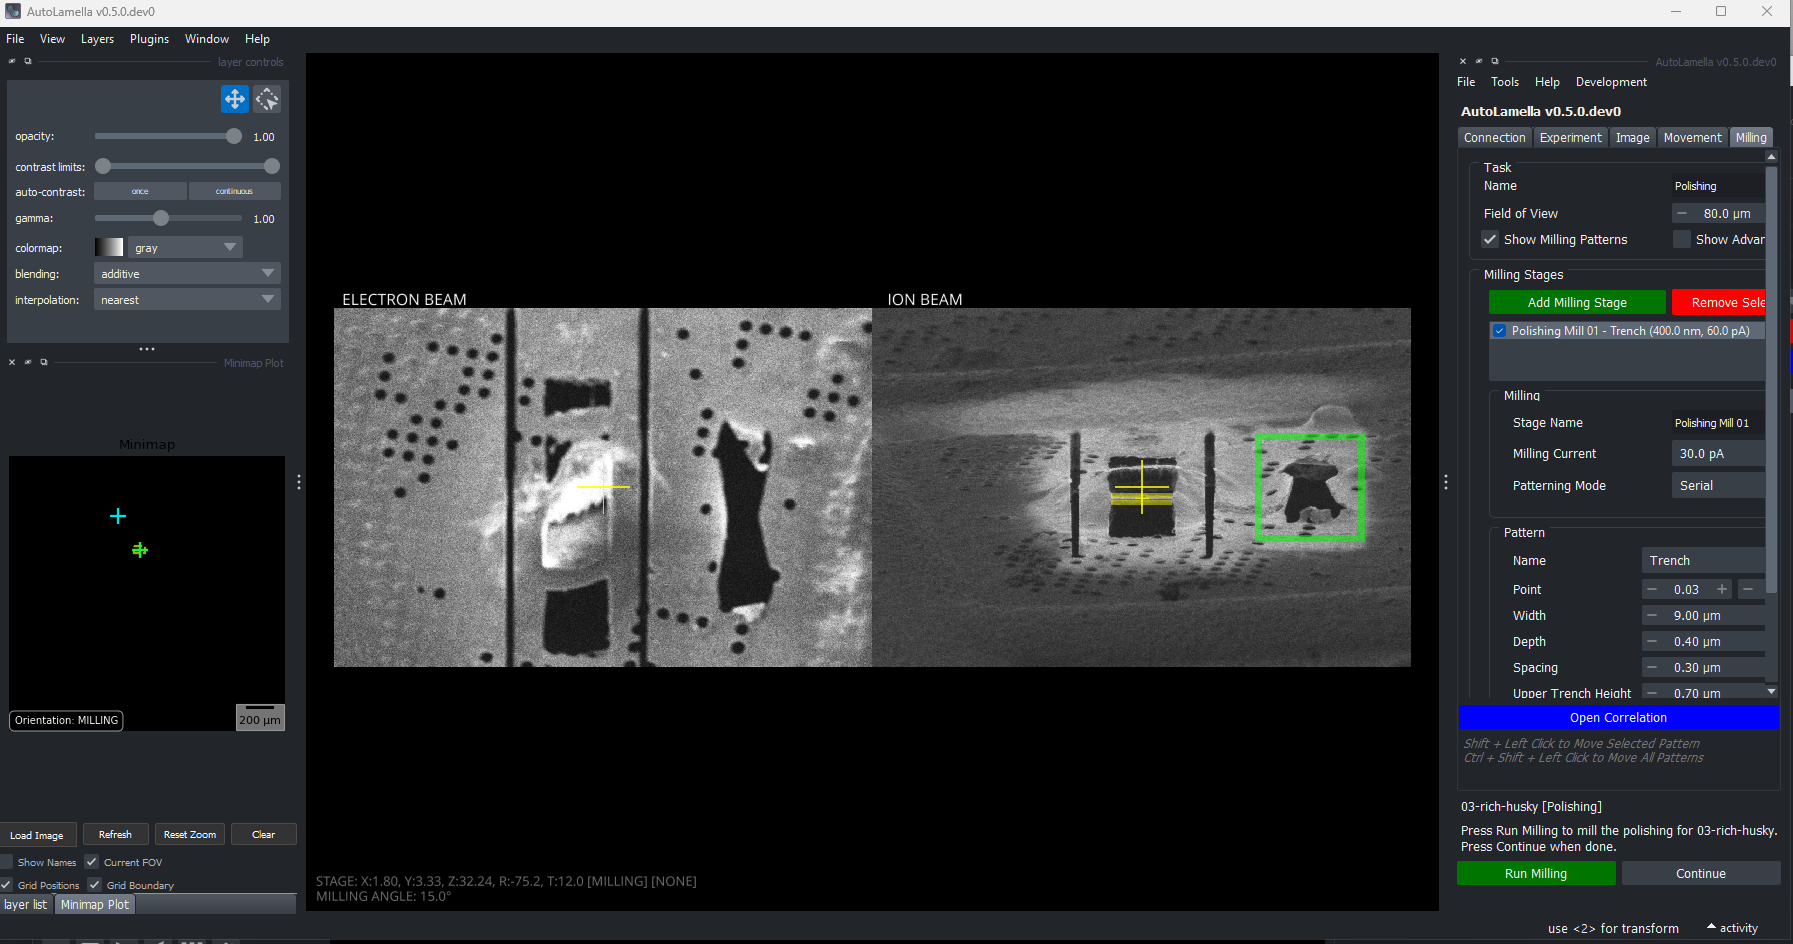
Polishing
Summary: Performs fine polishing milling to thin the lamella to the final target thickness using low-current milling. This task uses the alignment reference to precisely position polishing patterns relative to the rough-milled lamella.
Steps:
- Move to the stored lamella milling pose
- Align to the reference alignment image using beam-shift
- Acquire reference images at the polishing field-of-view
- Execute polishing milling patterns using configured low-current stages
- Acquire final reference images documenting the polished lamella
Example Lamella Workflow
The following shows the full workflow for a lamella:
Cheat Sheet (Controls)
Stage Movement
- Double Click: Move stage to selected position (along sample plane)
- Alt + Double Click: Move stage vertically in chamber (correct coincidence)
- Acquire image after stage movement: Toggle in Movement Tab
Milling Patterns
- Shift + Left Click: Move Selected Pattern
- Ctrl + Shift + Left Click: Move all Patterns (maintains orientation)
Fluorescence Imaging
- Shift + Scroll: Move Objective by Step Size