Image acquisition
By the end of this page you have imaged the grid with both beams, changed the field of view and the beam settings and know which panel each belongs to, and saved an image to disk.
Before you start
- You are connected. On the simulator that is all; its stage starts over the grid.
- On a real instrument, be at the grid first. The stage starts wherever the last person left it, which may be off the grid or at the loading position, and an image of nothing is easy to mistake for a fault. Move to the grid in the microscope’s own software or on the Movement tab before taking the first image here.
1. The Image tab
Open the Image tab in the control panel on the right (the regions of the window are named in Around the window). It has two settings panels and a row of buttons, and the difference between the two panels is the thing to understand on this page.
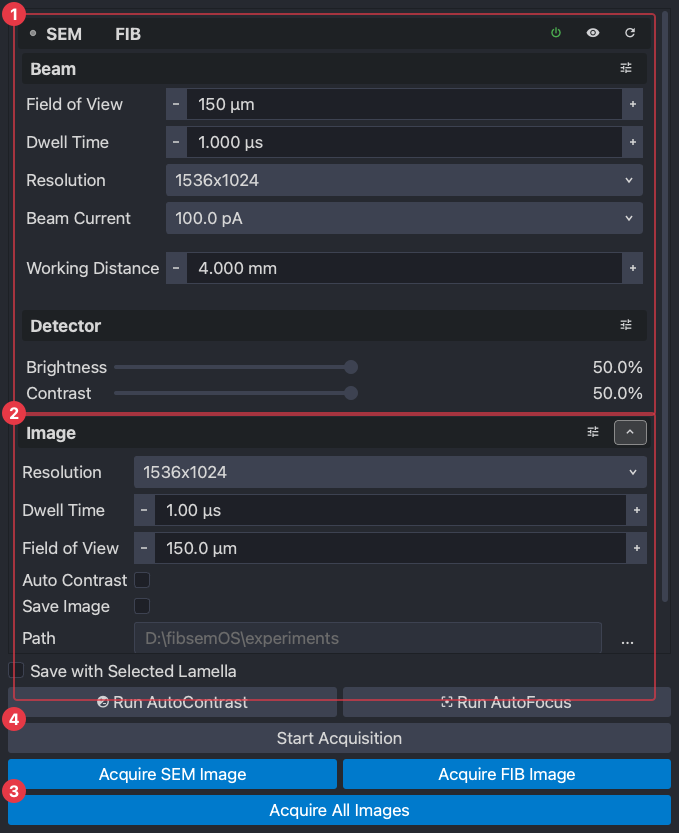
- The beam panel (top) is the microscope’s current state, one beam at a time: pick SEM or FIB at the top of it and the fields below show that beam’s field of view, dwell time, resolution, current, voltage, working distance and detector. Change a value here and it is sent to the microscope immediately, and stays: the next image, the next milling run, and anyone using the instrument’s own software after you all see it.
- The Image panel (bottom) is the recipe for the next acquisition you press a button for: resolution, dwell time, field of view, whether to autocontrast first, and whether and where to save. Nothing here touches the microscope until you acquire, and it applies to that acquisition only.
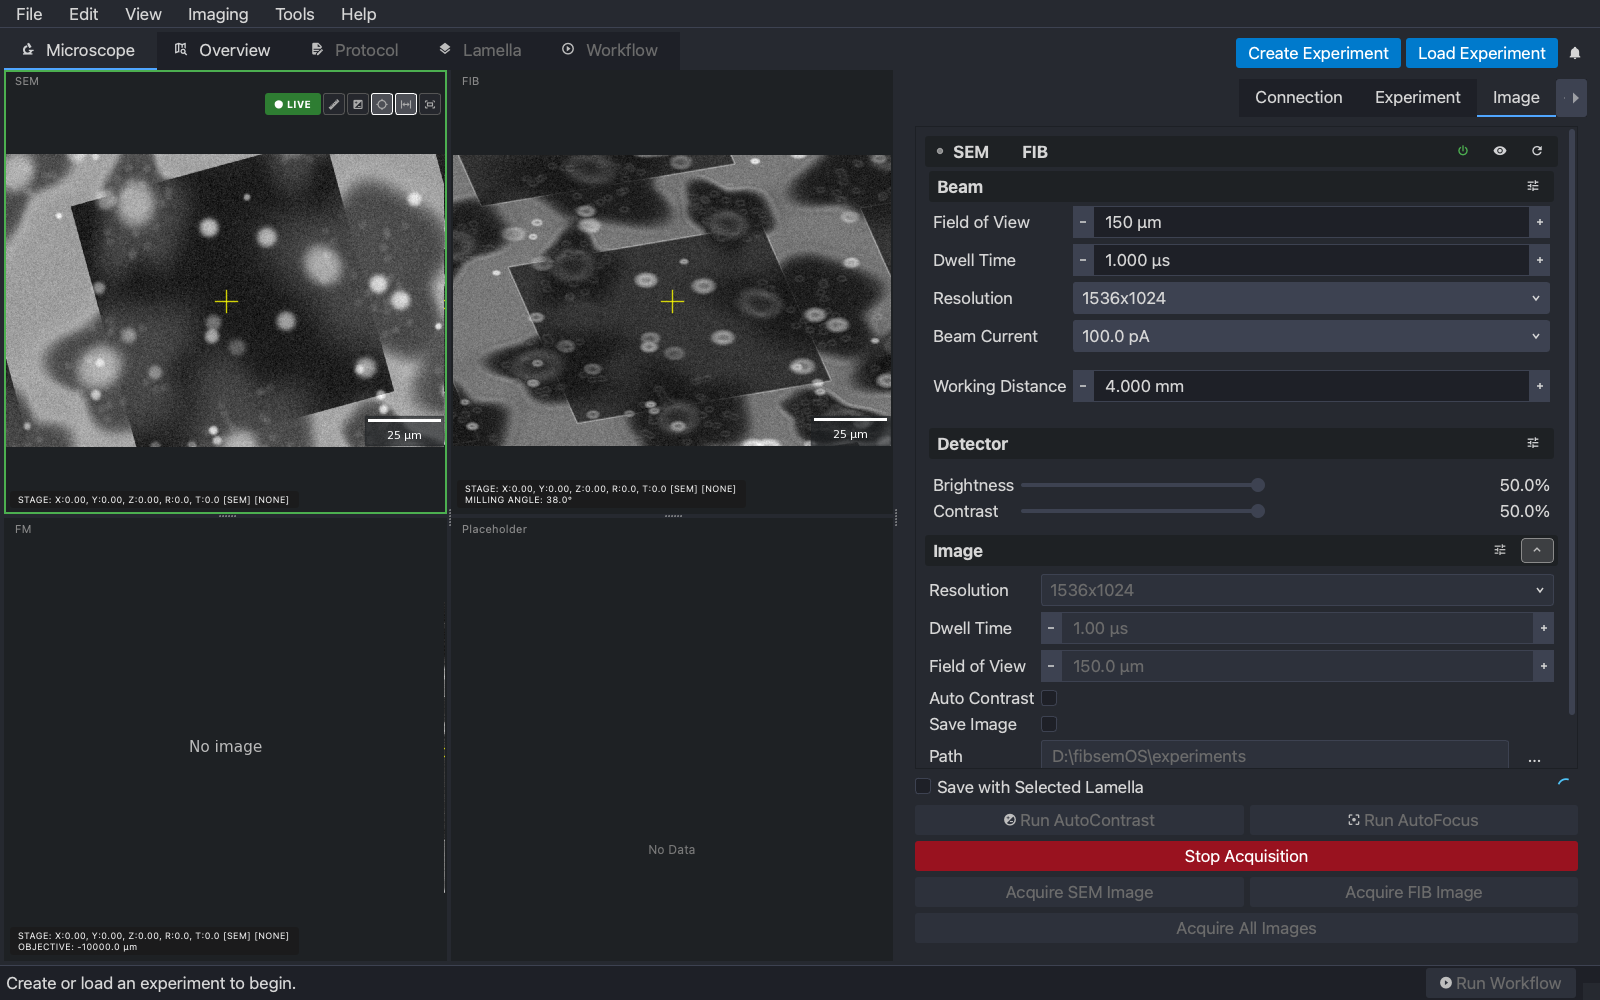
- Acquire All Images takes one SEM and one FIB image with the Image panel’s settings; Acquire SEM Image and Acquire FIB Image take one beam. F2 acquires whichever view is selected (click a view to select it; the selected one has the blue border).
- Start Acquisition is live imaging: continuous frames from the selected beam until you stop it (F6).
Field of view, dwell time and resolution appear in both panels, which is where people get caught. The beam panel’s copy is what the microscope is set to right now; the Image panel’s copy is what the next acquisition will use, and the acquisition sets the microscope to it on the way. So: to take a picture at 50 µm, set 50 µm in the Image panel and acquire. Use the beam panel when you mean to change the instrument itself, such as the beam current, the working distance or the detector.
2. Take the first images
Press Acquire All Images. Both views fill.
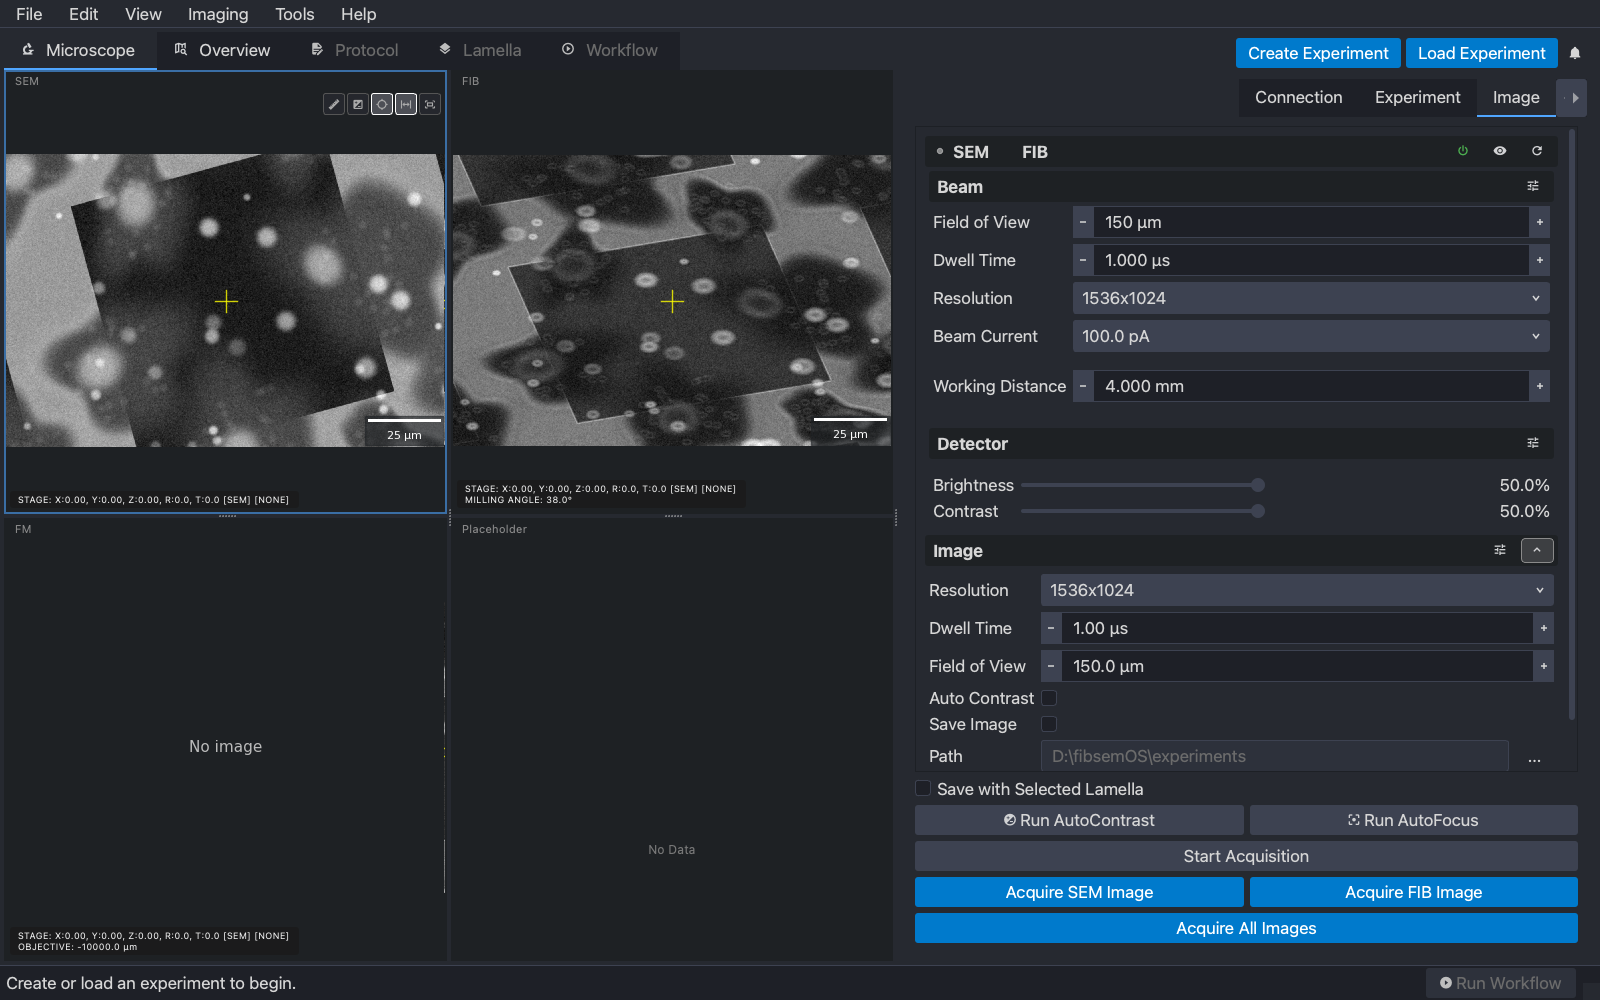
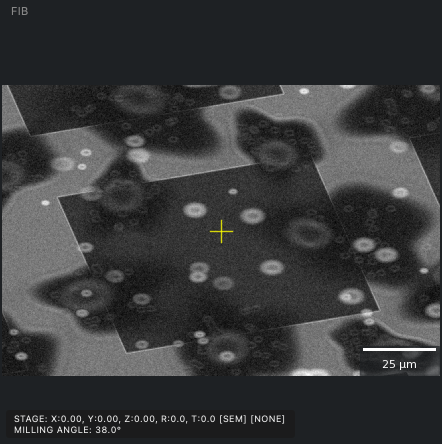
The SEM and FIB see the same place from different directions. The SEM looks straight down on the sample, so a grid square is square. The FIB looks at it from an angle, so the same square is foreshortened along one axis, and a feature’s position differs between the two views by an amount that depends on the sample height. That difference is what the coincidence alignment removes, and it is why every position in fibsemOS is recorded with the beam it was seen in.
3. What is drawn on a view
Scroll to zoom a view and drag to pan it. On top of the image each view draws a few things of its own.
- The crosshair marks the beam centre, which is where a new milling pattern is placed by default.
- The scale bar follows the field of view.
- The text at the bottom is the stage position when the image was taken,
followed by the orientation it was at (
[SEM],[FIB],[MILLING]) and the grid the position belongs to. The FIB view adds the milling angle, the angle between the ion beam and the sample at the current tilt; the fluorescence view adds the objective position.
The buttons at the top right of the selected view control the rest.
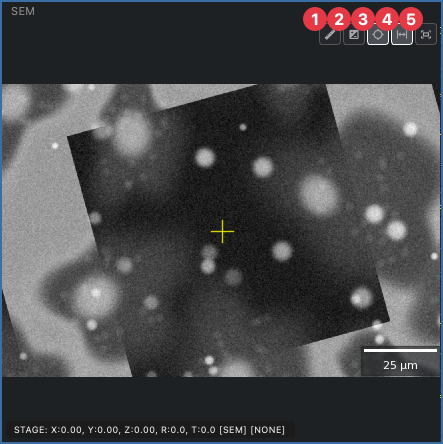
- Ruler. Drag across the image to measure a distance. While the ruler is on it owns the mouse, so a double-click will not move the stage; turn it off to get that back.
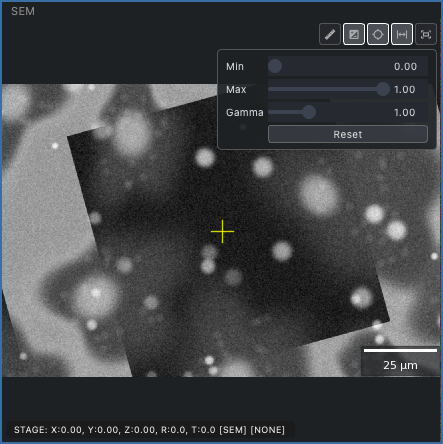
- Contrast and gamma. Opens a small panel to stretch the display of the image on screen. Display only: it changes nothing on the microscope and nothing in a saved image. For the detector’s own brightness and contrast use the beam panel.
- Crosshair on or off.
- Scale bar on or off.
- Reset view. Fit the whole image back into the panel after zooming or panning.
A sixth button appears when something else owns the mouse in the view, such as a milling pattern being drawn; it shows what is active and returns the view to normal when clicked. To give one view the whole window, press F5 (or View → Full Screen View); Esc brings the others back.
4. Field of view
The field of view is the width of the image on the sample. Set it in the Image panel and acquire the SEM image again at each of these values.
| 400 µm | 150 µm | 50 µm |
|---|---|---|
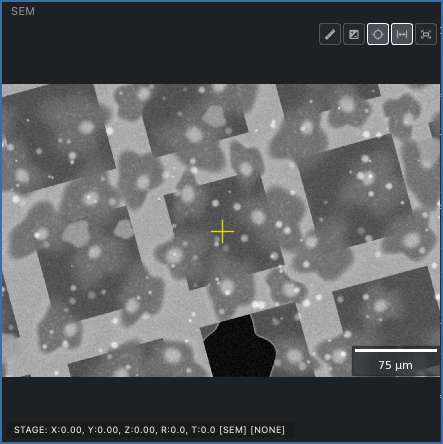 | 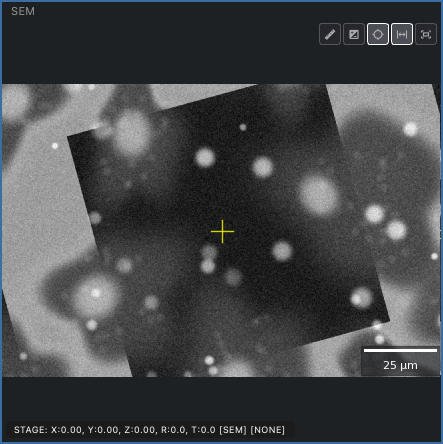 | 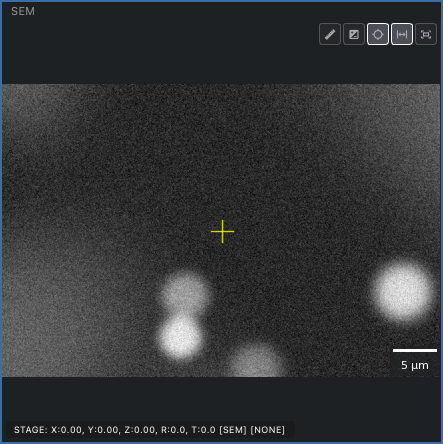 |
At a few hundred microns you see grid squares and can tell bars from film; at 150 µm one square fills the view and cells and ice are visible on it; at 50 µm individual cells. Resolution is the number of pixels the image is made of, independent of the field of view; dwell time is how long the beam spends on each pixel, so a longer dwell gives a cleaner image and a slower scan.
The FIB view at the same field of view shows the same square, foreshortened:
5. Beam and detector settings
Pick SEM or FIB at the top of the beam panel to see and change that beam.
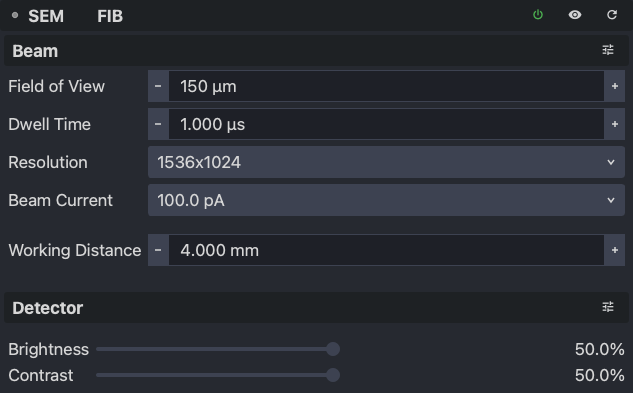
- Beam current sets how much signal there is against how much the beam damages the sample. Keep it low for imaging; the milling currents are set in the milling stages themselves, not here.
- Working distance is the focus. Run AutoFocus (F11) sets it from the image; on a real instrument that takes a few seconds per beam.
- Brightness and contrast are the detector’s. Run AutoContrast (F9) sets them from the image, and ticking Auto Contrast in the Image panel does it before every acquisition.
- The slider icon beside each heading opens the advanced settings for that beam: voltage, scan rotation, beam shift and stigmation. Leave those alone unless you know why you are changing them.
Everything on this panel is applied to the instrument as you change it. The microscope’s own software shows the same values a moment later.
6. Save an image
Images are not saved unless you ask. In the Image panel tick Save Image (1), choose the folder (2) and type a filename (3). The next acquisition is written there as a TIFF with the acquisition settings and the stage position stored in its metadata, and a timestamp appended to the name so a repeat never overwrites the previous one.
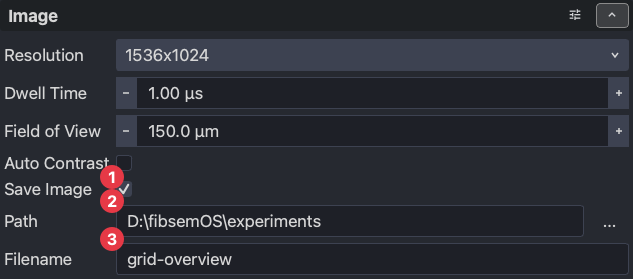
Once an experiment is open, Save with Selected Lamella saves into the selected lamella’s own folder instead, which is how the workflow keeps every image with the lamella it belongs to.
7. Live imaging
Start Acquisition streams frames from the selected beam. The live view gets a green border and a LIVE badge, the other controls are disabled while it runs, and the button becomes Stop Acquisition. Use it to focus and to watch the stage move; stop it before running anything else.
To focus by eye while live, hold Shift and scroll over the view: each notch nudges that beam’s working distance, and the live frames show the result. Plain scrolling zooms the view instead.
Next
Stage movement: move around the grid by clicking in the image, and understand the orientations.