Getting started
By the end of this page fibsemOS has a configuration for your microscope, you have connected to it, and the microscope controls are open. The page walks the setup twice: once for an instrument with a pre-tilted shuttle (Aquilos, Hydra) and once for the Arctis, whose compustage answers one of the questions for you.
Before you start
- fibsemOS is installed and opens from its shortcut.
- On a microscope: the vendor software is installed (step 5 of Installation) and you know the instrument’s network address. On a laptop, neither is needed; use the simulator in the example below.
What a configuration is
A configuration is a file that describes one microscope: who makes it, how to reach it, how its stage is built, and the imaging and milling defaults to start from. fibsemOS ships one for each instrument it supports, and the Guided Setup below starts from the right one and asks only for the values that are specific to your instrument. The result is saved under a name of your choice and appears in the Configuration list on the Connection tab, so you set it up once and pick it every session after.
1. Open the Connection tab
Start fibsemOS. The right-hand panel of the Microscope tab is the Connection tab. On a fresh install it offers the Guided Setup (1); the Configuration list (2) is where a saved configuration is chosen later.
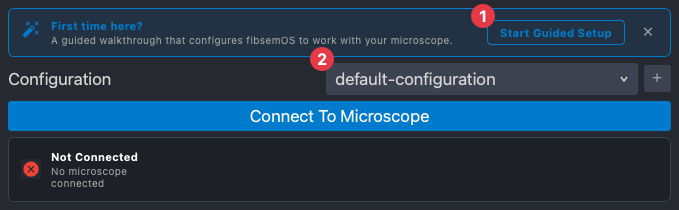
Click Start Guided Setup. (It is also under Tools → Guided Setup… at any later time.)
2. Guided Setup: a pre-tilted shuttle instrument
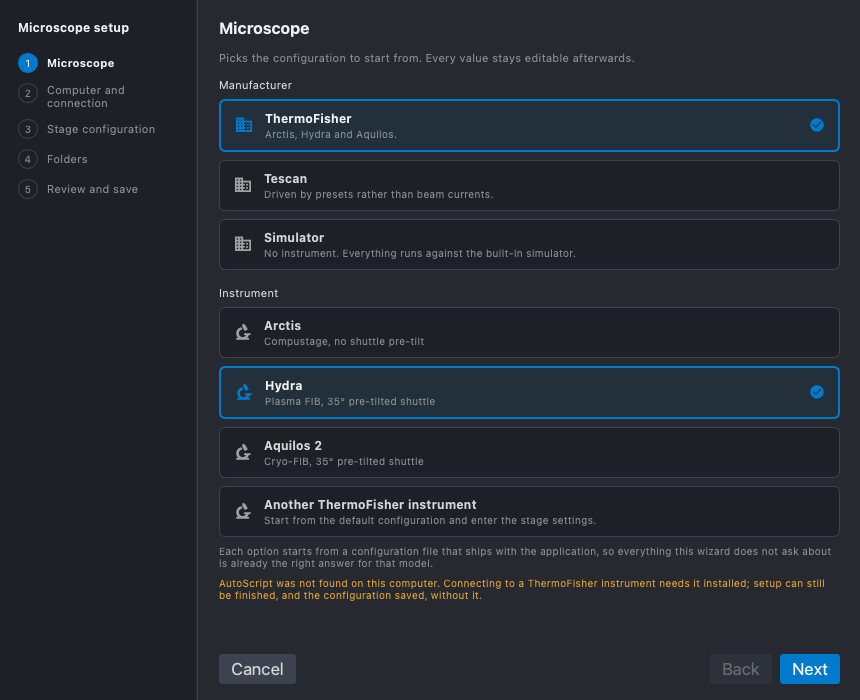
This example sets up a Hydra. An Aquilos is the same with Aquilos 2 chosen at the first step.
Microscope
Pick the manufacturer, then the instrument. Each instrument starts from its shipped configuration, so everything the wizard does not ask about is already right for that model. The note at the bottom says whether the vendor software was found on this computer; setup can be finished without it, but connecting cannot.
Computer and connection
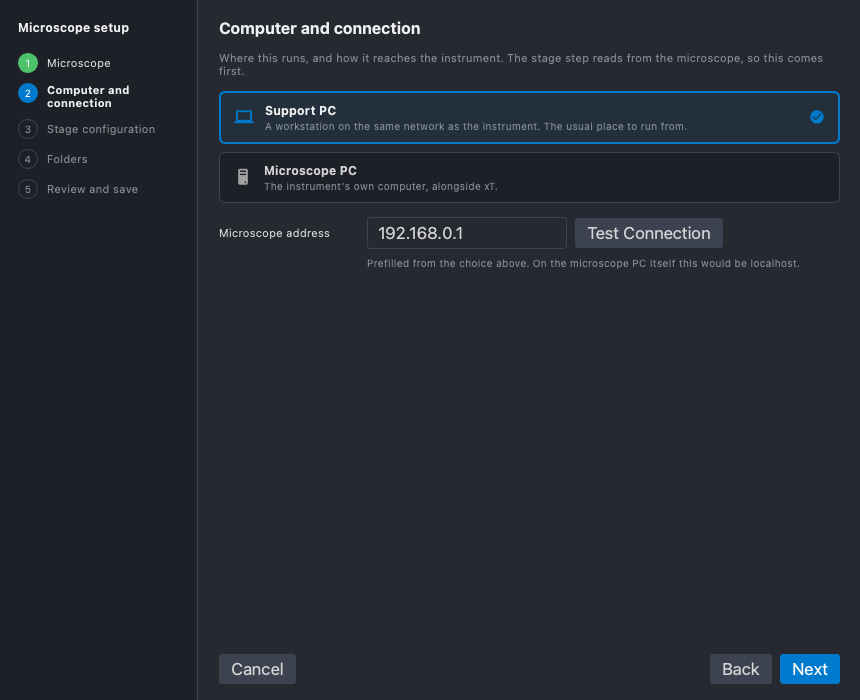
Say where fibsemOS is running. On a Support PC the address is the
microscope’s network address; on the Microscope PC itself it is
localhost. Press Test Connection if the instrument is reachable now; the
next step can then read the stage instead of asking you for numbers.
A successful test shows a green Connected card naming the instrument. If it fails, the card says why:
- Could not connect: no response from the address. fibsemOS cannot reach
the microscope. Check the address, check that this computer is on the
instrument’s network, and check that you chose the right computer above:
on the microscope PC the address is
localhost, not the network address. - A message naming a missing module (
autoscript,tescanautomation). The manufacturer’s software is not installed in the fibsem environment. The note on the first step says the same thing. Finish the setup, then follow Microscope software on the Installation page and test again.
Either way you can carry on: the configuration still saves, and the stage values on the next step are entered by hand instead of read.
Stage configuration
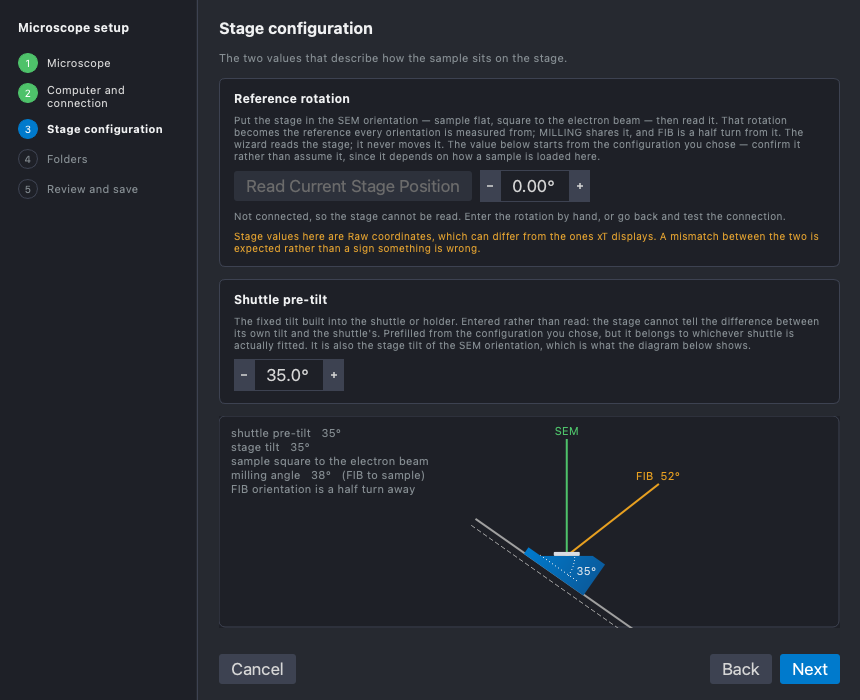
Two numbers describe how the sample sits on the stage.
- Reference rotation is the stage rotation at which the sample is flat and square to the electron beam. It is also the rotation you mill lamellae at: the MILLING orientation shares it, and the FIB orientation is a half turn from it. Every orientation fibsemOS moves to is measured from it. If you tested the connection, put the stage in that position and press Read Current Stage Position; otherwise enter it.
- Shuttle pre-tilt is the fixed tilt built into the shuttle, 35° for the standard Aquilos and Hydra shuttles. It is prefilled from the shipped configuration; confirm it matches the shuttle actually fitted.
The diagram redraws as you type, showing the stage at the SEM orientation with the sample square to the electron beam.
Folders
Where the configuration file is saved, and where new experiments go. The default configuration folder is inside the installed package, which an upgrade replaces; point it somewhere you keep. Experiments hold data and there will be many, so give them a folder of their own on a large disk. The default protocol is optional.
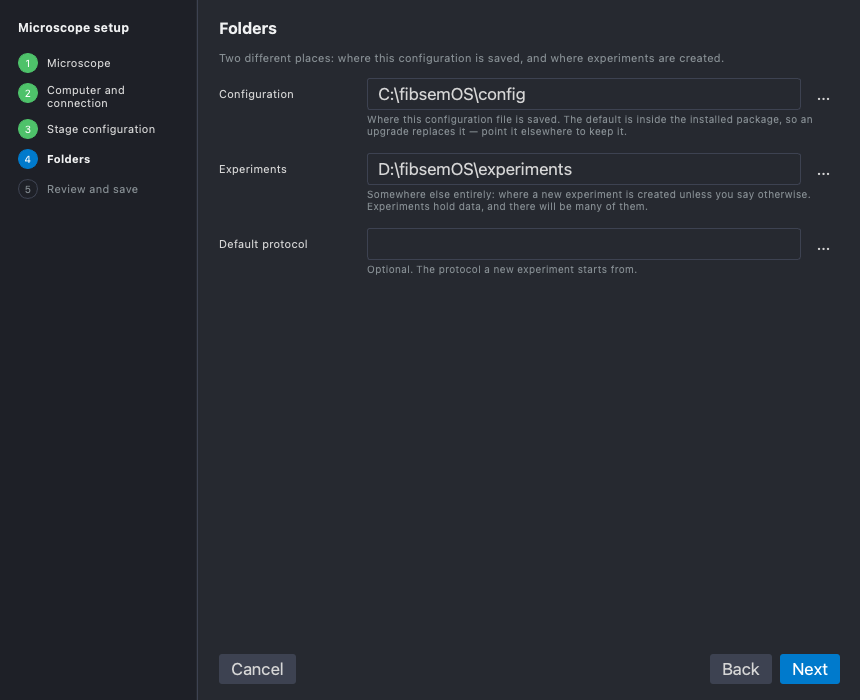
Review and save
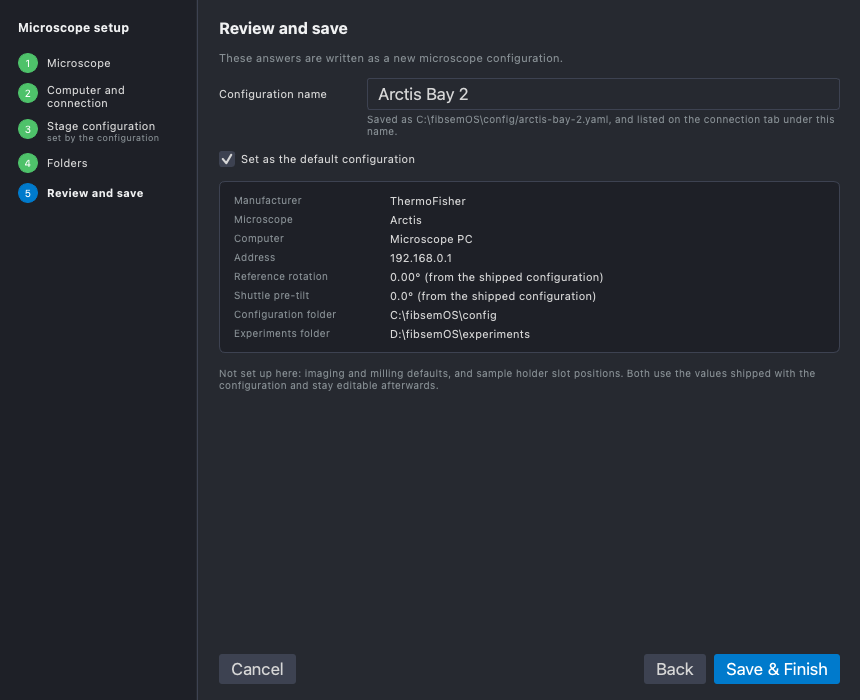
Name the configuration after the instrument as people here call it. Check the summary, leave Set as the default configuration ticked, and press Save & Finish. The wizard closes and the new name is selected on the Connection tab.
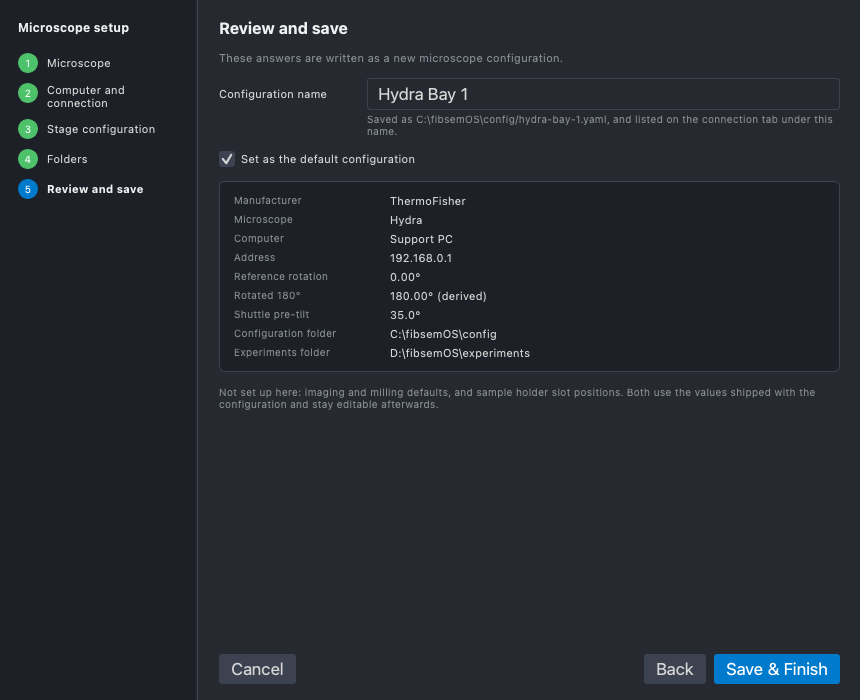
3. Guided Setup: an Arctis
The Arctis walks the same five steps. Three of them look different.
At the first step choose Arctis.
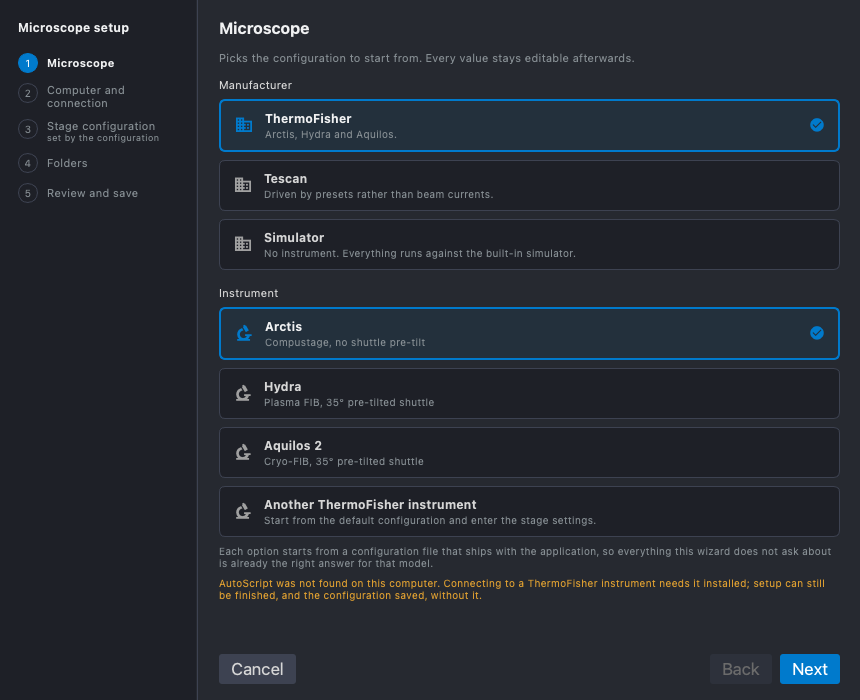
At the connection step choose Microscope PC: on an Arctis, fibsemOS
normally runs on the instrument’s own computer, so the address is
localhost rather than a network address.
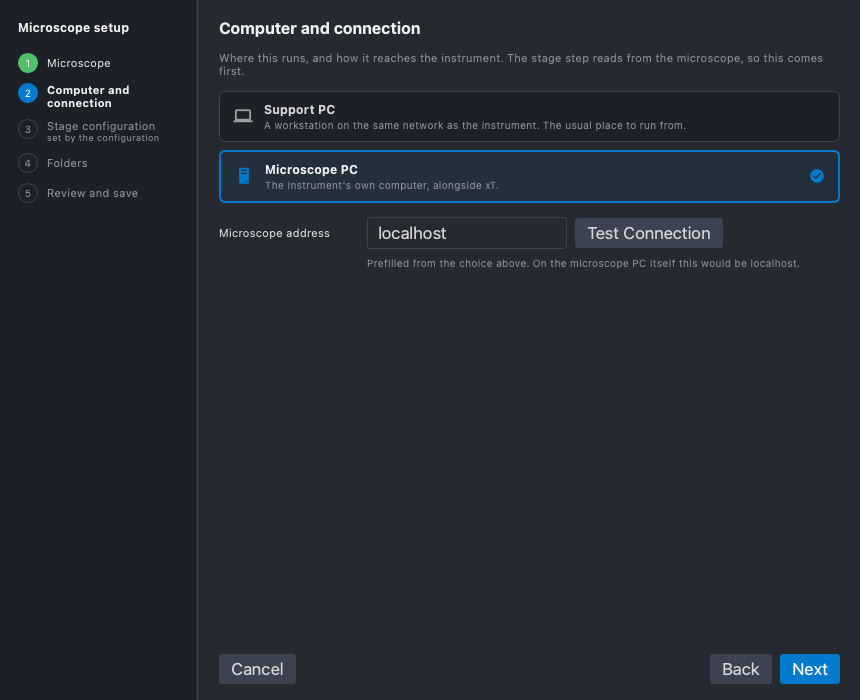
At the stage step there is nothing to enter. The Arctis has a compustage: it reaches the other side of the sample by tilting rather than rotating, so there is no reference rotation to measure, and it has no pre-tilted shuttle, so the holder in the diagram is flat. Both values come from the shipped configuration and the controls are shown disabled so you can see them.
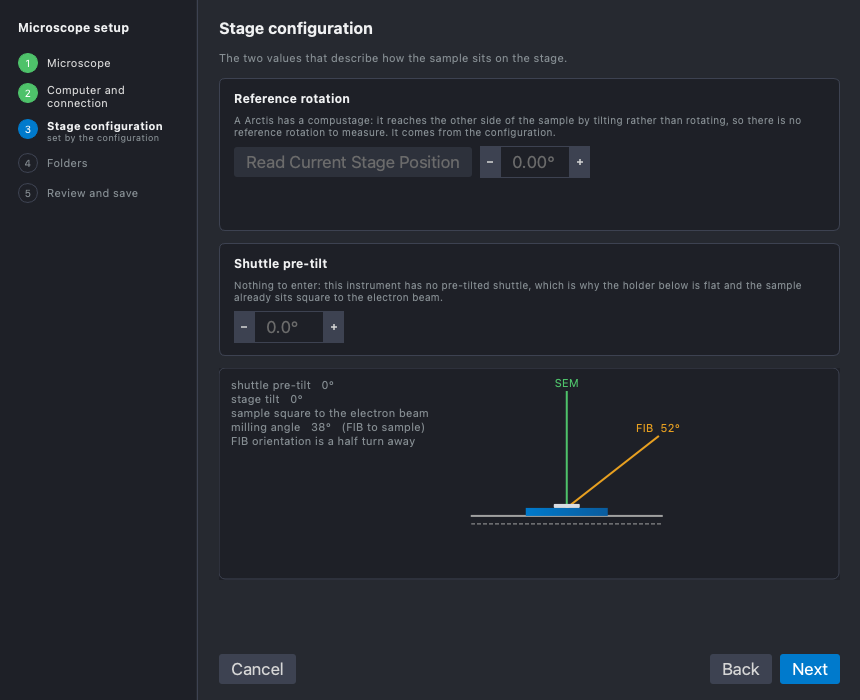
Folders and the review are as before.
No microscope? Use the simulator
At the first step choose Simulator as the manufacturer. The simulator is a complete microscope in software, with both beams, a stage and a fluorescence microscope, imaging a synthetic cryo-grid, and every page of this guide can be followed against it. It needs no manufacturer software at all, so it runs on any laptop straight after Installation: everything fibsemOS can do, from imaging and stage movement to milling and a full AutoLamella workflow, works against it. Demo microscope stands in for a pre-tilted shuttle instrument and asks the stage step like one; Simulated Arctis is a compustage and answers it for you. The connection step has no address to fill in.
4. Connect
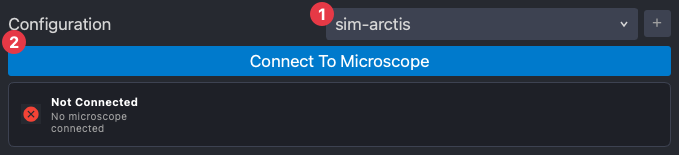
Back on the Connection tab, make sure the configuration you just saved is the one selected (1), then press Connect To Microscope (2).
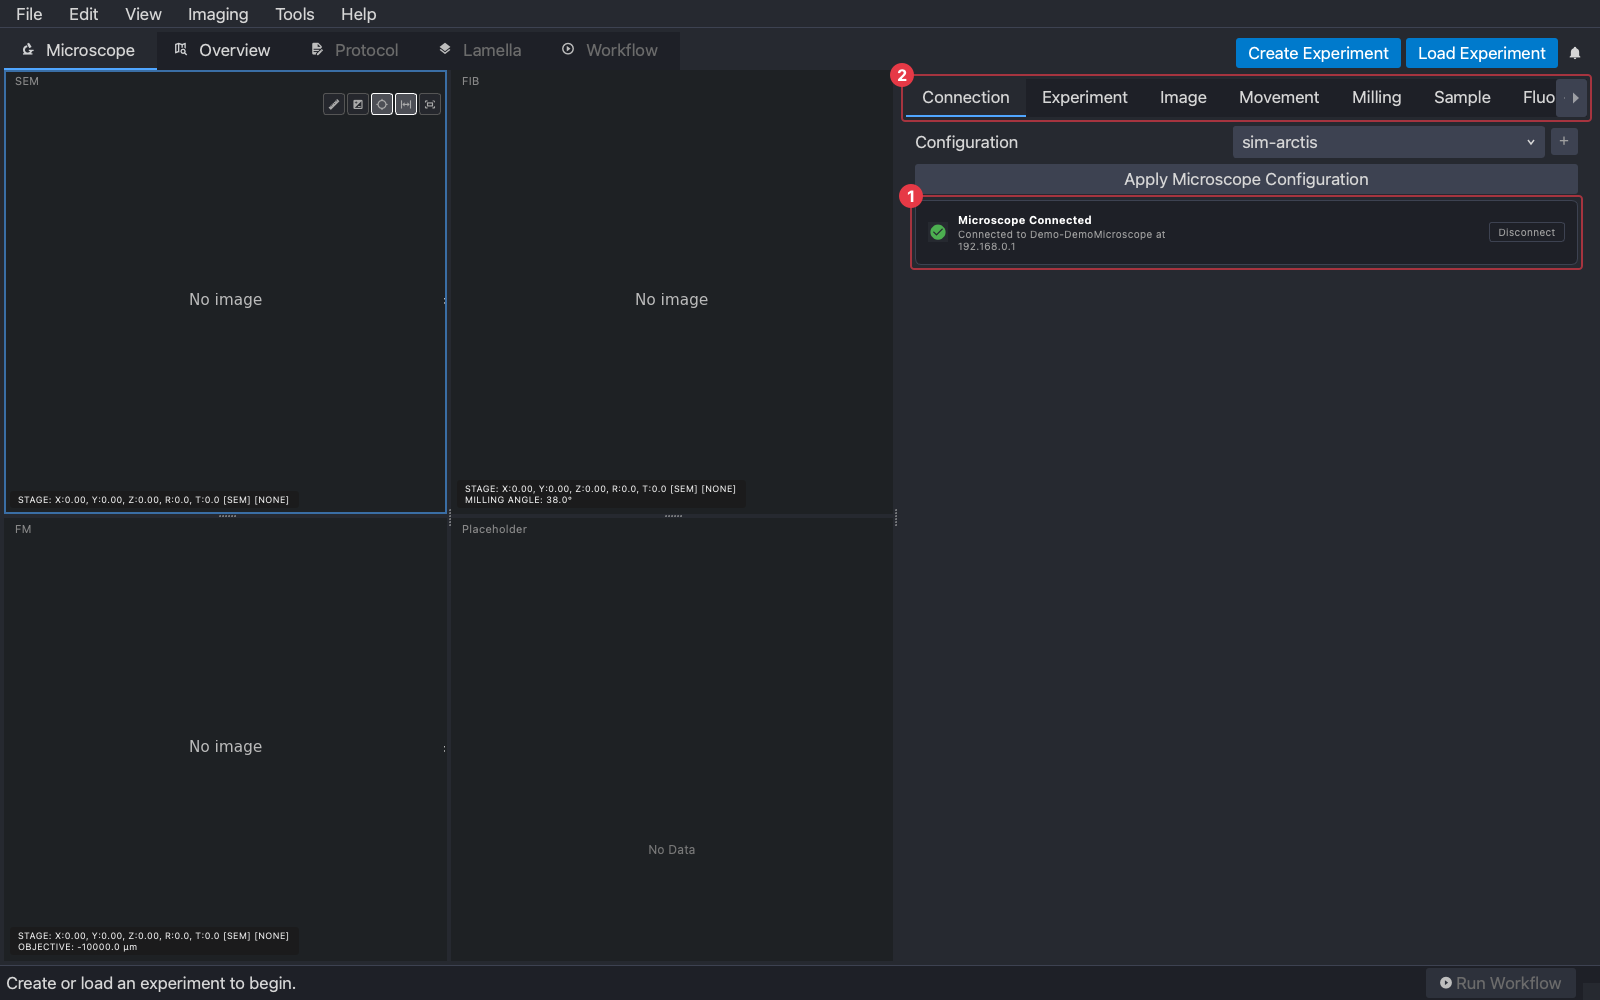
Connecting to a real instrument takes a few seconds. When it succeeds the status card turns green and names the instrument (1), and the microscope controls appear as tabs beside Connection (2): Experiment, Image, Movement, Milling, Sample and, on instruments that have one, Fluorescence.
5. Around the window
Every page that follows names these parts of the window, so here they are once.
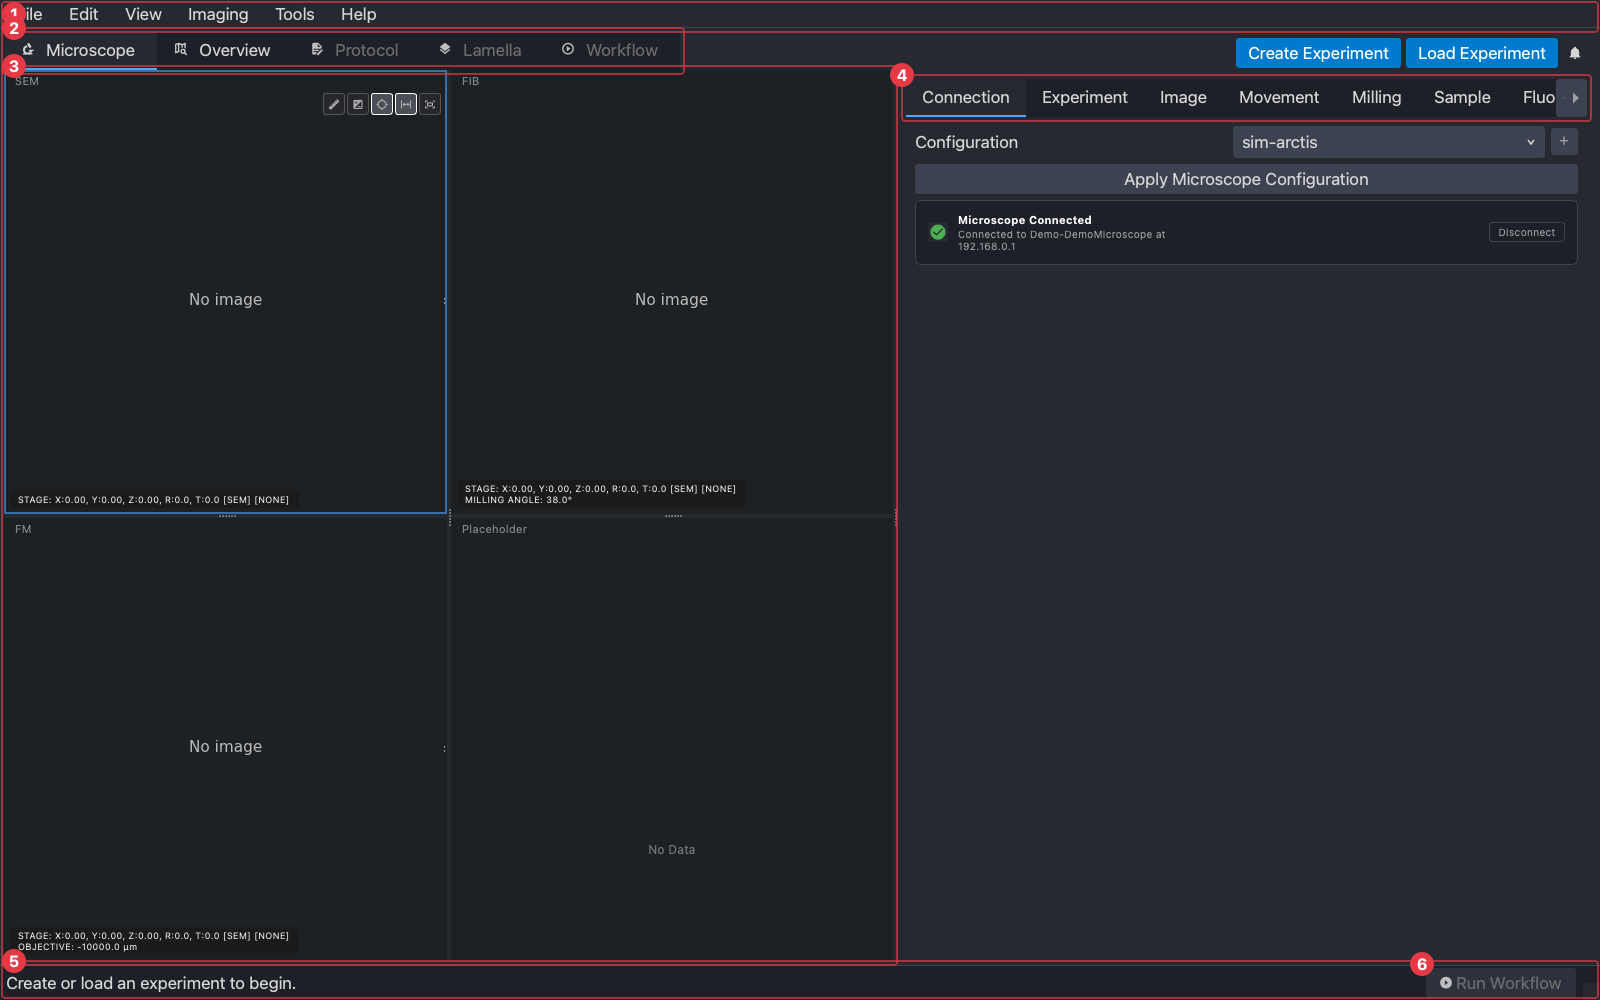
- The menu bar. File for experiments and protocols, View for the layout, Imaging for the acquisition shortcuts, Tools for Guided Setup and the desktop shortcut, Help for reporting a problem.
- The main tabs. Microscope is the instrument: images, movement, milling. The other four belong to AutoLamella and light up once an experiment is open: Overview (the tiled grid image and lamella positions), Protocol (the task settings), Lamella (each lamella’s own configuration) and Workflow (running it).
- The views. On the Microscope tab, the SEM and FIB images side by side, with the fluorescence view below on instruments that have one. Click a view to select it; the selected view has a blue border and is what the keyboard shortcuts act on.
- The control panel. Tabs for each thing you do to the microscope: Connection, Experiment, Image, Movement, Milling, Sample and, on an Arctis, Fluorescence. The next pages of this guide are one tab each.
- The status line. Always says what to do next; right now it reads Create or load an experiment to begin. When something is running it says what, and the window’s border changes colour with it.
- Run Workflow. Starts the AutoLamella workflow on the selected lamellae. Disabled until there is an experiment with lamellae in it.
Each of the following pages starts from here, connected.
If it did not connect
- A message about a missing module (
autoscript,tescanautomation): the vendor software is not in the fibsem environment. See step 5 of Installation. - A timeout or refused connection: the address is wrong, the instrument’s server is not running, or the computer is not on the instrument’s network. Check the address under Tools → Guided Setup… and use Test Connection.
- Wrong instrument connected: the wrong configuration is selected in the Configuration list. Every saved configuration is listed there; pick yours and press the + button to import one from a file.
Next
The Sample holder page, to tell fibsemOS about your shuttle or cassette. Or go straight to Image acquisition to take your first images.