Installation
By the end of this page fibsemOS is installed in its own Python environment, the application opens from a desktop shortcut, and you know which vendor software your microscope needs on top.
The same guide, without the screenshots, ships with the code as INSTALLATION.md , for machines without a browser.
Before you start
- A computer running Windows, Linux or macOS. On a microscope, this is usually the support PC on the same network as the instrument, not the microscope’s own PC.
- Python 3.8 or newer. If you do not have Python, install
Miniforge : it gives you
condafrom the community-maintained conda-forge channel with no licensing conditions. - No microscope is needed. Everything in this guide also runs against the built-in simulator, so you can install and try fibsemOS on a laptop first.
1. Create an environment
Open a terminal (on Windows, the Miniforge Prompt) and create an environment for fibsemOS. Keeping it separate from everything else on the computer means an upgrade of fibsemOS cannot disturb other software, and vice versa.
conda create -n fibsem python=3.11 pip
conda activate fibsem
2. Install fibsemOS
Install the package with its user-interface dependencies:
pip install "fibsem[ui]"To install from a checkout of the source instead, for example to run a
development branch, run the same command from the repository directory with
-e . in place of the package name:
pip install -e ".[ui]"Either way, the [ui] extra is what installs the application windows. Leave
it off only for a scripting-only install with no graphical interface. Image
labelling (fibsem_label) draws in napari, which is not part of [ui]; add
the [labelling] extra for it.
Offline installation
For a computer with no internet connection, download the packages on a connected computer with the same Python version and carry them over, for example on a USB stick.
On the connected computer:
mkdir pkg
cd pkg
pip download "fibsem[ui]"
On the offline computer, from the copied pkg directory, with the fibsem
environment active:
pip install --no-index --find-links . "fibsem[ui]"3. Open the application
With the environment active:
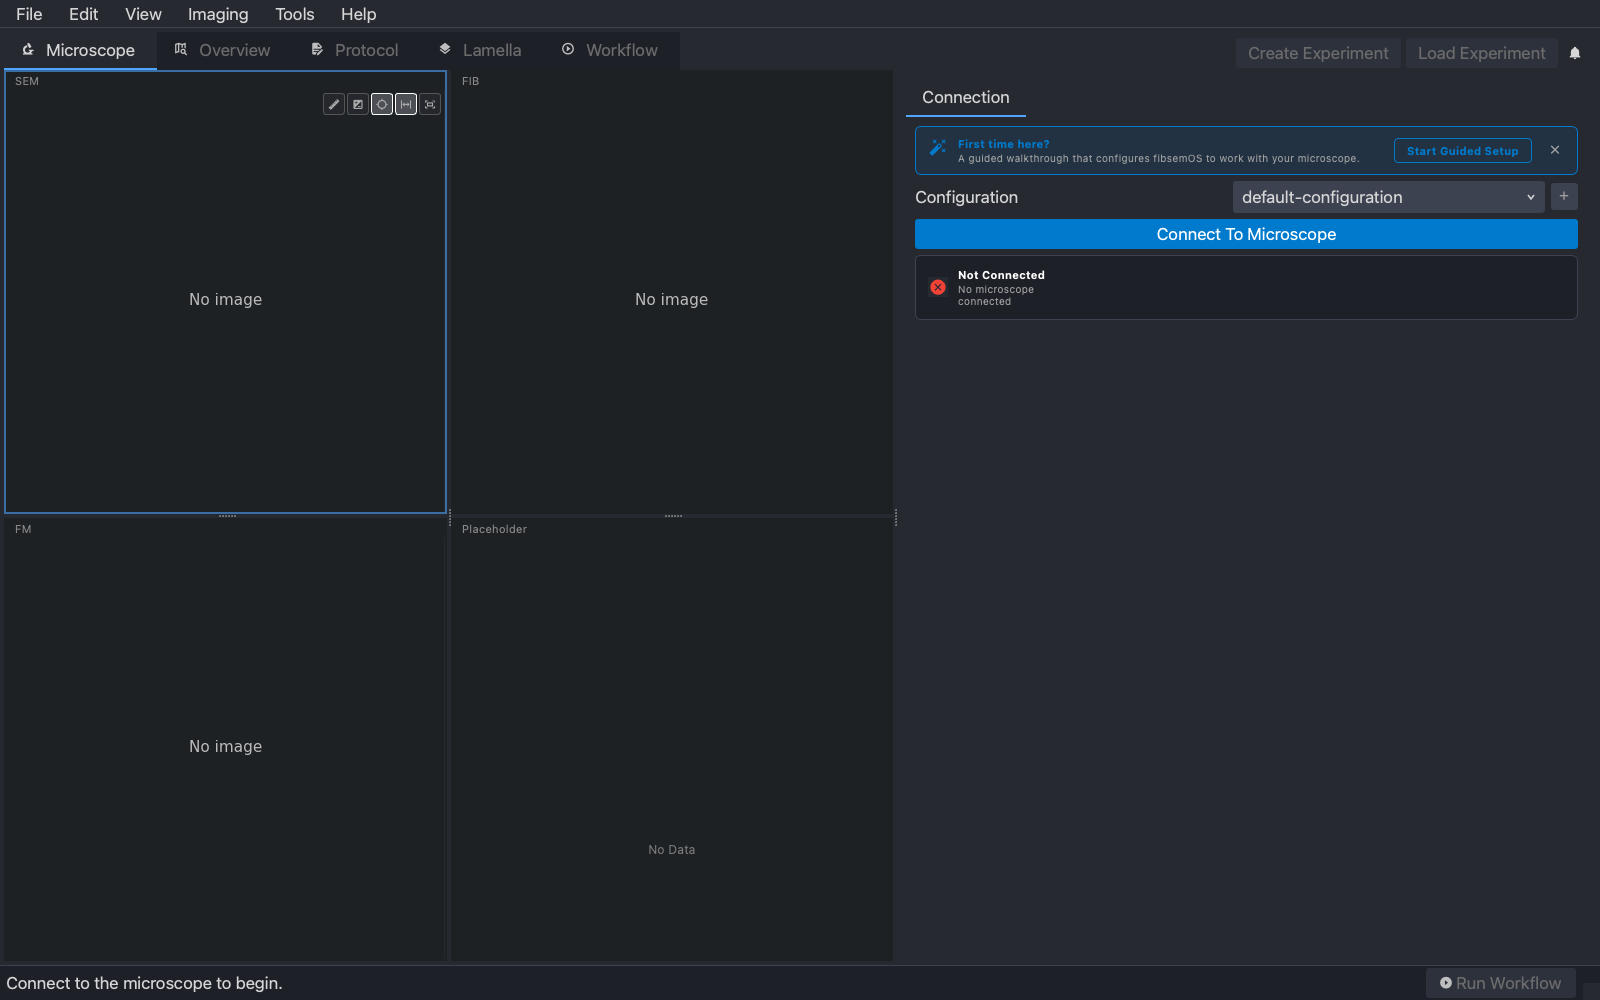
fibsem-autolamella-uiThe window opens on the Microscope tab with nothing connected yet. That is the whole test: if you see this, the install worked.
4. Make a desktop shortcut
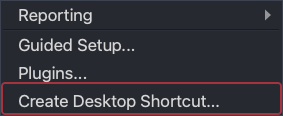
You will not want to open a terminal every session. From the menu bar choose
Tools → Create Desktop Shortcut…, pick where to put it (the Desktop is
offered), and fibsemOS writes a shortcut that activates the right environment
and starts the application. It makes a .lnk on Windows, a .desktop file
on Linux and a .command file on macOS.
From now on, double-click the shortcut to start fibsemOS.
5. Microscope software
fibsemOS talks to a real instrument through the manufacturer’s own control software, which is licensed by them and is not on PyPI. This step only applies on the computer that will connect to the microscope; skip it on a laptop, and skip it entirely for the simulator.
Thermo Fisher (Aquilos, Hydra, Arctis)
fibsemOS controls Thermo Fisher instruments through AutoScript, Thermo Fisher’s scripting interface. It is a licensed product; contact Thermo Fisher for pricing and installation. fibsemOS works with AutoScript 4.7 and later.
If AutoScript is already installed on this computer, fibsemOS will most likely find it on its own: the first step of Guided Setup reports whether it was found. If it reports that AutoScript was not found, its Python packages are in AutoScript’s own environment and need copying into yours.
-
Find AutoScript’s packages. AutoScript installs into its own Python environment, usually named
AutoScript, with packages at a path likeC:\Program Files\Python35\envs\AutoScript\Lib\site-packages\. If it is not there, open a terminal and runwhere python: the result is something likeC:\Program Files\Python35\envs\AutoScript\python.exe, andLib\site-packagessits beside thatpython.exe. -
Find the fibsem environment’s packages. With the
fibsemenvironment active, runwhere python(Windows) orwhich python. The result is something likeC:\Users\yourname\.conda\envs\fibsem\python.exe, and againLib\site-packagessits beside it. If you made the environment withvenvoruv, it is wherever you created that environment. -
Copy the packages across. Copy these folders from AutoScript’s
site-packagesinto the fibsem environment’ssite-packages:autoscript_coreandautoscript_core-<version>.dist-infoautoscript_sdb_microscope_clientandautoscript_sdb_microscope_client-<version>.dist-infoautoscript_sdb_microscope_client_testsandautoscript_sdb_microscope_client_tests-<version>.dist-infoautoscript_toolkitandautoscript_toolkit-<version>.dist-infothermoscientific_loggingandthermoscientific_logging-<version>.dist-info
With AutoScript 4.7 the versions were 4.7.0 for the
autoscript_*packages and 5.12.0 forautoscript_coreandthermoscientific_logging.
Restart fibsemOS afterwards; Guided Setup should now report AutoScript as installed.
Tescan
Run the Tescan Automation SDK installer from Tescan. When it asks which
Python interpreter to install into, choose the one in the fibsem
environment (where python with the environment active shows its path). If
the installer put the packages elsewhere, copy every folder beginning with
tescan, PySide6 and shiboken from that site-packages into the
fibsem environment’s.
To check, with the environment active:
python -c "from tescanautomation import Automation; print('Tescan SDK found')"If you finish Getting started and the connection fails with a message about a missing module, this is the step to come back to.
Alternatives
uv. If you prefer uv to conda, uv venv
then uv pip install "fibsem[ui]" in the activated environment does the same
job, faster. uv also works inside a conda environment.
venv. Python’s own python -m venv fibsem, then activate it
(fibsem\Scripts\activate on Windows, source fibsem/bin/activate
elsewhere) and run the pip install above.
Manual shortcut. If the Tools menu is not an option, make a script that
activates the environment and runs fibsem-autolamella-ui, and create a
shortcut to that script.
Next
Getting started: tell fibsemOS which microscope it is talking to, and connect.