Your first lamella
The whole path from a connected microscope to a polished lamella, in one run, on the simulator or on an instrument. Each step links to the page that explains it; read those when a step needs more than a line.
Before you start
- fibsemOS is installed and connected. On a laptop, use the simulator.
- On an instrument: the grid is loaded, the beams are on, and you have taken an image of it.
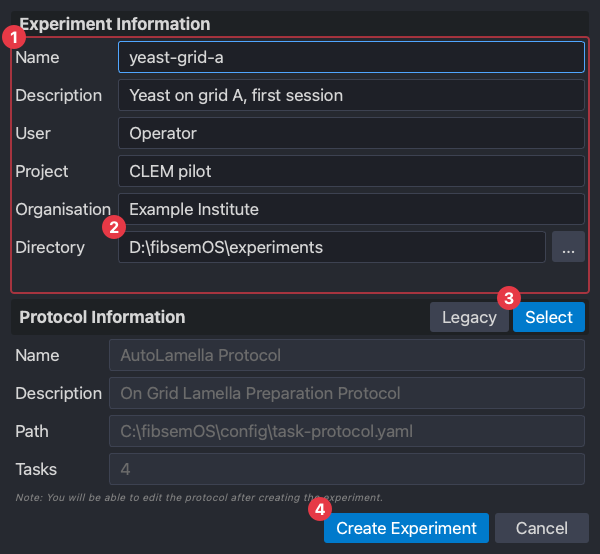
1. Create an experiment
Create Experiment at the top right. Name it, pick the experiments folder, leave the default on-grid protocol selected, and create. The AutoLamella tabs wake up. Experiments
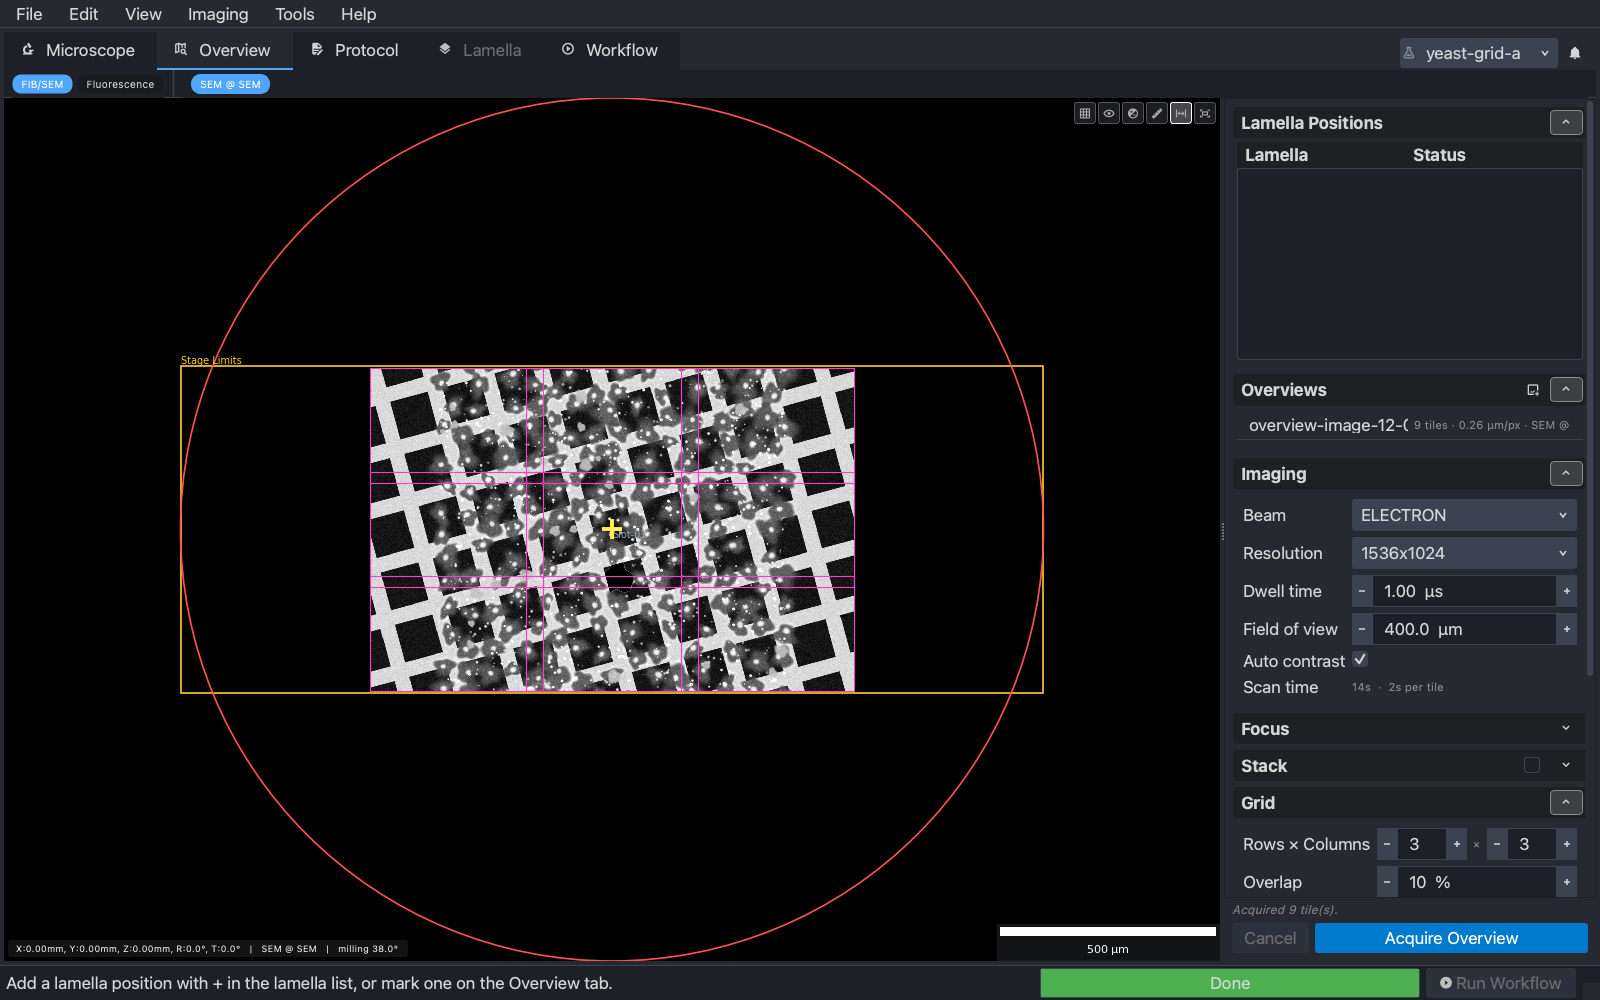
2. Image the grid
Move to the SEM orientation and put the surface in coincidence (Movement). On the Overview tab, choose the electron beam, 3 × 3 tiles at 400 µm, and Acquire Overview. Overview acquisition
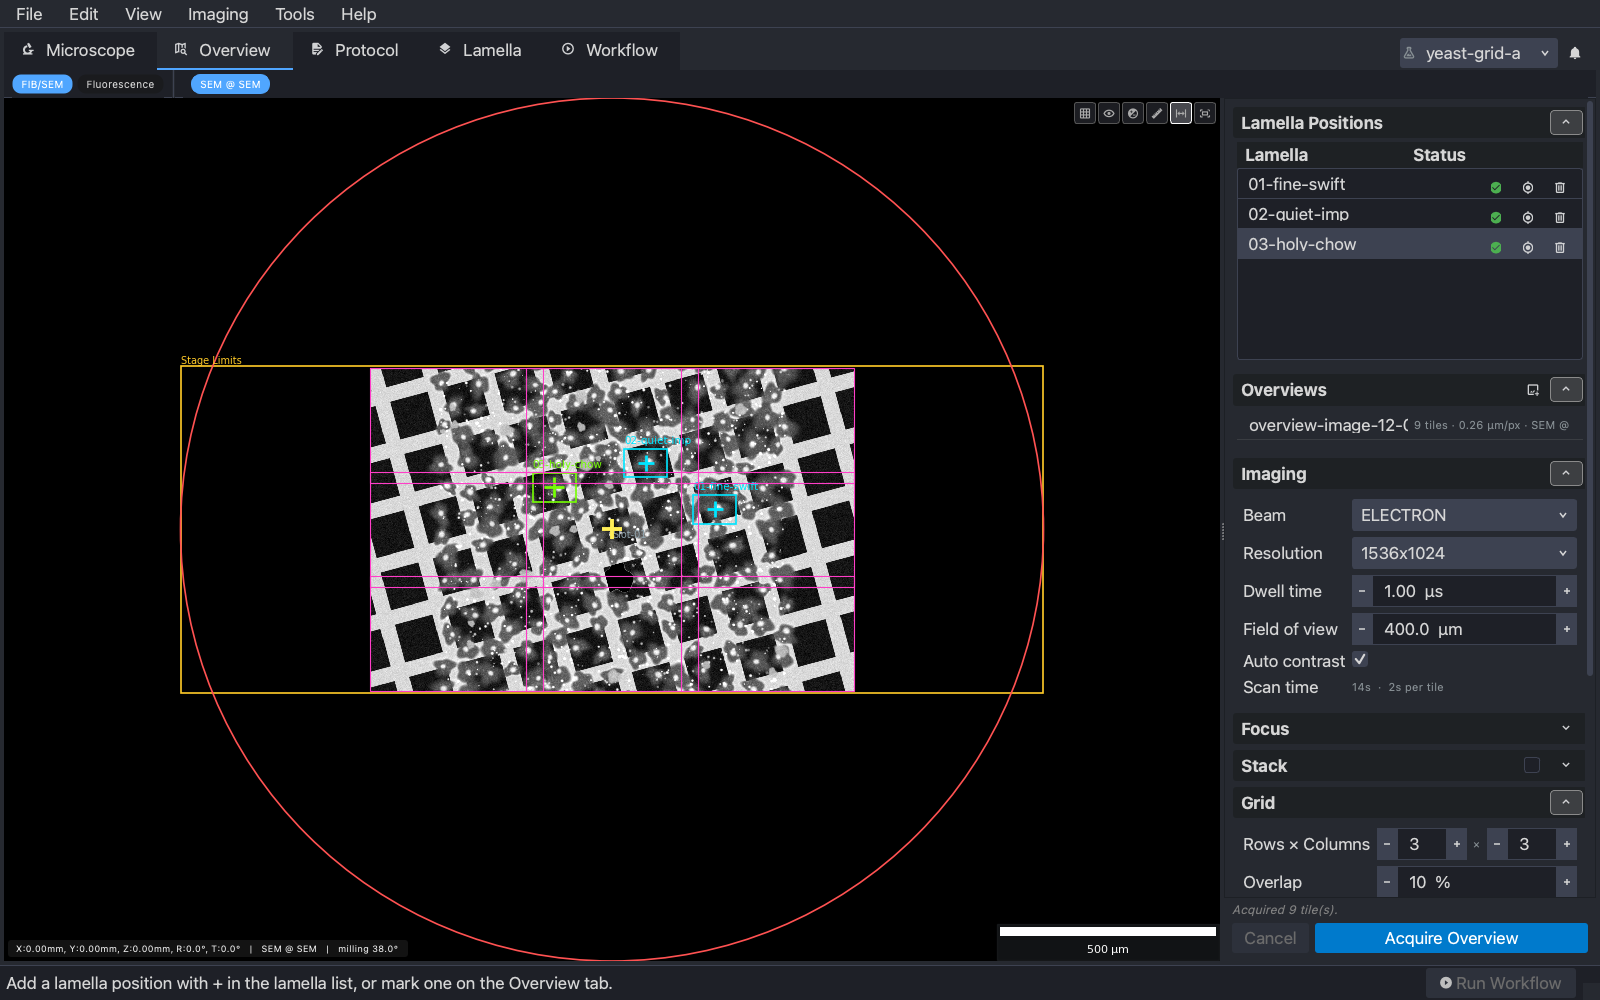
3. Mark the lamellae
Find cells sitting on film, away from the grid bars, and right-click each one: Add New Position Here. Two or three is plenty for a first run. Overview acquisition
4. Check the protocol
On the Protocol tab, look at Rough Milling and Polishing: the currents and the milling angle should be ones your instrument uses. On the simulator, leave everything as it is. Protocols
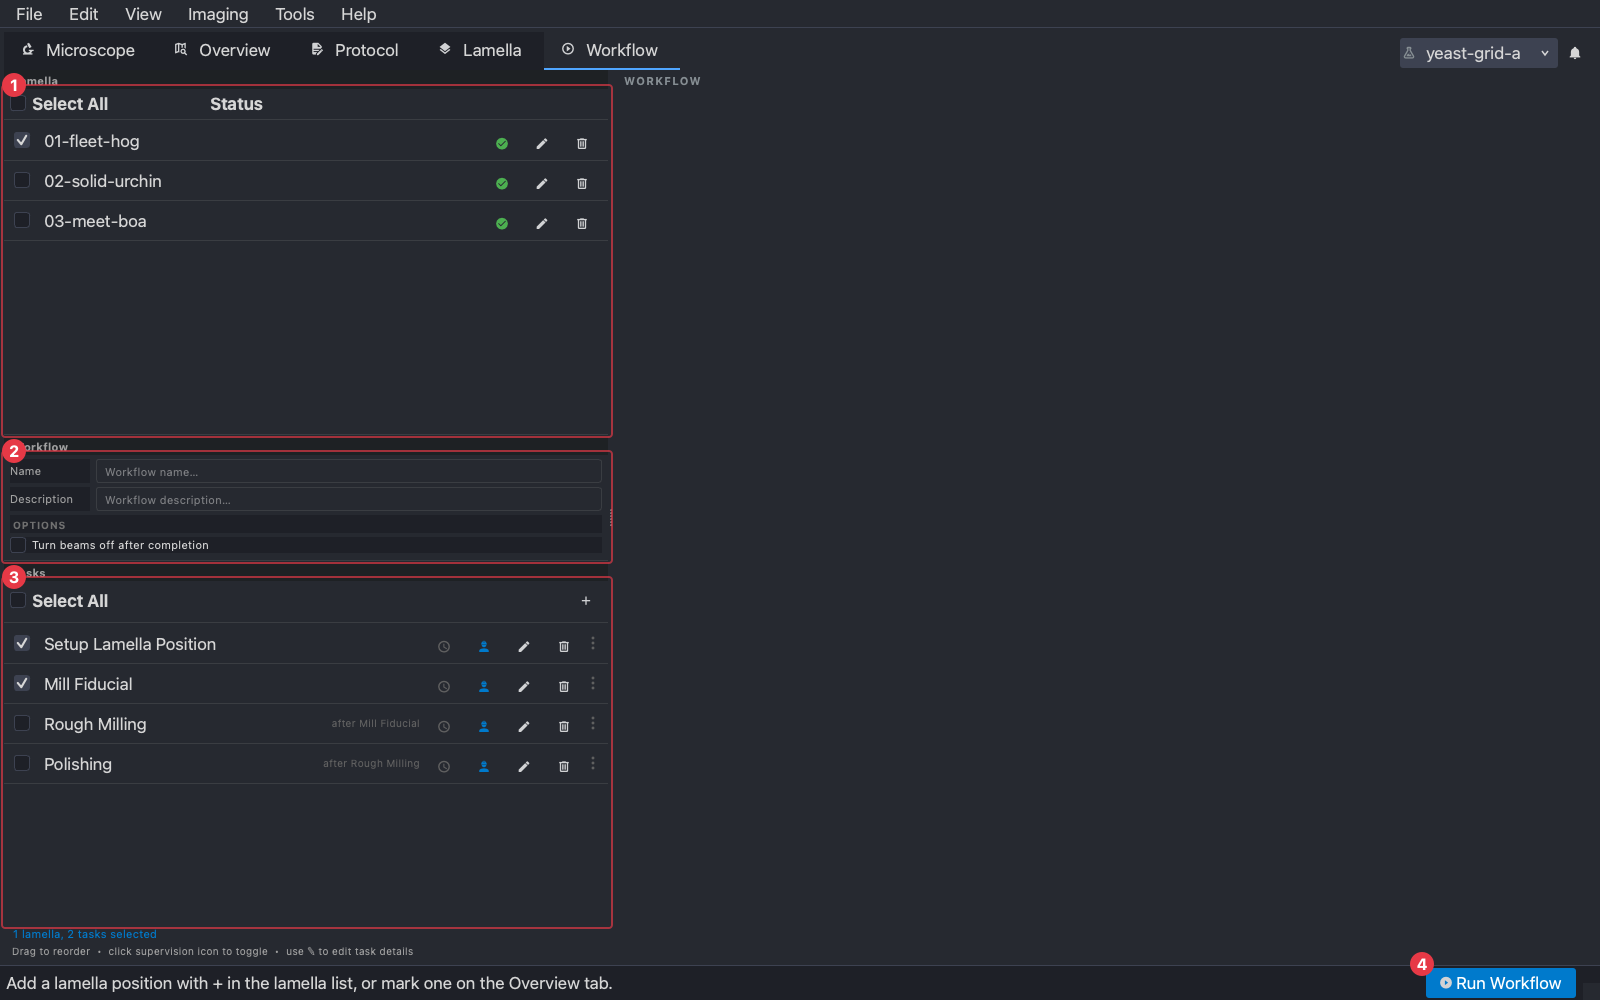
5. Set up each lamella
On the Workflow tab tick your lamellae and the first two tasks, Setup Lamella Position and Mill Fiducial, leave both supervised, and press Run Workflow. Confirm the preflight. Workflows
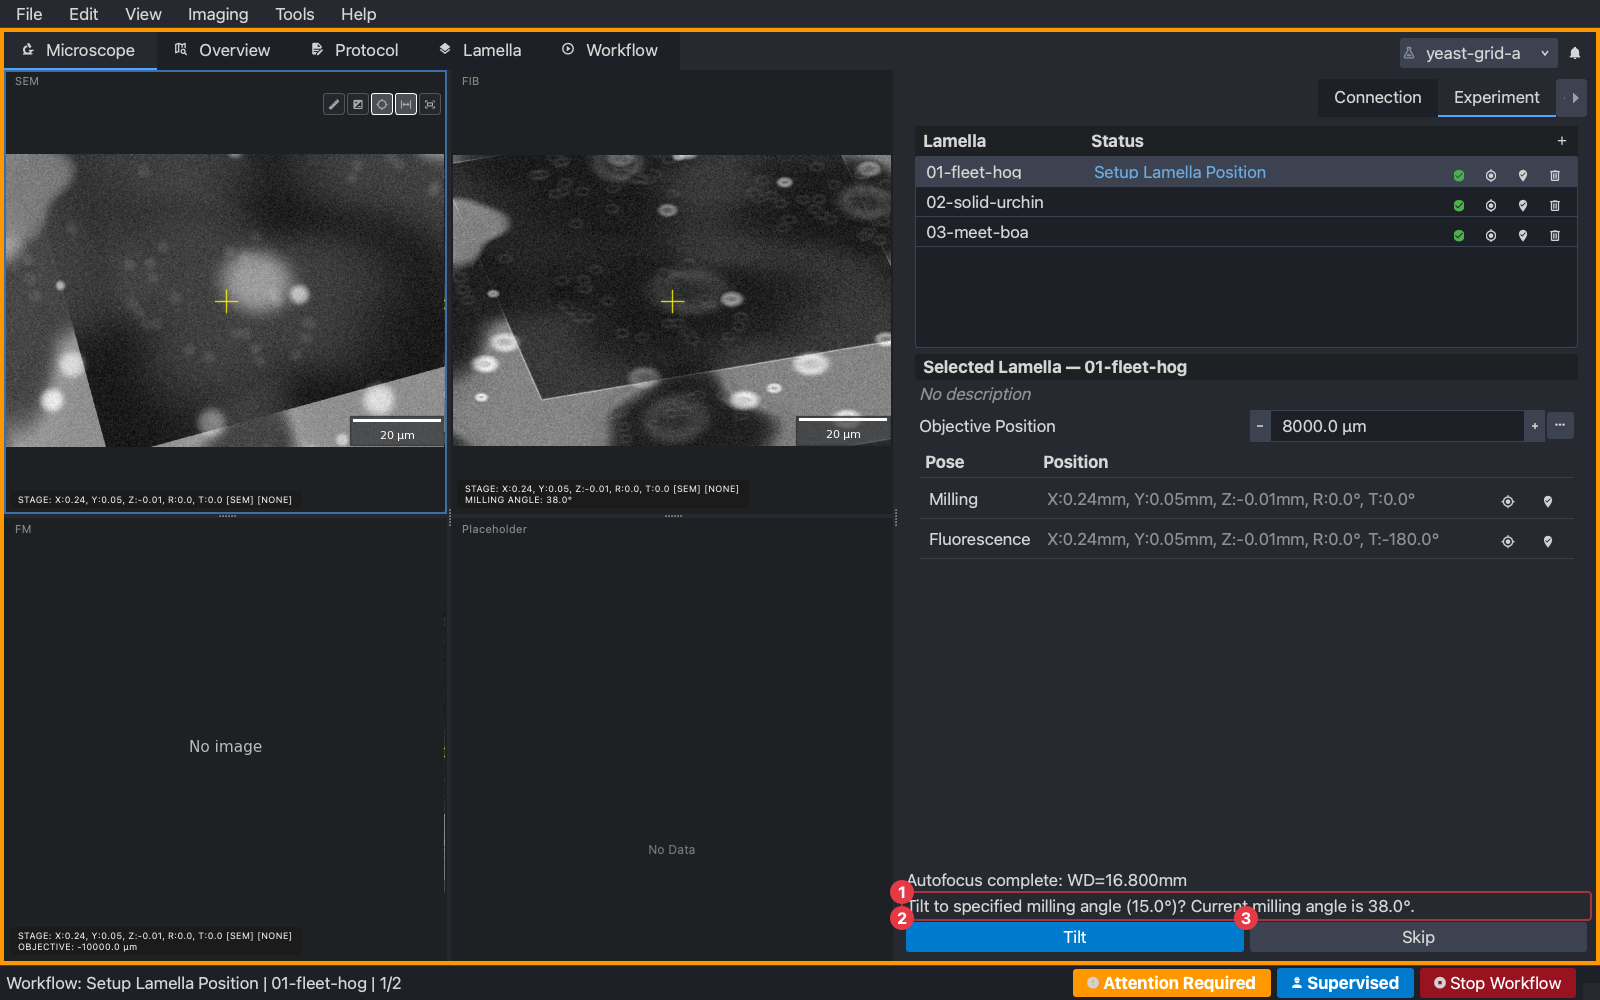
When Attention Required lights up, go to the Experiment tab and answer. Setup Lamella Position asks to Tilt to the milling angle, then to double-click the cell to centre it and Continue:
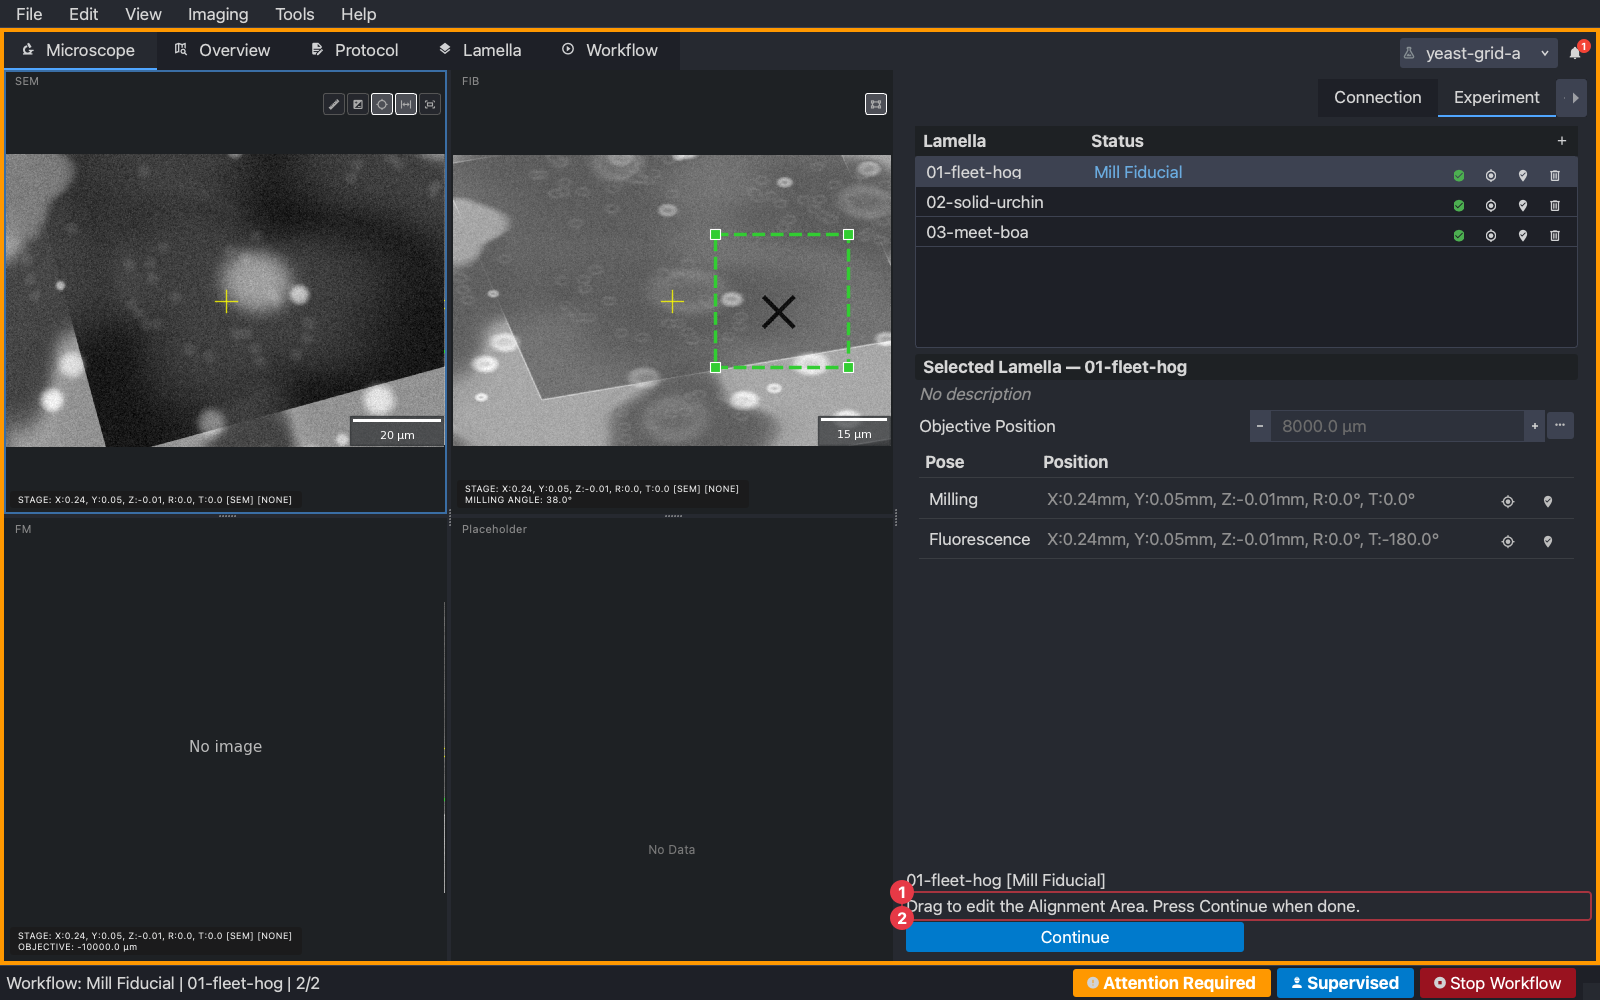
Mill Fiducial shows the fiducial pattern beside the cell; move it if it sits on something, Run Milling, and Continue when it looks right. Then it asks you to check the alignment area, the dashed box the later tasks align to. Drag it if needed and Continue:
Each lamella takes its turn, and a summary appears at the end.
6. Look at what you have set up
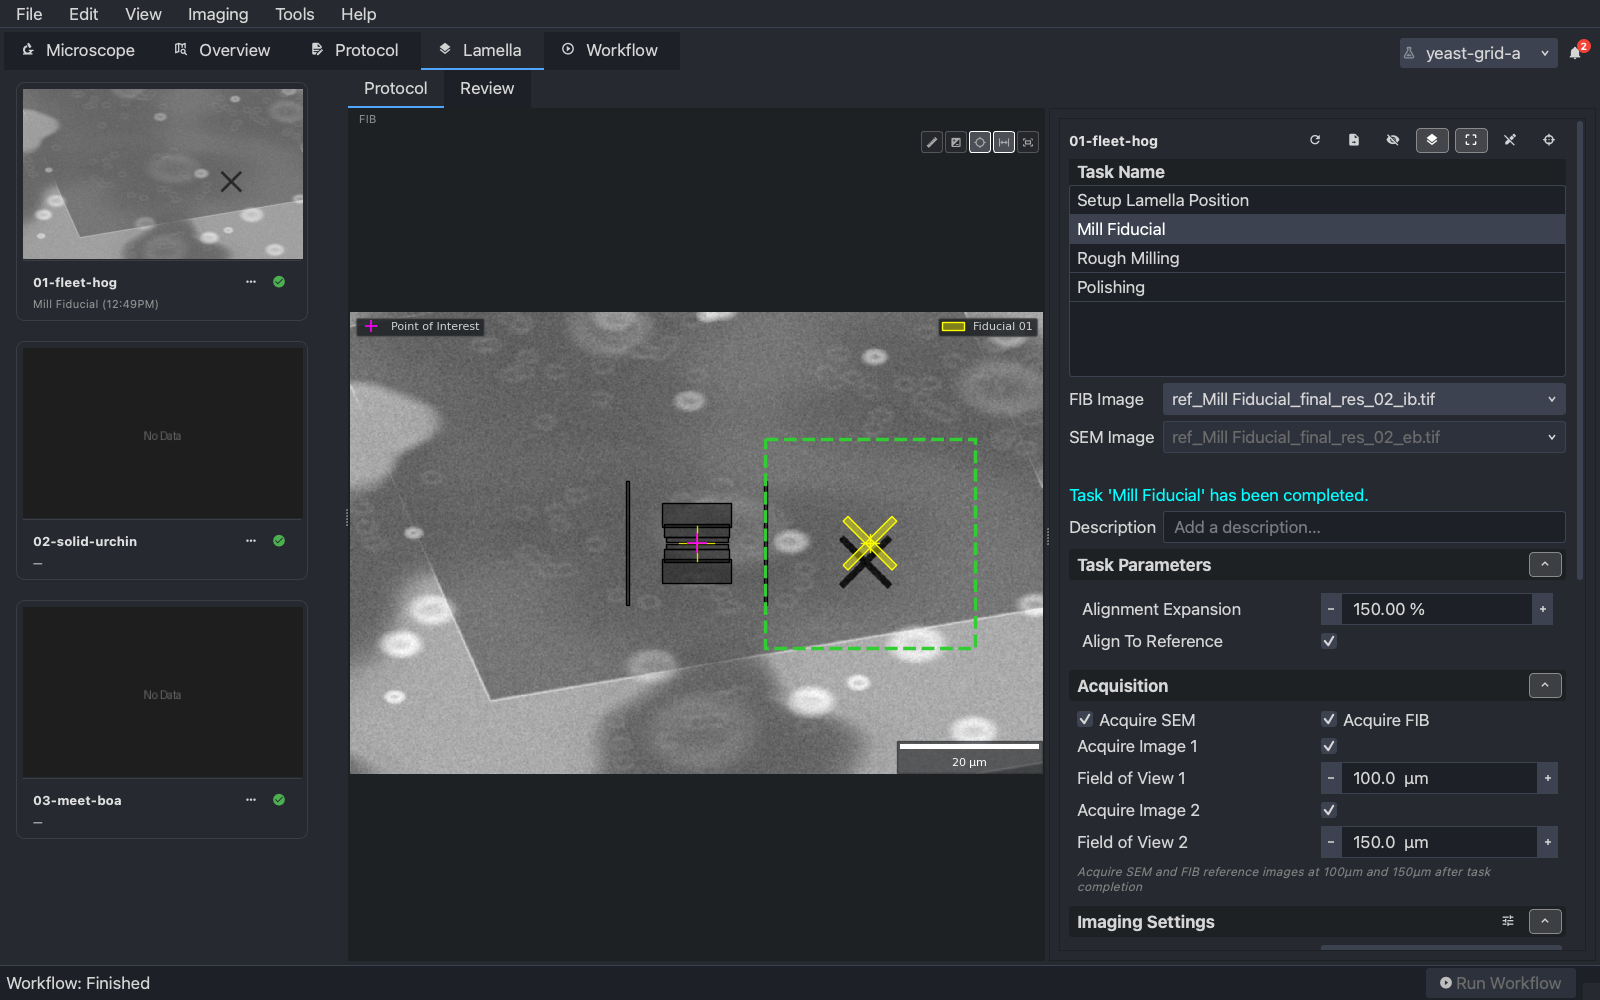
On the Lamella tab, click each card. The FIB image is the lamella at its milling position with the fiducial milled, and the task list shows the two tasks done. Select Rough Milling to see where its patterns will land on this image; this is the moment to move a pattern that is off. Lamella
7. Rough milling and polishing
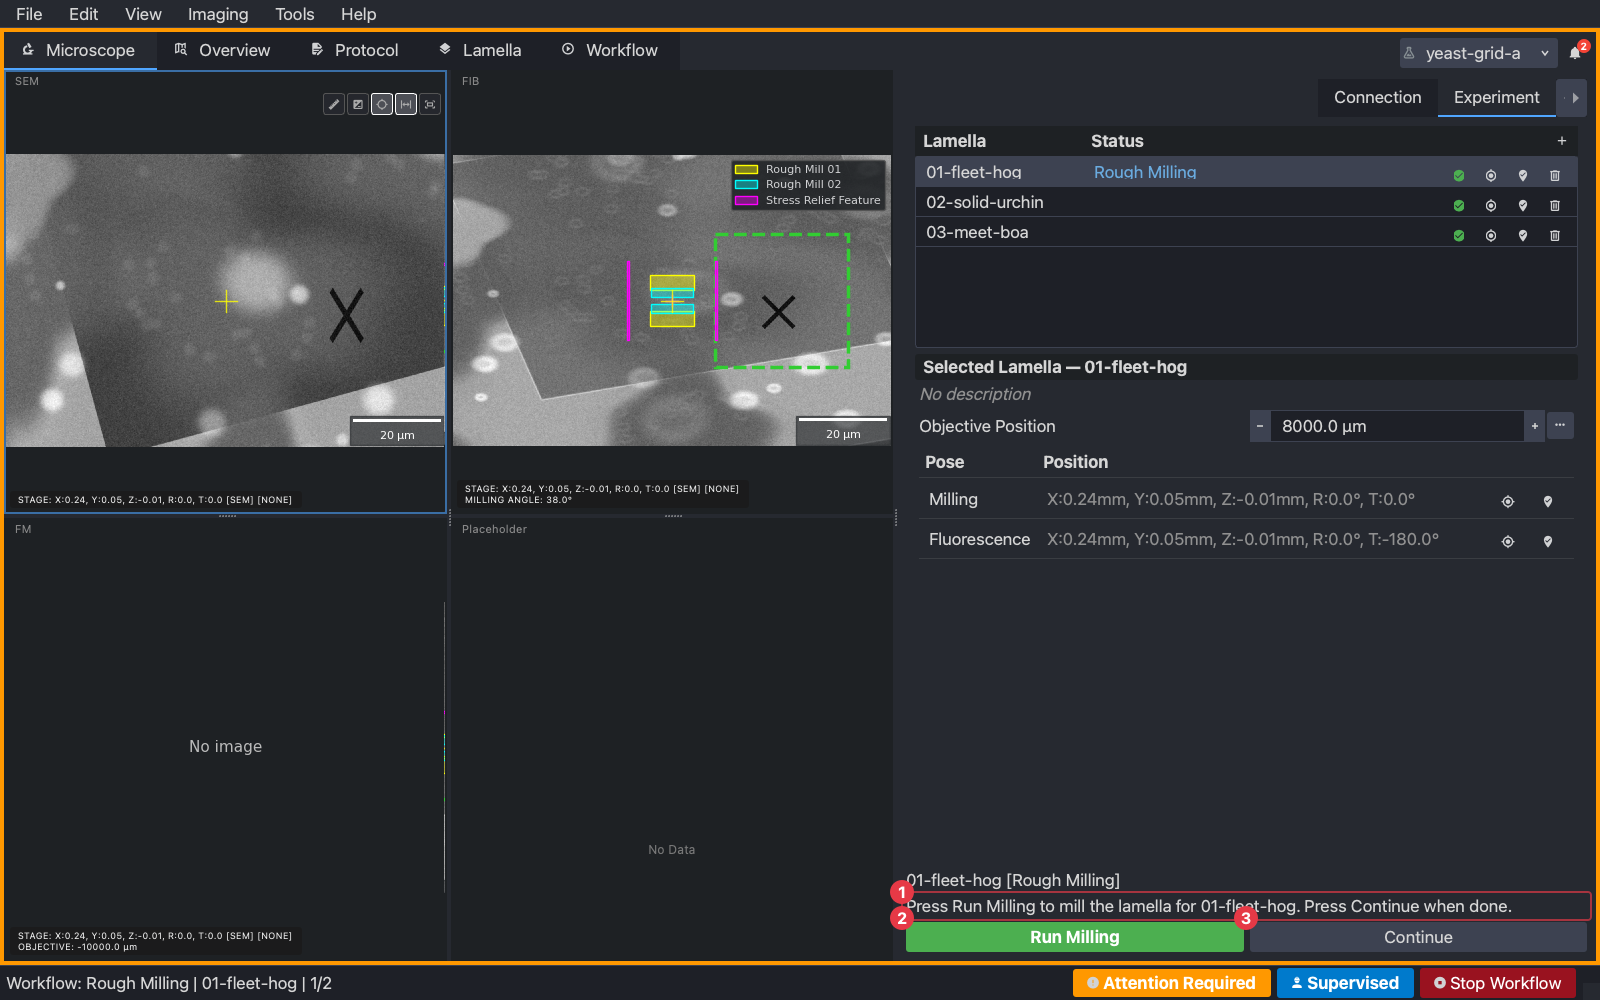
Back on the Workflow tab, tick Rough Milling and Polishing, and run. Supervised the first time: at each milling prompt check the patterns sit where you want on the FIB view, then Run Milling and Continue. On the simulator each stage takes a few seconds; on an instrument, minutes to tens of minutes per lamella.
8. Look at what you have made
The summary lists every task and its outcome. On the Lamella tab the FIB image now shows the finished lamella, and the Review sub-tab shows each task’s images in order, which is where you judge the result.
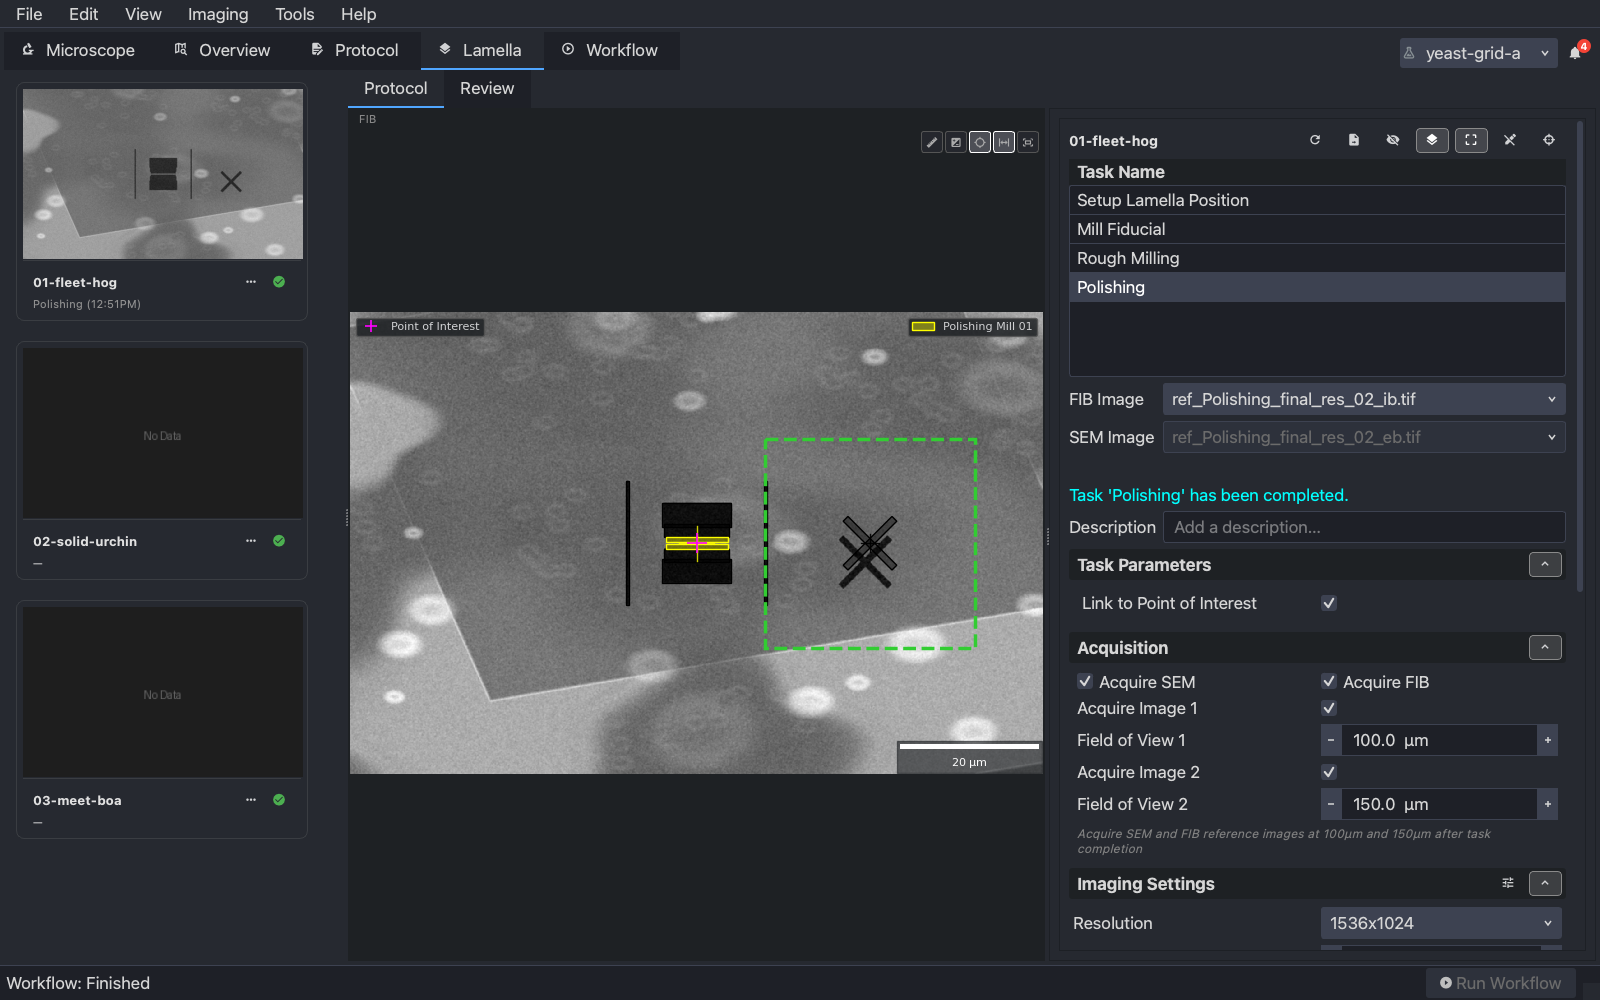
Polishing is the step most likely to need tuning for your sample: the final thickness, the current and how long it runs. Adjust it on the Protocol tab, apply to existing lamellae, and run Polishing again on the ones that need it.
Next time
Turn supervision off for Rough Milling and Polishing, and let the run go unattended. The Tasks page says what each task does and which to keep an eye on.