Overview acquisition
By the end of this page you have a tiled image of the grid to navigate by, have marked where the lamellae go on it, and know how the same place looks to the ion beam at the two orientations you mill from.
Before you start
- An experiment is open.
- The stage is at the SEM orientation, over the grid, with the surface in coincidence. Overviews are stitched from the stage positions of their tiles, so a height error puts every tile slightly off.
1. The Overview tab
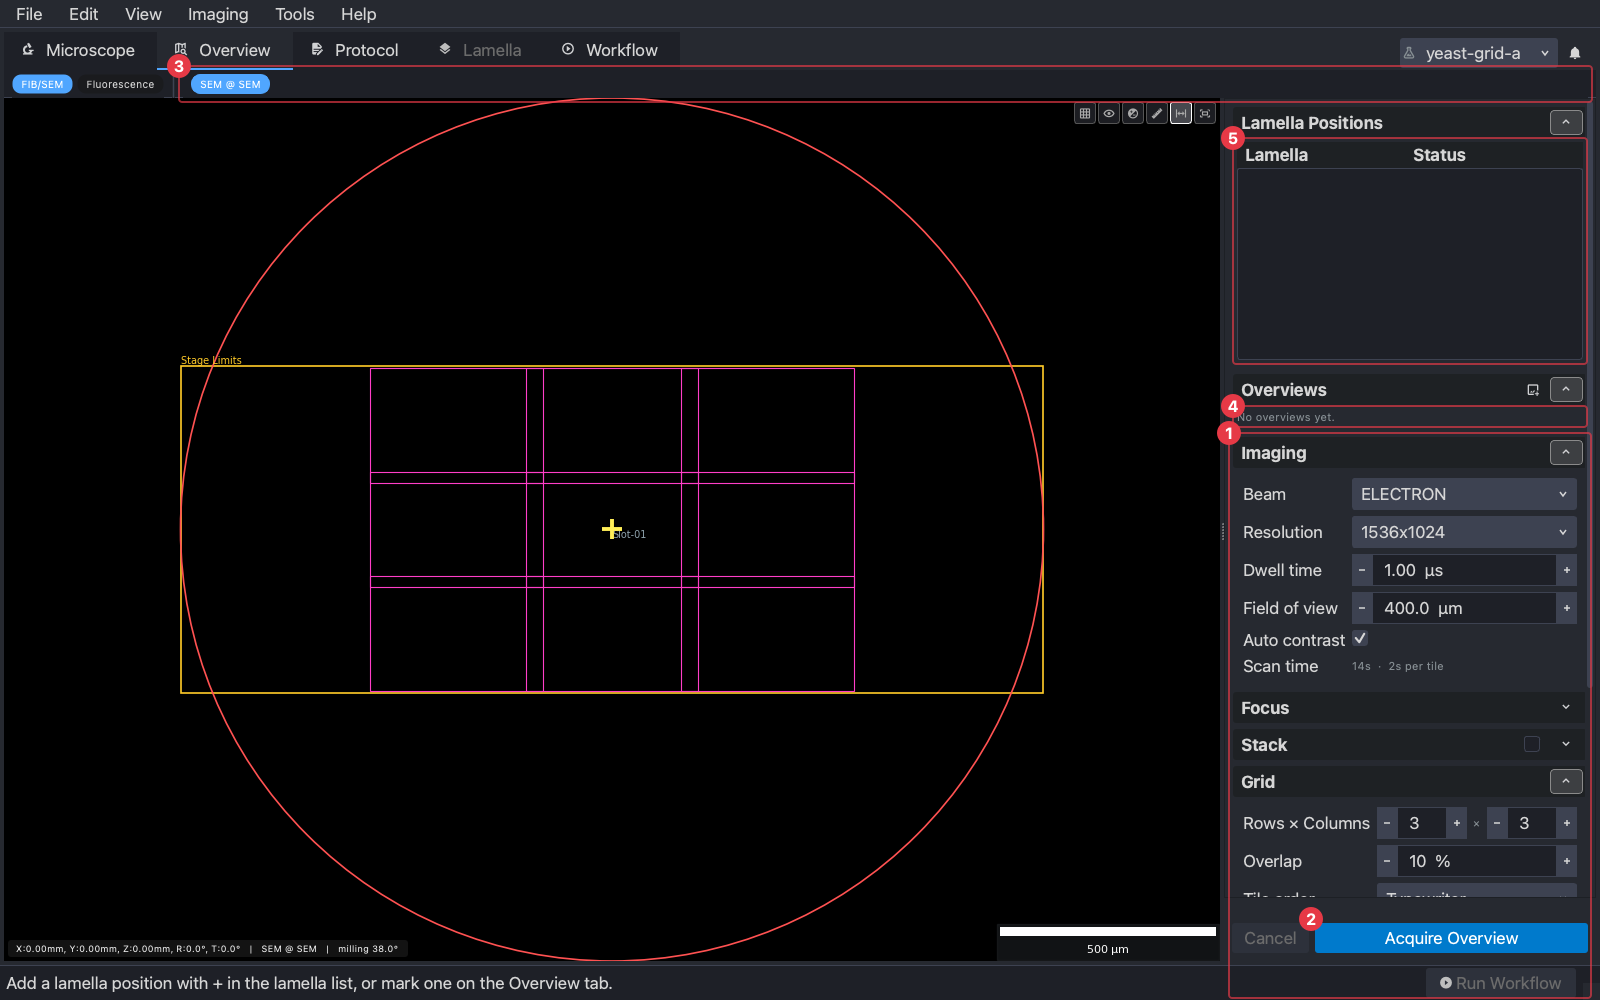
- (1) The acquisition settings: the beam and its imaging settings, the field of view of one tile, the grid of tiles as rows × columns and their overlap, and focus options. The scan time is estimated below the imaging settings.
- (2) Acquire.
- (3) The view strip. An overview belongs to a view, which is a beam and a stage orientation together, named like “SEM @ SEM”. Every view acquired this session gets a chip here; click one to see it.
- (4) The overviews taken in this session, with their tile count and pixel size, and a button to load one from disk.
- (5) The lamella positions, the same list as the Experiment tab.
The canvas is drawn in stage coordinates, not image coordinates. Before any image exists it shows the stage limits as a box and, from the sample holder, the grid’s boundary as a circle, so you can see where an overview will land before taking it. The toolbar at its top right toggles the tile grid, the overlays, and contrast and gamma, then the ruler and reset from the other views.
2. Acquire an SEM overview
Choose the electron beam, a tile field of view and the number of tiles. Three by three at 400 µm covers a millimetre of grid; a whole 3 mm grid at that field of view is eight by eight. Press Acquire Overview and confirm. The stage visits each tile, the images are placed by their stage positions and stitched, and the result appears on the canvas.
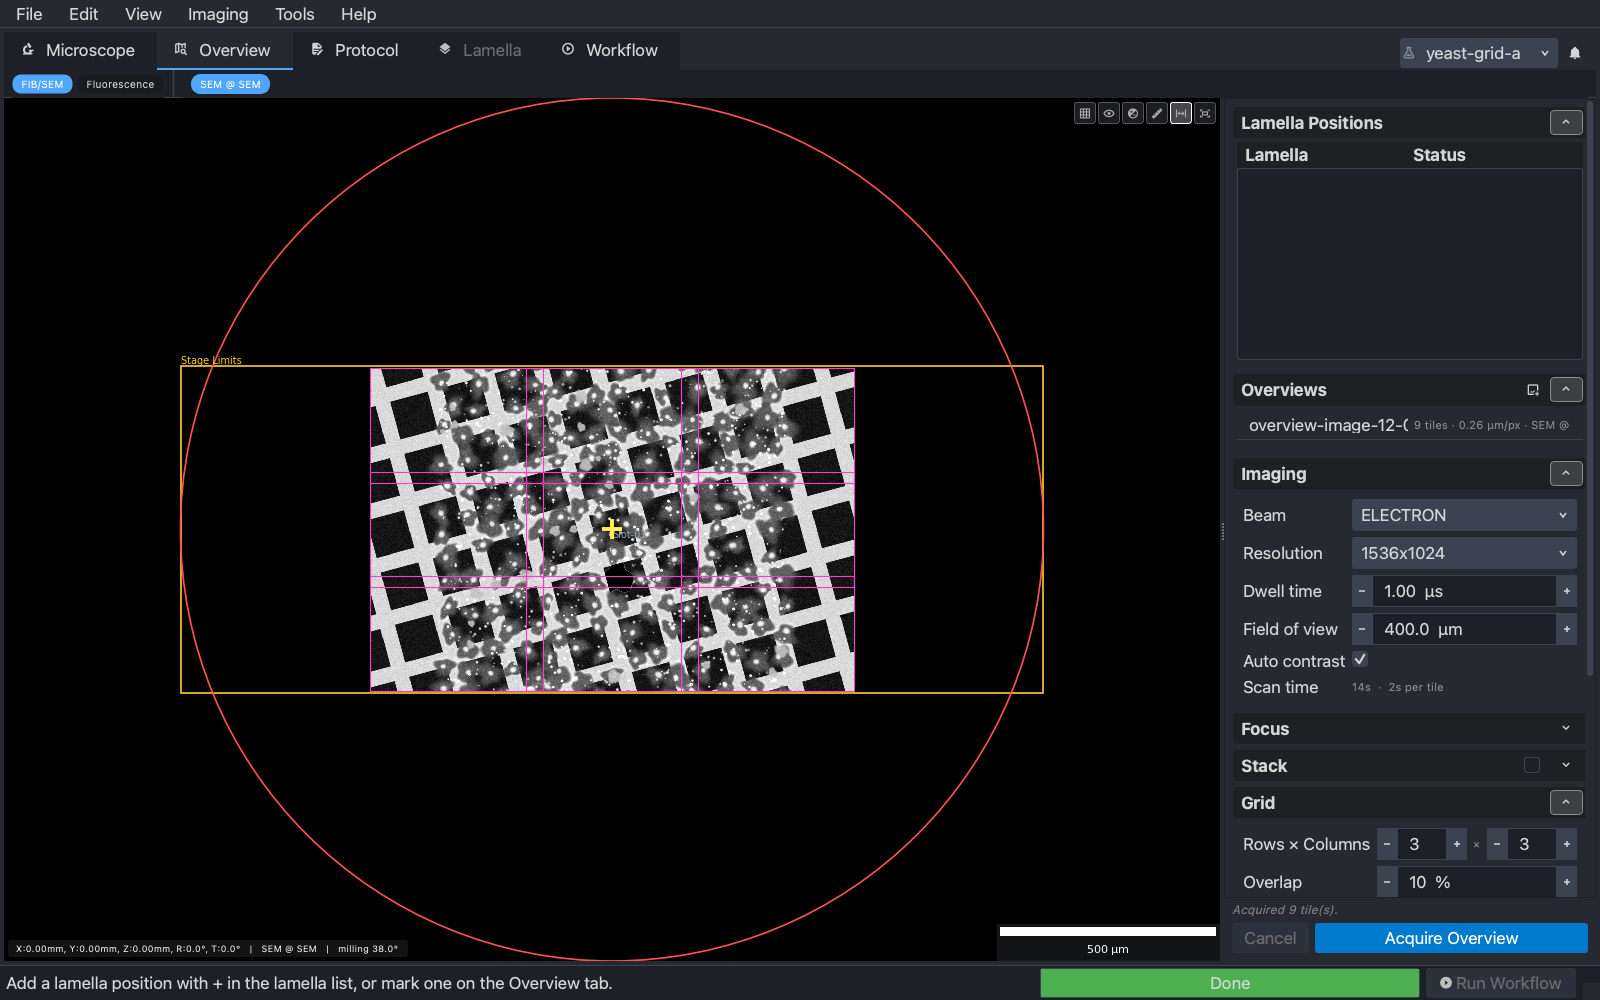
The stitched overview is a map: grid bars, squares, the film in them, cells and ice. Zoom and pan as in any view. A single click selects a marker; a double-click moves the stage to that point, as in the beam views, and re-images.
3. Mark lamella positions
Right-click a spot on the overview and choose Add New Position Here. A lamella is created at that stage position with a generated name, appears in the list, and is drawn on the overview with its name and a box the size of the milling field of view.
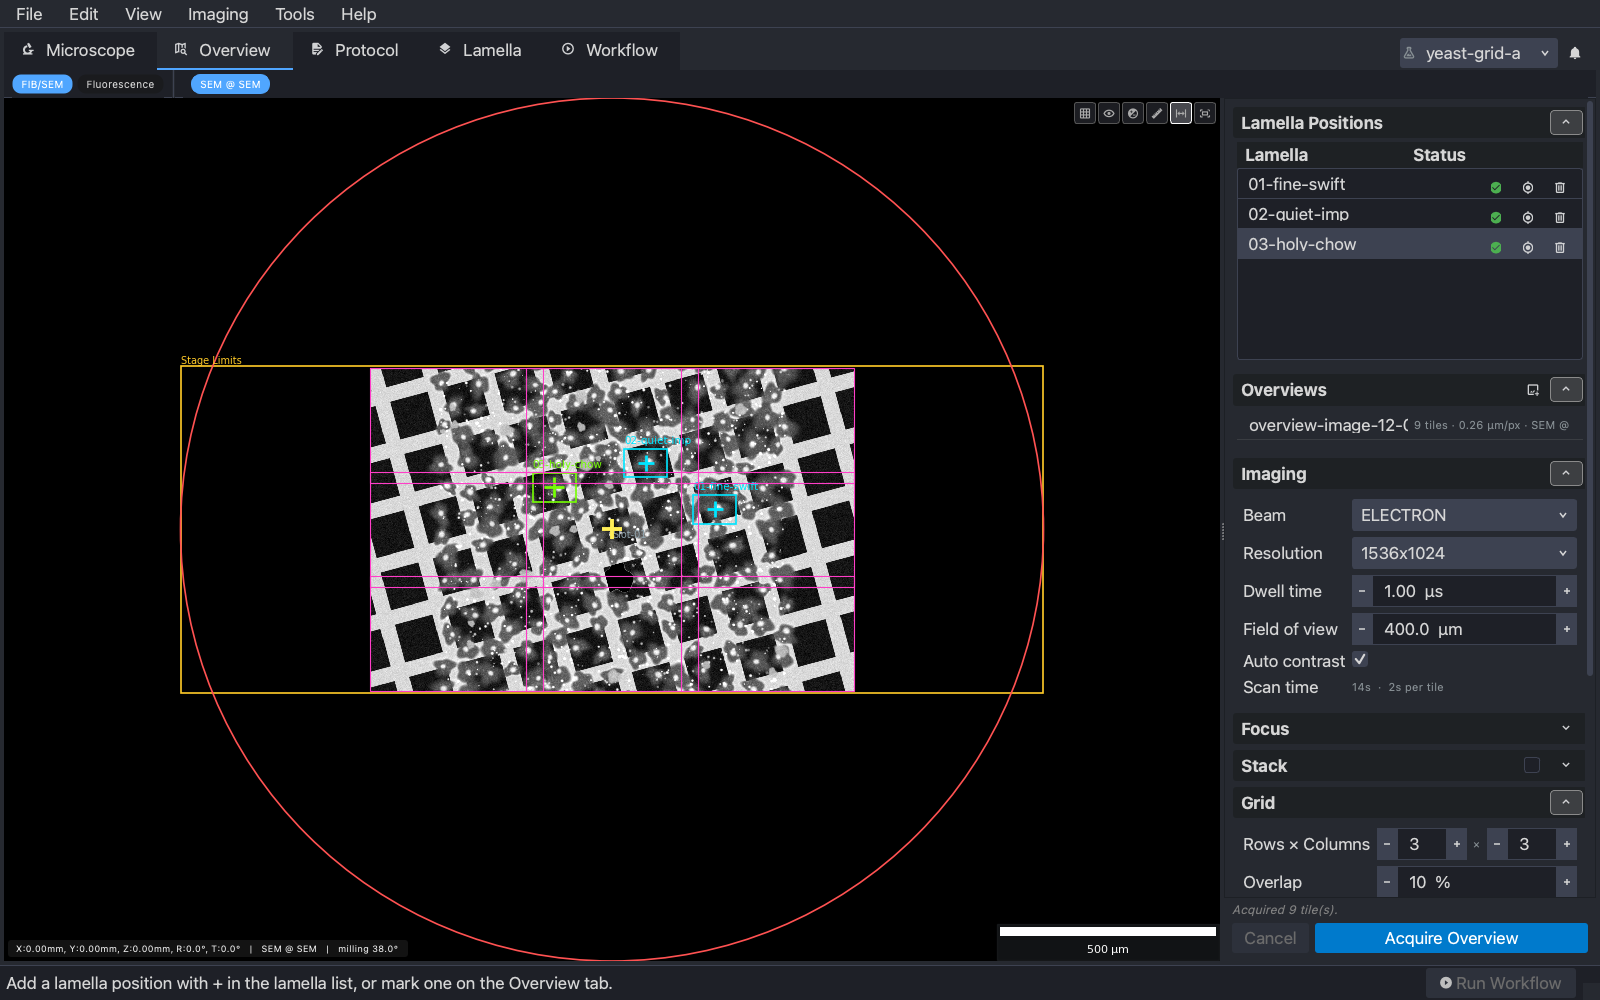
Click a marker or a row to select a lamella; the move button on its row drives the stage there. A position is recorded at the orientation the overview was taken at, which is why the SEM overview is the one to mark on: the workflow moves each lamella from its SEM position to the milling angle itself. Removing a lamella from the list removes its marker.
4. Overviews with the ion beam
The ion beam can take overviews too, and they are worth having: one at the SEM orientation shows what the FIB sees of the places you marked, and one at the MILLING orientation shows the same places as they will look while milling. Choose the ion beam and acquire at each orientation; each becomes its own chip in the view strip, named for the orientation the stage was at.
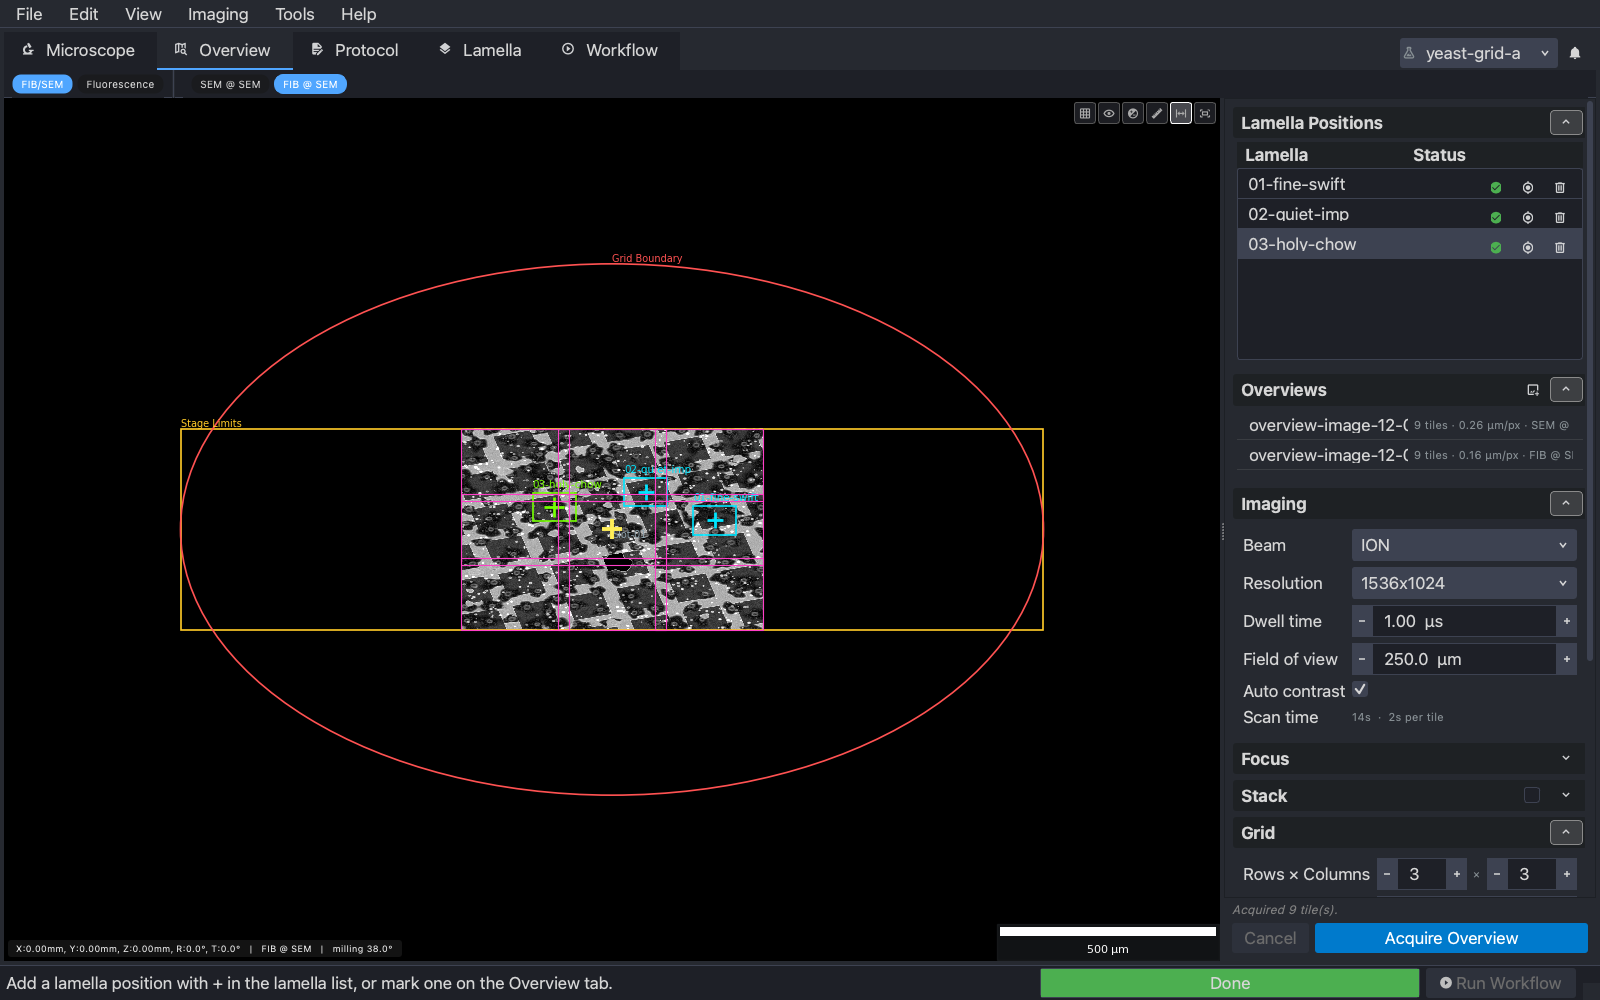
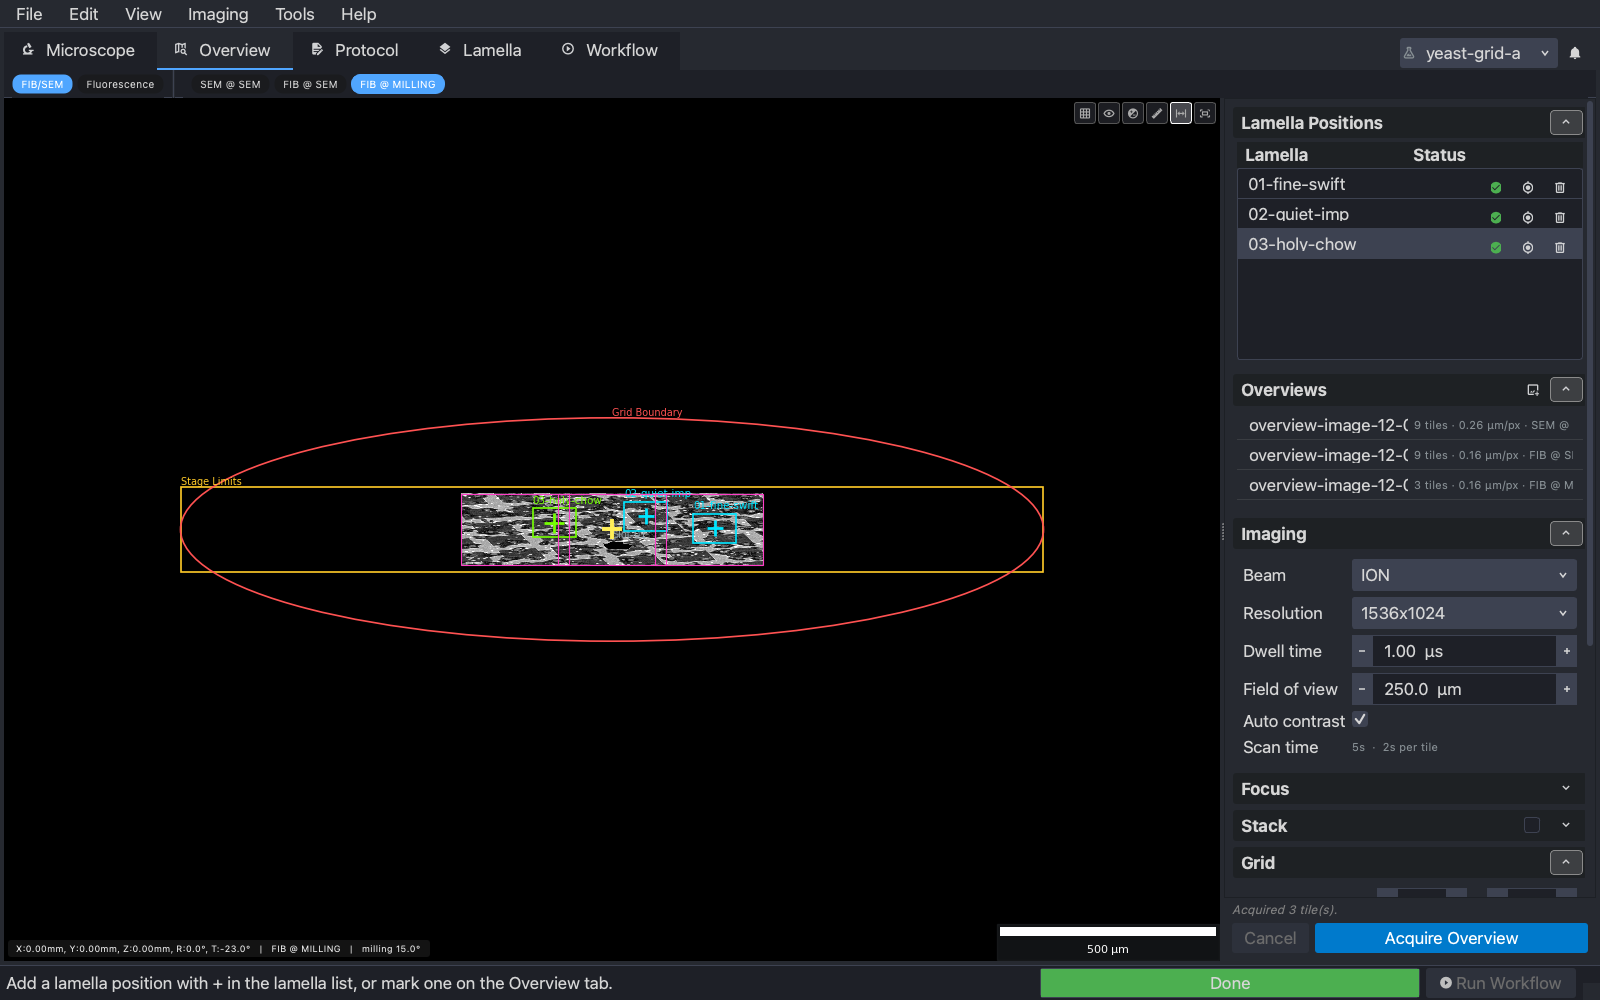

The ion beam looks at the sample from an angle, so its tiles are foreshortened and step further across the stage than their width. At the milling angle the beam grazes the surface and a row of tiles spans a long way, which is why that overview is usually a strip rather than a square. Positions marked on the SEM overview are drawn on the ion beam’s overviews at the same stage coordinates, so you can check each one before milling.
5. The fluorescence overview (Arctis)
On an Arctis the Overview tab has a second modality, Fluorescence, with the same layout: channels instead of beam settings, and an overview taken with the fluorescence microscope at the FM orientation. It is used to find labelled cells and mark lamella positions on them, and positions marked here are projected back onto the SEM overview. This is currently available on the Arctis only.
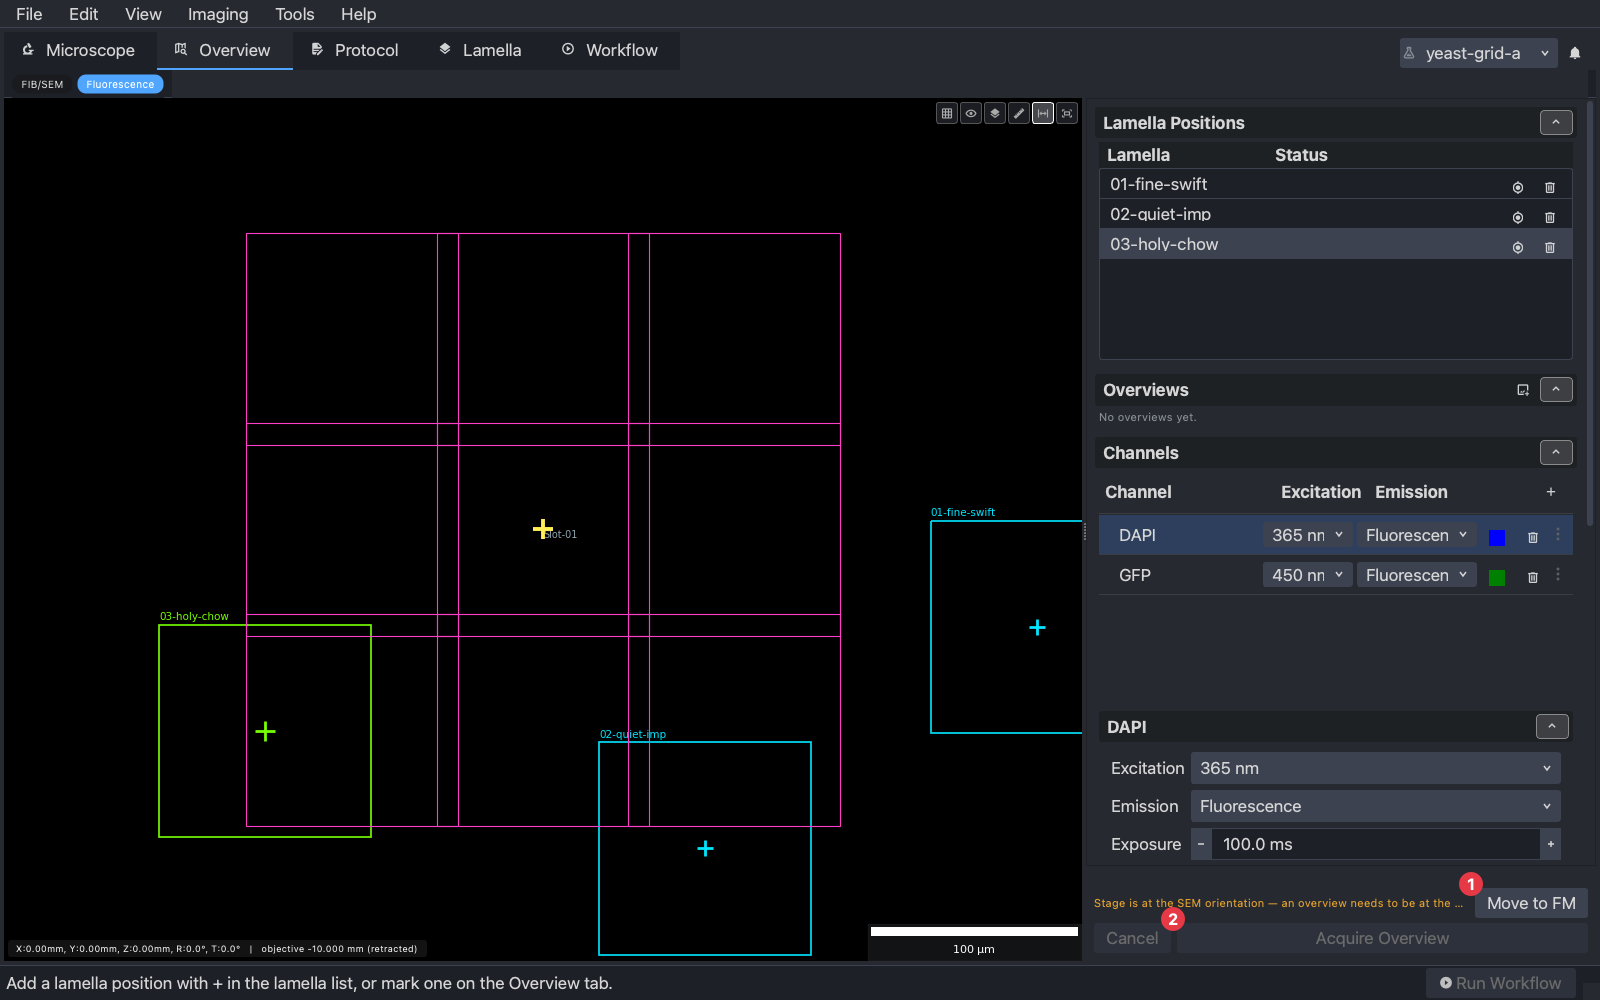
- (1) The stage must be at the FM orientation with the objective inserted; the banner says which is missing, and (2) Move to FM takes the stage there.
- (3) Acquire, with the channels and z-stack settings on the right.
Next
Lamella: what a marked position becomes, and how to set one up.