Lamella
By the end of this page you know what a lamella is to fibsemOS, where to see and change one, and how a lamella’s own settings relate to the protocol’s.
Before you start
- An experiment is open with at least one position marked, on the overview or with + on the Experiment tab.
What a lamella is
A lamella is one site on the grid that will become one lamella. fibsemOS keeps four things about it:
- Positions: where it is on the stage, one pose per orientation it is worked at. The milling pose is where the tasks mill; on an Arctis there is also a fluorescence pose, the same place at the FM orientation. The two differ only in tilt.
- Its own copy of the task configuration, taken from the protocol when the lamella was created. Every pattern position, current and parameter can be changed for this lamella alone.
- State: which task is running or ran last, and the history of every task with its images.
- A defect flag, set by you, not by the software: none, rework required, or failure.
It also has a name, generated from two words so it is easy to say aloud (the Lamella Template on the Protocol tab controls the naming), a description you can type, and a folder in the experiment where everything it produces is written.
1. The Experiment tab
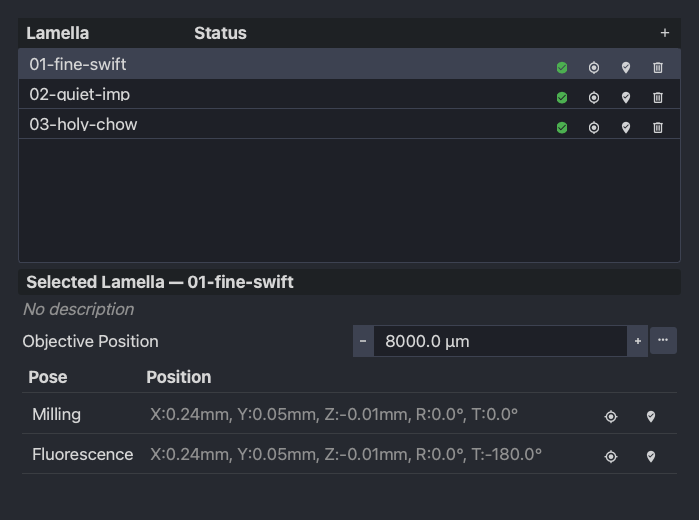
The list has one row per lamella with its status. + adds a lamella at the current stage position; the row buttons move the stage to the lamella, update its position to where the stage is now, and remove it. Below the list, the selected lamella’s description, its objective position on an Arctis, and its poses: for each, the stage position, a button to move there and a button to overwrite it with the current position.
2. The Lamella tab
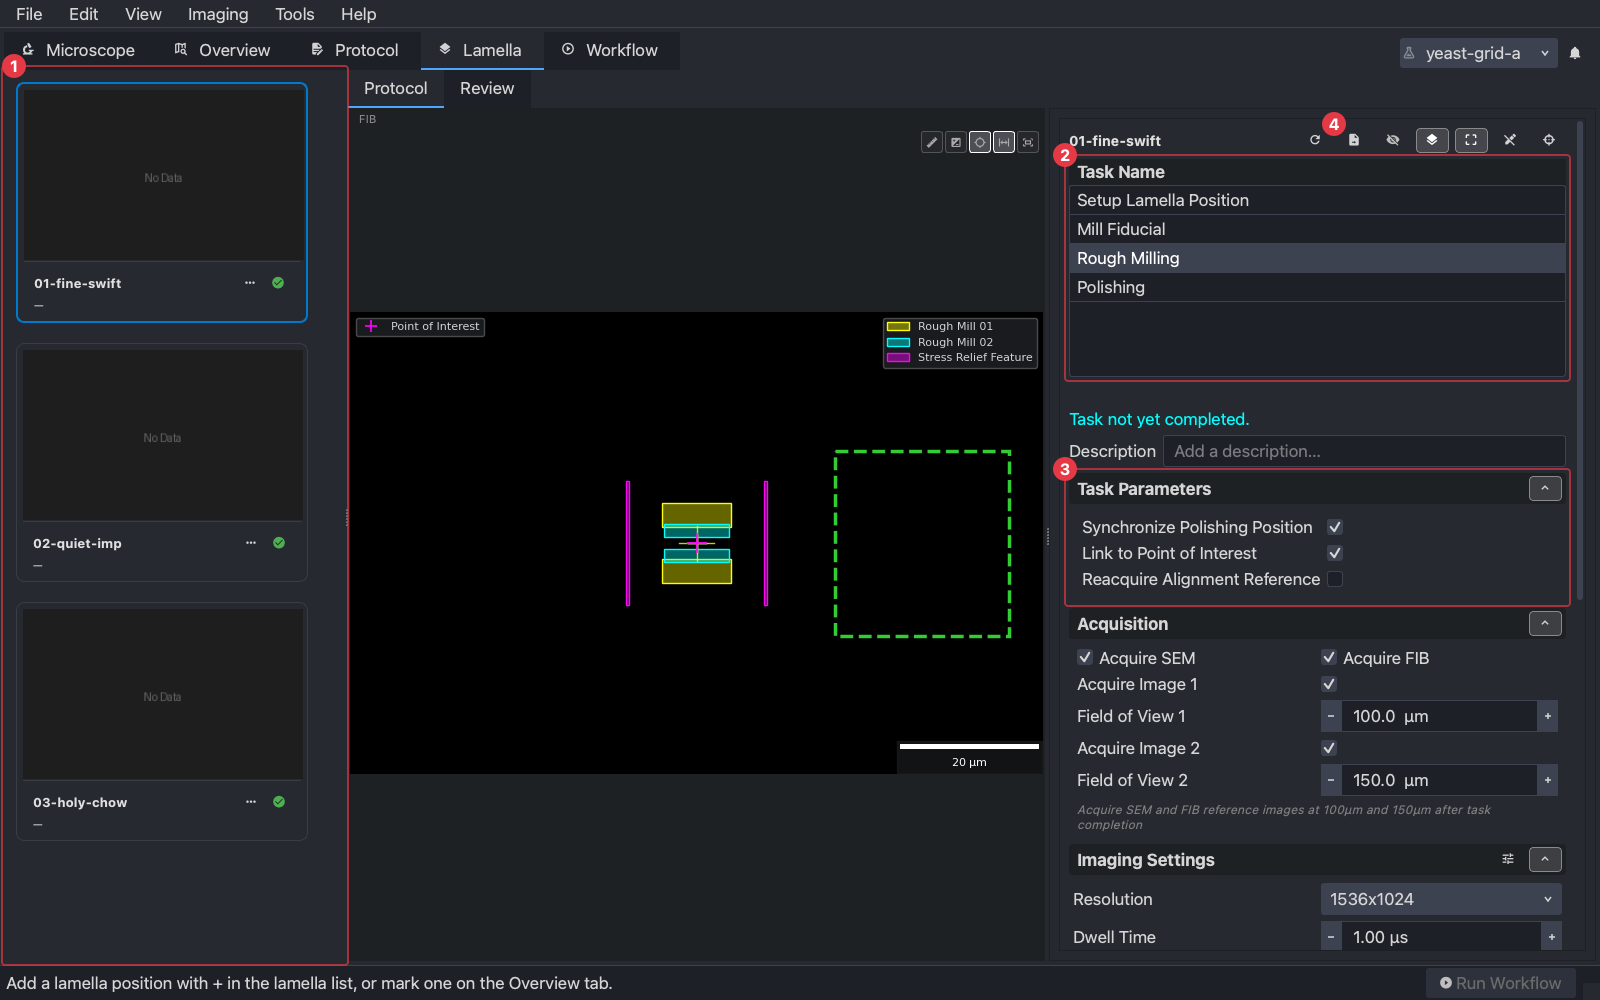
- (1) A card per lamella, with its latest reference image once a task has produced one, its name, and its defect mark. Click a card to select the lamella.
- (2) The selected lamella’s tasks. Click one to edit this lamella’s copy of that task; the line under the list says whether it has run.
- (3) The task’s parameters, reference-image acquisition and imaging settings, as on the Protocol tab but for this lamella only. Below them, for a milling task, the milling task editor with this lamella’s stages and patterns.
- (4) Apply this lamella’s configuration for the task to other lamellae.
The view in the middle is the FIB image of this lamella with the selected task’s patterns drawn on it, at the position they will be milled. Before a task has run there is no image and the patterns are drawn on black; after Setup Lamella Position there is one. This is where a lamella’s patterns are moved (right-click, as on the Milling page) and its alignment area adjusted, and the buttons at the top right of the panel toggle the SEM image, the related tasks’ patterns and the alignment area, open the correlation tool, and refresh the positions.
3. Lamella settings versus the protocol
Editing here changes one lamella. Editing on the Protocol tab changes the protocol, which reaches lamellae created afterwards, or existing ones when you press Apply Config to Existing Lamella there.
The recommended way to use the two is to tune on one lamella first. Run a task on a single lamella, adjust its patterns, currents and parameters here until the result is right, then press (4), which opens a dialog to choose which of the other lamellae in the experiment receive this lamella’s task configuration. This is how to handle a new sample type or a different workflow: the protocol is a starting point, one lamella is where it gets tuned, and the others inherit the tuning. Applying the protocol to existing lamellae afterwards would overwrite that tuning for the task applied, so do it the other way round.
The one thing that is always per lamella is where its patterns sit on its image: that is never copied from the protocol or from another lamella.
4. A card’s actions
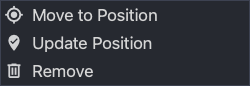
The … button on a card opens its actions: Move to Position drives the stage to the lamella’s milling position, Update Position overwrites that position with where the stage is now, and Remove deletes the lamella from the experiment (its folder stays on disk).
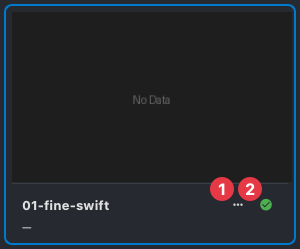
The mark beside it (2) is the defect state. Click it to set No defect, Rework required or Failure. A failed task does not set this; it is your judgement of the lamella, recorded with the task it was made after, and it is how a lamella that is not worth continuing is told apart from one that is finished.
5. Review

The Review sub-tab beside Protocol shows the selected lamella’s task history as a strip of images per task. Click an image to see it full size. It is empty until a task has run; after a workflow it is the quickest way to see what happened to a lamella step by step.
Next
Tasks: what each task does, and a recommended starting workflow.